Ansible playbook II
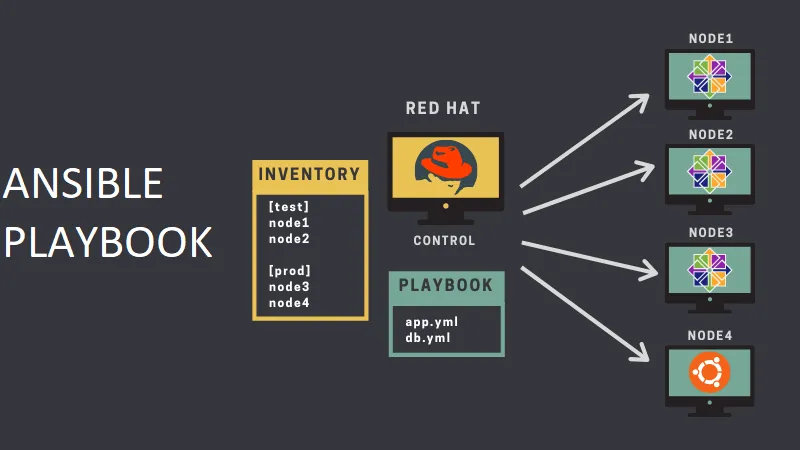
First Read ansible playbook1 before starting this section. Ansible “file” and “template” module File ownership create directory create file permission syslinks Template To understand this let’s…

ON THIS PAGE
First Read ansible playbook1 before starting this section.
Ansible “file” and “template” module
File
- This module is used to configure file related configurations
- ownership
- create directory
- create file
- permission
- syslinks
- name: Change file ownership, group and permissions
  file:
    path: /etc/foo.conf
    owner: foo
    group: foo
mode: '0644'Template
To understand this let’s understand with a scenario with an example of chrony which is an NTP[Network time protocol] server.
Example: Changing NTP server configuration file
Network Time Protocol (NTP) is an internet protocol used to synchronize with computer clock time sources in a network. It belongs to and is one of the oldest parts of the TCP/IP suite.
- The basic example is all the people that are currently in Nepal use time sent by NTP server. All the Clients has same time those who are connected to NTP server.
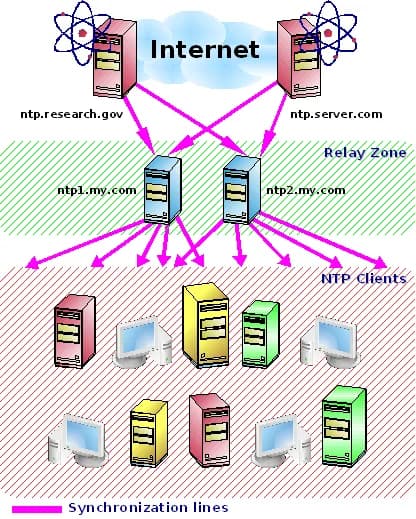
- In the case of ubuntu we have a chrony server. To install the chrony server
- sudo apt install chrony
- The configuratiojn details are in the path “/etc/chrony/chrony.conf” in the case of ubuntu and in case of centos “/etc/chrony.conf”

- In the case of Nepal search “NTP server Nepal”
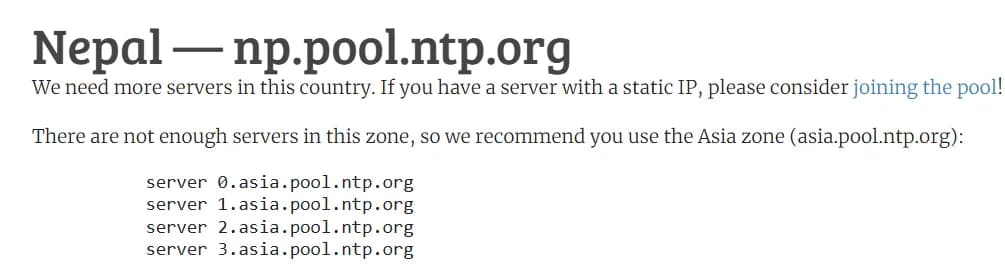
- Now the main scenario is to modify the pool in the /etc/chrony/chrony.conf file in different lines. So if we want to modify in the single machine we can do it without any trouble but if we want to do this in multiple machine then it will be difficult to pass commands to replace line by line. So in this case we will modify the file in our local machine and copy that file in the remote machines. So we are creating a file as a template.
Creating shared folder and setting VS code.
Create a synced folder in vagrant file. Add this line in vagrant file
config.vm.synced_folder “./shared_folder”, “/home/vagrant/shared_folder”
- Add YAML extension in VS code.
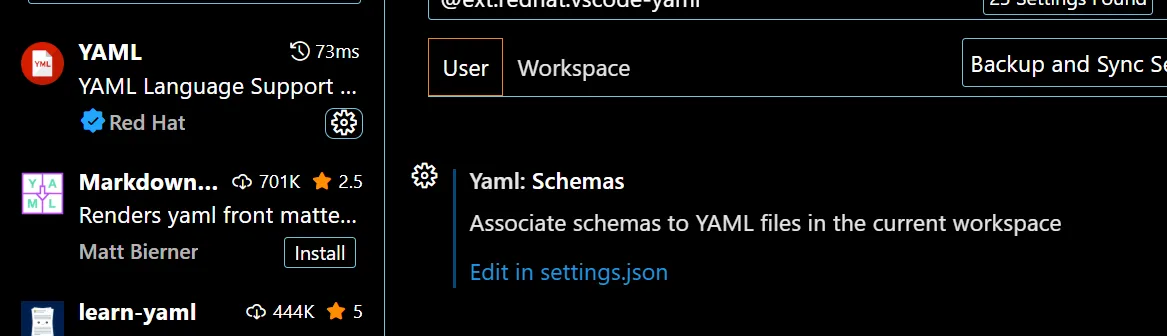
- click the option in Edit in settings .json file andd the ansible line in the code. Kubernetes line is for Kubernetes yaml syntax.
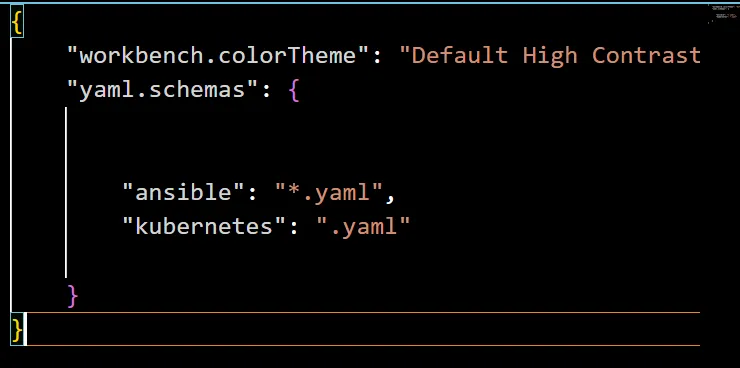
-
Need to know after we create shared folder
- In the case of running playbook file by default it won’t take inventory file and need to mention the inventory file in cmd due to permission issue.
- ansible-playbook -i inventory playbook.yaml
- In the case of ssh we need to move the key in local machine which directory is not shared otherwise we can’tlogin using ssh_key.
- In the case of running playbook file by default it won’t take inventory file and need to mention the inventory file in cmd due to permission issue.
-
Now install the chrony in both ubuntu and centos machine, and copy templates.
-
Update the template.
-
For this we need to create two file that is working as a template
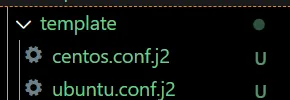
- Like this in the working directory.
- .j2 extension is compulsory because it need jinja template.
- without .j2 extension it will through error.
- For now i am only changing these lines in the file to change the pool of NTP server to Nepal.
#These are the changes made in ubuntu.conf.j2 file
pool 0.asia.pool.ntp.org       iburst maxsources 4
pool 1.asia.pool.ntp.org iburst maxsources 1
pool 2.asia.pool.ntp.org iburst maxsources 1
pool 3.asia.pool.ntp.orgg iburst maxsources 2

#These are the changes made in centos.conf.j2 file
pool 0.asia.pool.ntp.org iburst
pool 1.asia.pool.ntp.org iburst
pool 2.asia.pool.ntp.org iburst
pool 3.asia.pool.ntp.org iburst- Now let’s create a playbook to update these services.
---
- name: Provision server
  hosts: all
  become: yes
  tasks:
    - name: Install NTP server on Ubuntu
      apt:
        name: "{{item}}"
        state: present
        update_cache: yes
      when: ansible_distribution == "Ubuntu"
      loop:
       - chrony
       - wget
       - git
       - zip
       - unzip
    - name: Install NTP server on CentOS
      yum:
        name: "{{item}}"
        state: present
      when: ansible_distribution == "CentOS"
      loop:
       - chrony
       - wget
       - git
       - zip
       - unzip
    - name: Start and Enable chronyd service on Debian and CentOS
      service:
       name: chronyd
       state: started
       enabled: yes
      when: ansible_distribution == "Ubuntu"

    - name: Update chrony template on Ubuntu
      template:
        src: ./template/ubuntu.conf.j2
        dest: /etc/chrony/chrony.conf
      when: ansible_distribution == "Ubuntu"

    - name: Update chrony template on CentOS
      template:
        src: ./template/centos.conf.j2
        dest: /etc/chrony.conf
      when: ansible_distribution == "CentOS"

    - name: Restart chronyd service
      service:
        name: chronyd
state: restarted- Now after making these changes
ansible.builtin.file
- This module is used to change specific lines in the file.
For this we will replace a certain line in sshd_config file. For now i am only setting up in centos machine.
- Here in this code we are doing simply two tasks
- With the help of copy module copying the content to the path /etc/banner.txt
- with the help of lineinfile module we have searched for the specific line and replaced that line based on our need.
- regexp: “#Banner none” : The line which we are looking is located in the file /etc/ssh/sshd_config for both machine.
- line: “Banner /etc/banner.txt” : we want to replace with this line
- After that using service module we have restarted ssh service but name are different for both distros so we have created different tasks.
- ubuntu: ssh
- centos: sshd
---
- name: Provision server
  hosts: all
  become: yes
  tasks:
    - name: Add SSH banner #To add the message
      copy:
        dest: /etc/banner.txt
        content: |
          ***************************************
          Welcome to Ansible-Managed Server!
          If you are not an authorized user,
          please logout immediately.
          **************************************

    - name: Update sshd_config for ssh bannner
      become: yes
      lineinfile:
        path: /etc/ssh/sshd_config
        regexp: "#Banner none" #Search for this line
        line: "Banner /etc/banner.txt" #Replacing with this
        state: present

    - name: Restart ssh service pn Ubuntu
      service:
        name: ssh
        state: restarted
      when: ansible_distribution == "Ubuntu"

    - name: Restart sshd service on CentOS
      service:
        name: sshd
        state: restarted
when: ansible_distribution == "CentOS"After running this as we can see the line in the sshd_config file is replaced from #Banner none to Banner /etc/banner.txt in both of the machines.


Here we can see the banner path is successfully replaced with the help of lineinfile module
Now if we try to login to that machine using ssh we will see a banner message like this:

Ansible Handlers
Sometimes you want a task to run only when a change is made on a machine. For example, you may want to restart a service if a task updates the configuration of that service, but not if the configuration is unchanged. Ansible uses handlers to address this use case. Handlers are tasks that only run when notified.
---
- name: Provision server
  hosts: all
  become: yes
  tasks:
    - name: Install NTP server on Ubuntu
      apt:
        name: "{{item}}"
        state: present
        update_cache: yes
      when: ansible_distribution == "Ubuntu"
      loop:
       - chrony
       - wget
       - git
       - zip
       - unzip
    - name: Install NTP server on CentOS
      yum:
        name: "{{item}}"
        state: present
      when: ansible_distribution == "CentOS"
      loop:
       - chrony
       - wget
       - git
       - zip
       - unzip
    - name: Start and Enable chronyd service on Debian and CentOS
      service:
       name: chronyd
       state: started
       enabled: yes
      when: ansible_distribution == "Ubuntu"

    - name: Update chrony template on Ubuntu
      template:
        src: ./template/ubuntu.conf.j2
        dest: /etc/chrony/chrony.conf
      notify:
        - Restart chronyd service
      when: ansible_distribution == "Ubuntu"

    - name: Update chrony template on CentOS
      template:
        src: ./template/centos.conf.j2
        dest: /etc/chrony.conf
      notify:
        - Restart chronyd service
      when: ansible_distribution == "CentOS"

  handlers:
    - name: Restart chronyd service
      service:
        name: chronyd
state: restarted- When we run this playbook then we will see if we make any changes to the file then the handlers block will run otherwise it won’t.
- First let’s make small change in the template file and then run this playbook then it will restart chronyd service.
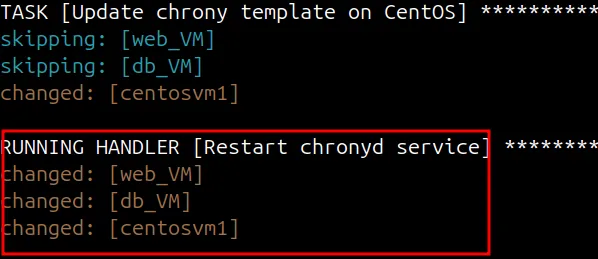
- Now without making any changes to the file if we run this playbook then we can see the handlers won’t run

- Here we can’t see handlers being running and don’t see any changed status.
Ansible Roles
Roles let you automatically load related vars, files, tasks, handlers, and other Ansible artifacts based on a known file structure. After you group your content into roles, you can easily reuse them and share them with other users.
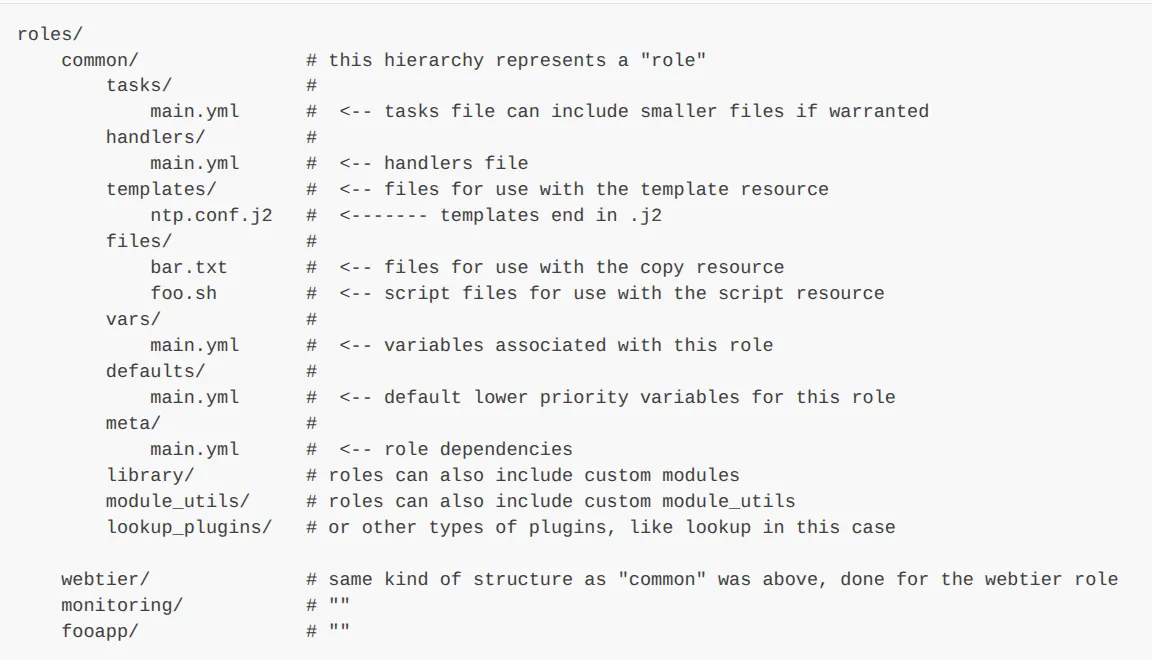
- If you want to use role that is created by any other user you can simply download it from ansible galaxy
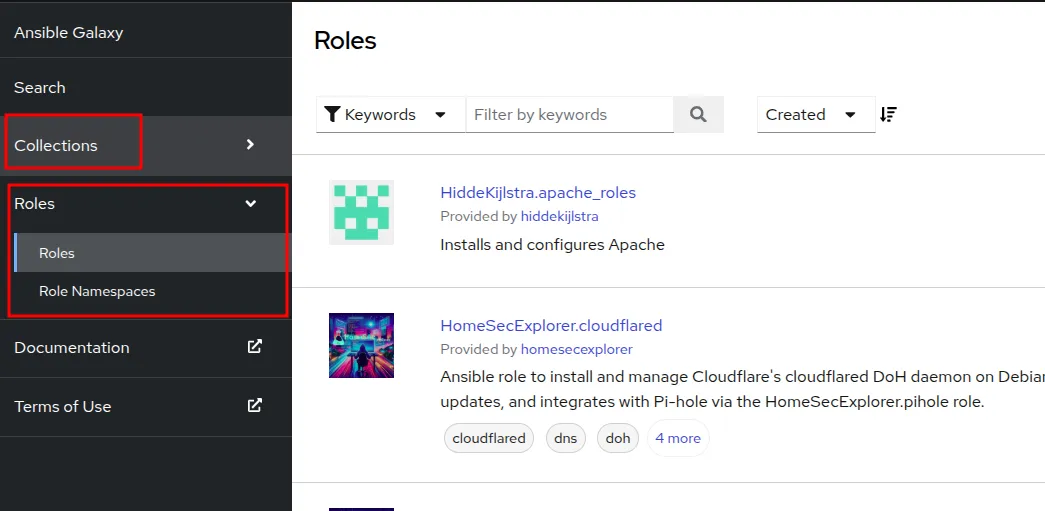
- For now let’s create our own role. We can create role and collection with the help of ansible-galaxy command. We can perform the following tasks with the help of ansible-galaxy role and ansible-galaxy collection command
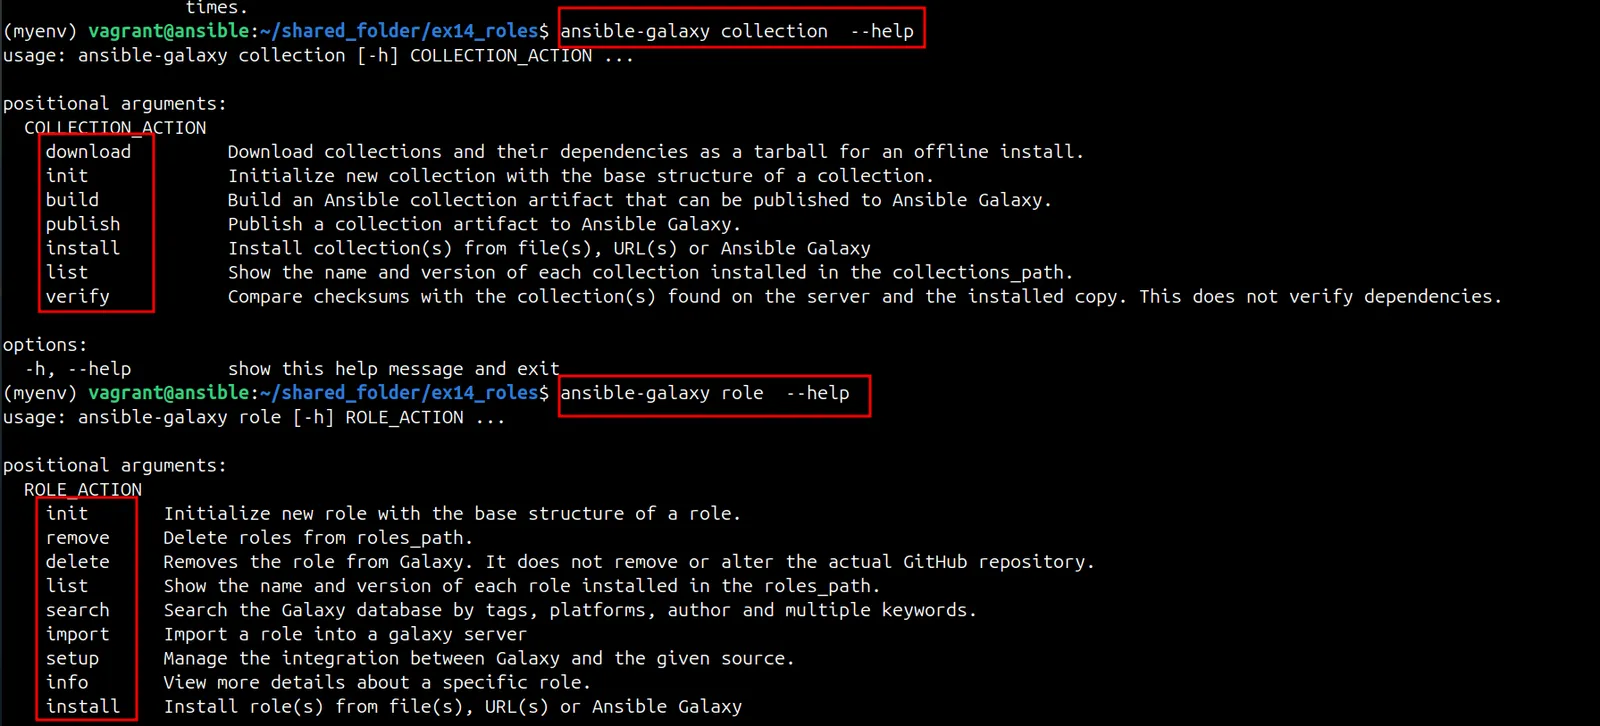
- To create role we can use command
- ansible-galaxy role init rolename
- ansible-galaxy role init demo_role
- ansible-galaxy role init rolename
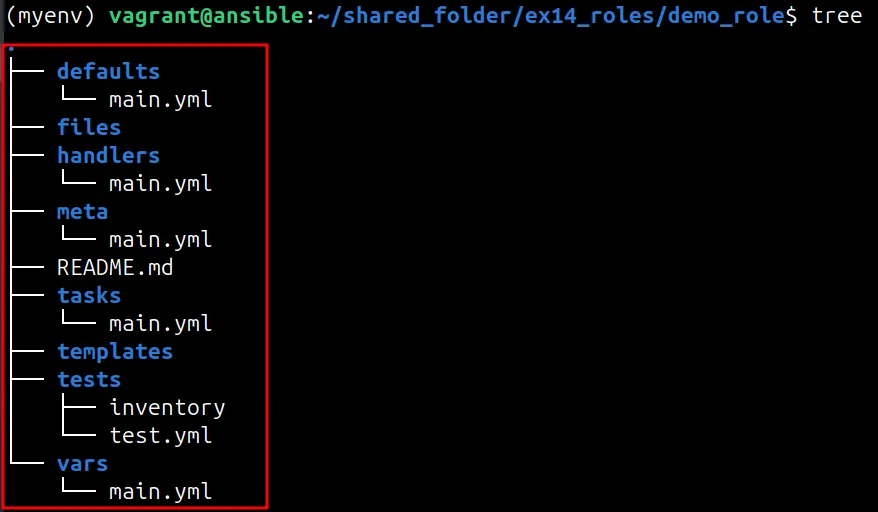
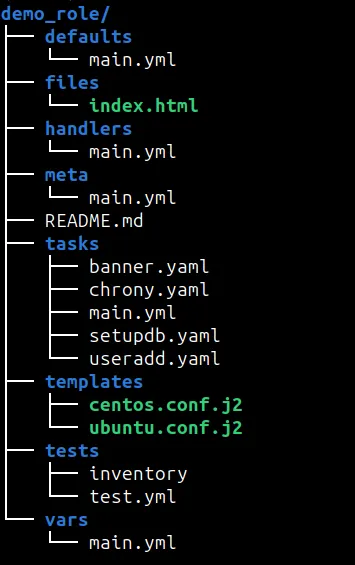
- Here we can see the role is successfully created. It doesn’t include files by default we need to add the files manually. This is the template only. So now here we are defining tasks in the files and the structure is like this.
- Using role what i have done here:
- Created separated files to do separate tasks
- called the files from a single file
- Mentioned only host name in playbook.yaml file.
- Arranged the files based on their characteristics
- tasks in tasks directory
- templates in templates directory
- .j2 extension is compulsory
- variables in vars directory
- You can also add variables in defaults
- handlers tasks in handlers main.yml file
- For detailed preview of the project you can look in my github repo ex14_role.
Commands
- ansible galaxy role install role_name: To download the role from galaxy
- ansible-galaxy role list: To list all the available lists
- ansible-galaxy role delete name: To delete the role
- ansible-galaxy role info name: To see information
- ansible-galaxy role init name: To initialize a fresh role
Ansible-Vault/
Ansible Vault is a feature of ansible that allows you to keep sensitive data such as passwords or keys in encrypted files, rather than as plaintext in playbooks or roles. These vault files can then be distributed or placed in source control. To enable this feature, a command line tool – ansible-vault – is used to edit files, and a command line flag (--ask-vault-pass, --vault-password-file or --vault-id) is used.
Ansible Vault can encrypt any structured data file used by Ansible. This can include “group_vars/” or “host_vars/” inventory variables, variables loaded by “include_vars” or “vars_files”, or variable files passed on the ansible-playbook command line with -e @file.yml or -e @file.json. Role variables and defaults are also included. Ansible tasks, handlers, and so on are also data so these can be encrypted with vault as well. To hide the names of variables that you’re using, you can encrypt the task files in their entirety. These are the commands that we can use with ansible-vault.
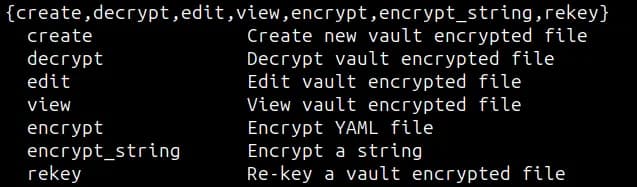
- Let’s do a small example with these files
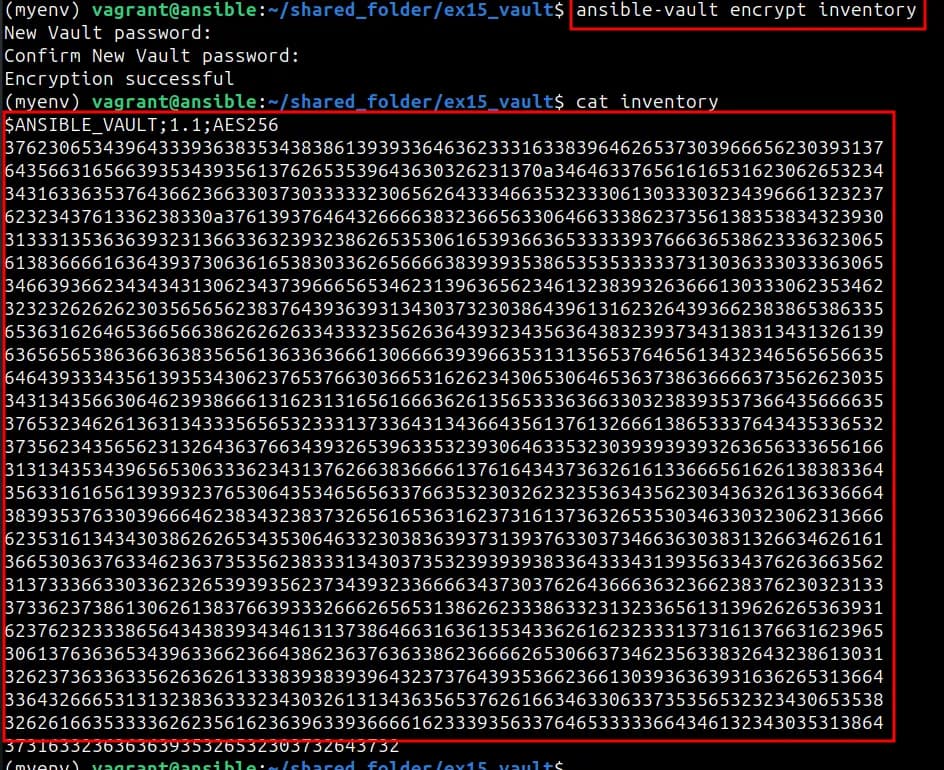
- We can encrypt files like this and to run this encrypted file we can run command.
- ansible-playbook playbook.yaml –ask-vault-password: To run with the help of command
- To run with the help of file. Like storing the password in the file ans using in cli we can use

- First create the file
- vim /home/vagrant/mypass : Can be any path
- place password there
- example: demo [This is the password that we have set during encrypt process]
- ansible-playbook –vault-password-file=/home/vagrant/mypass playbook.yaml: To pass the password file from the file
- vim /home/vagrant/mypass : Can be any path
Other commands
- ansible-vault create: To create a new and blank file
- ansible-vault decrypt filename: To decrypt any file
- ansible-vault edit filename: To edit the encrypted file
- ansible-vault view filename: To view the encrypte file
- ansible-vault rekey filename: To change password of the encrypted file
Ansible Tower
- Need to take subscription to use this.
Keep reading
- Ansible Playbook I
In this blog we will explore different playbooks example in ansible. Earlier we have used Ad-hoc command to configure another machine using ansible host. But in that approach we don’t have any data…
- Ansible
We can do basic automation using shell scrips like installing packages, build docker images and other basic tasks. Python scripting: Using python scripting it is a bit simpler because it has lots of…
- Vagrant
Vagrant is an automation tool to manage VM lifecycle, right from creating avirtual machine to making any changes, deleting it, recreating it, provisioningit, anything that we do manually with VMs, we…