Ansible
We can do basic automation using shell scrips like installing packages, build docker images and other basic tasks. Python scripting: Using python scripting it is a bit simpler because it has lots of…

ON THIS PAGE
We can do basic automation using shell scrips like installing packages, build docker images and other basic tasks.
Python scripting: Using python scripting it is a bit simpler because it has lots of modules available. Instead of writing everything from scratch we can use modules. That will make it easy. There are several other scripts like ruby script.
Writing scripts for low level operation is fine but it is not
Configuration Management
Configuration management is a process for maintaining a desired state of IT systems and components. It helps ensure that a system consistently performs as expected throughout its lifecycle. Popular Configuration management tools are Ansible, Puppet, Chef, SaltStack, and Terraform. Every configuration management tool will have a machine where the configuration data is stored and some machines (nodes) whose configuration needs to be maintained. How the nodes get configuration from the main server depends on the type of configuration management tool used. They are basically classified into types based on their architecture. ie;
1.Pull Based Configuration Management Tool
2.Push Based Configuration Management Tool
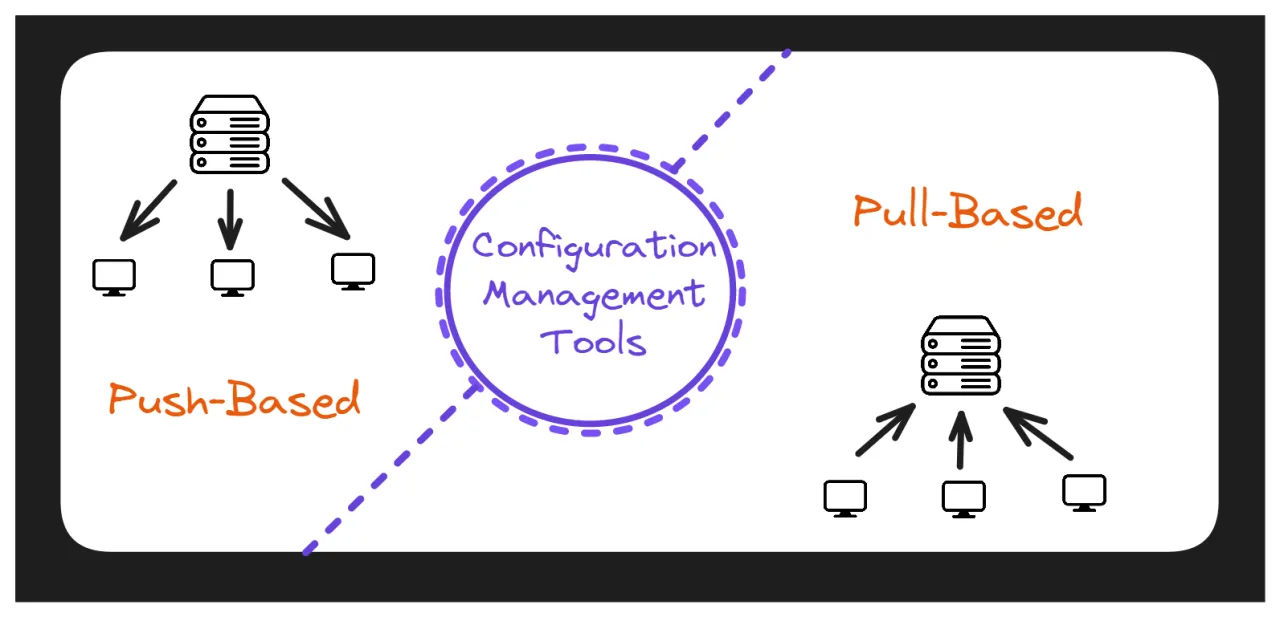
Pull Based Configuration Management Tool
In this type of configuration management tool, the nodes pull the configuration information from the server. A small software is installed on every node and that will get configurations from server at regular interval of time and compare the configuration received with current node configuration. If there are changes then it will take actions to match with the server configurations. Example: Chef, CFEngine.
Push Based Configuration Management Tool
In this type of configuration management tool, the main server (where the configuration data is stored) pushes the configuration to the node. So, it is the main server that initiates communication, not the nodes. Which means that an agent/client may or may not be installed on each node. Ansible is an example of a push based configuration management tool that doesn’t need an agent to be installed on the nodes. Example: Ansible, SaltStack
Ansible
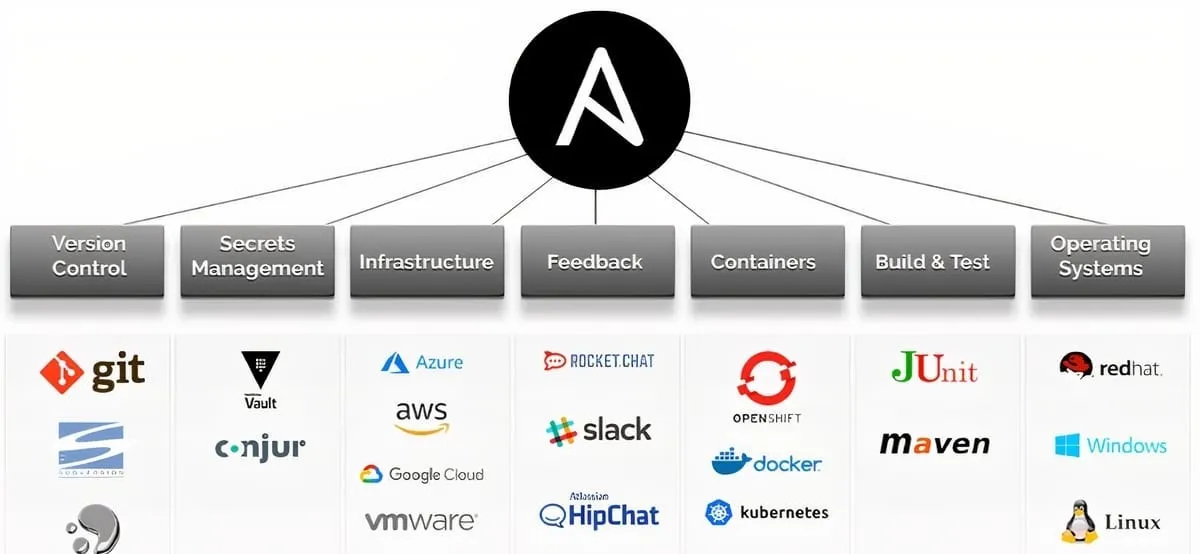
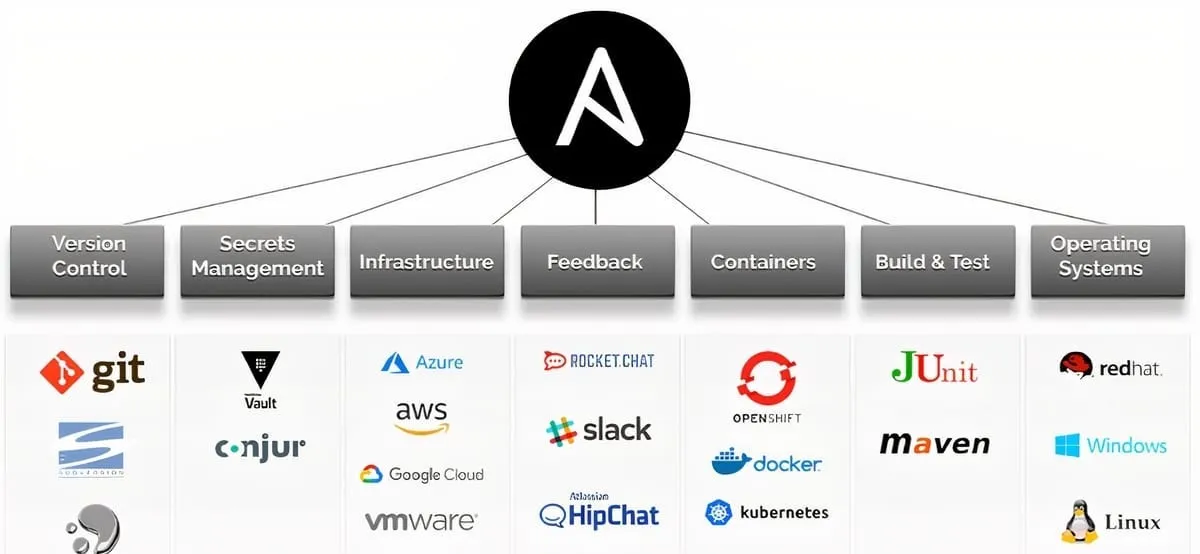
Ansible is a powerful open-source automation tool that simplifies IT tasks like configuration management, application deployment, and orchestration. It uses a straightforward, human-readable language called YAML to define the desired state of systems, making it relatively easy to learn and use.
- Ansible is agentless.
- Open source automation tool.
- This offers simple, flexible and powerful automation.
- This is a python package.
Architecture
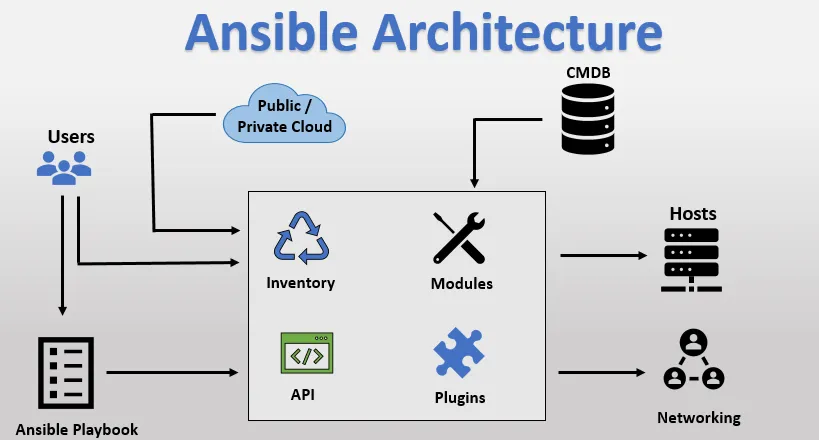
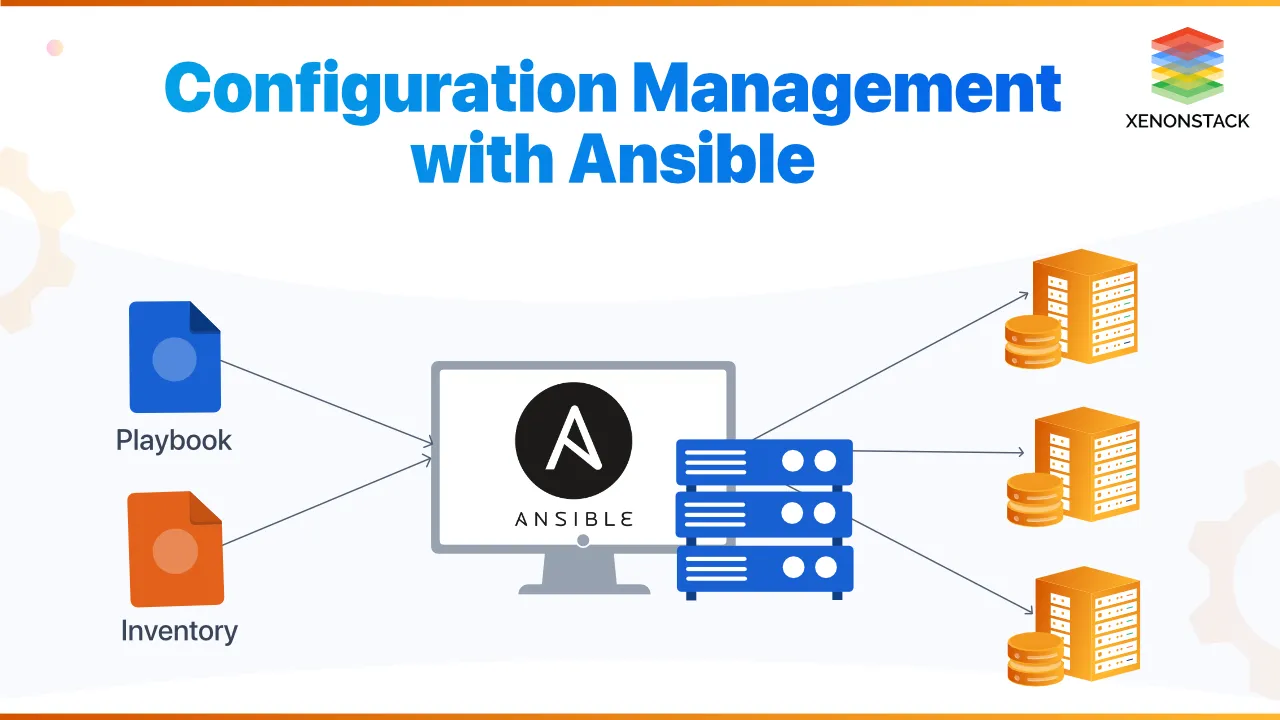
- As a user we install ansible package and binaries in a machine.
- For example we are setting up ansible in machine and that machine is know as controller machine. Compatible in Linux/ Mac OS.
- Note: We cannot make Windows OS as a controller machine but can control windows machine with the help of controller machine installed in Linux or macOS. We cannot install ansible in windows directly but can use VM or Linux sub system or use docker container to run ansible.
- In remote we have clouds/AWS environment or any other machine or network devices.
- To manage these devices we can use ansible.
- For example:
- To install and update packages.
- Install software
- To change network, storage, user management configurations.
- In this we write ansible playbook and run that playbook in the machine where we have installed ansible and with the help of play book we can configure networking, clouds, database, hosts and many more.
- Playbook
- We write list of steps in playbook.
- Playbooks can finely orchestrate multiple slices of your infrastructure topology, with very detailed control over how many machines to tackle at a time.
- Desired state configuration is defined here.
- Instead of write line by line step we write desired steps here.
- Inventory
- List of machines i.e.; Remote/host machine
- Ansible represents the machines it manages in a file (INI, YAML, and so on) that puts all of your managed machines in groups of your own choosing.
- username
- ip
- port
- variables
- credentials
- Resources group
- Modules
- Ansible works by connecting to your nodes and pushing out scripts called “Ansible modules” to them. Most modules accept parameters that describe the desired state of the system.
Why we need this ?
- When there is vulnerability in the software in OS and we are using that OS in few hundreds or thousands machine. To fix that vulnerability we need to install package in that machine. To manually install that package in those machine will be quite difficult. So in this case we can use automation tool and install in all machines by configuring them.
- We simply write a configuration and configuration millions of computers.
- This is a simple example we can do a lot more using these tools.
- In networking we can configure thousand of routers if we have
Ip
username and other setting of the machine. If we have these tools we can configure these things.
How to install Ansible
- We can install using ppa or by using pip.
- We can also install using apt package manager also ie:
- apt install ansible
- But now let’s install with pip.
- sudo apt install pip
- Install python
- to check whether it is installed or not type
python3 or pip –version
- apt install python3.12-venv
- It will install package to create a virtual environment. Without creating virtual environment it is throwing error.
- sudo python3 -m venv /home/vagrant/myenv
- It will create myenv virtual environment in /home/vagrant path.
- Now we can work in this environment without affecting the whole machine.
- Now let’s activate that environment by using command
- source myenv/bin/activate
- Now this will activate the environment.
- pip install ansible
- This will now install ansible in that environment.
- We have successfully installed ansible in this environment.
- sudo apt install pip
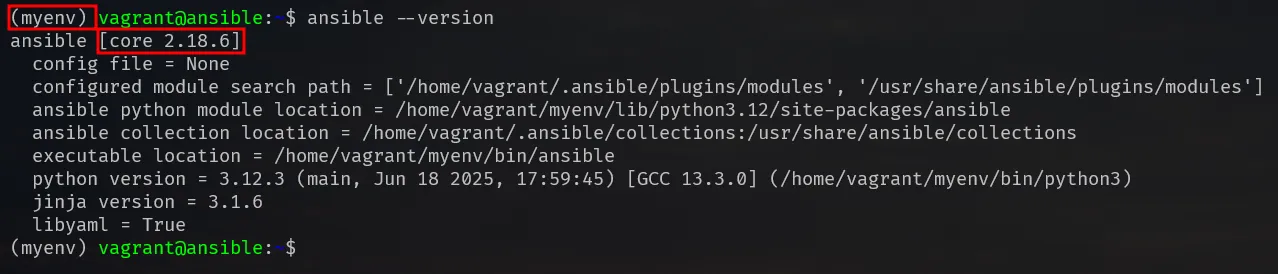
Note: We can directly install using apt package manager but it will install a bit older ansible that’s why it is better to install with python.
Note: After turning off the machine you need to turn it on using command
source myenv/bin/activate
Connecting hosts with ansible
Username and password based authentication
For this fist check the connectivity. By just using ping command.
- Test using ping -c 5 ip address and ssh username@ipaddress
- Configuration paths [Optional only for knowledge]
- In the case of vagrant we can see where the configuration is stored related ssh. To see where it is stored we can check this path /etc/ssh/sshd_config
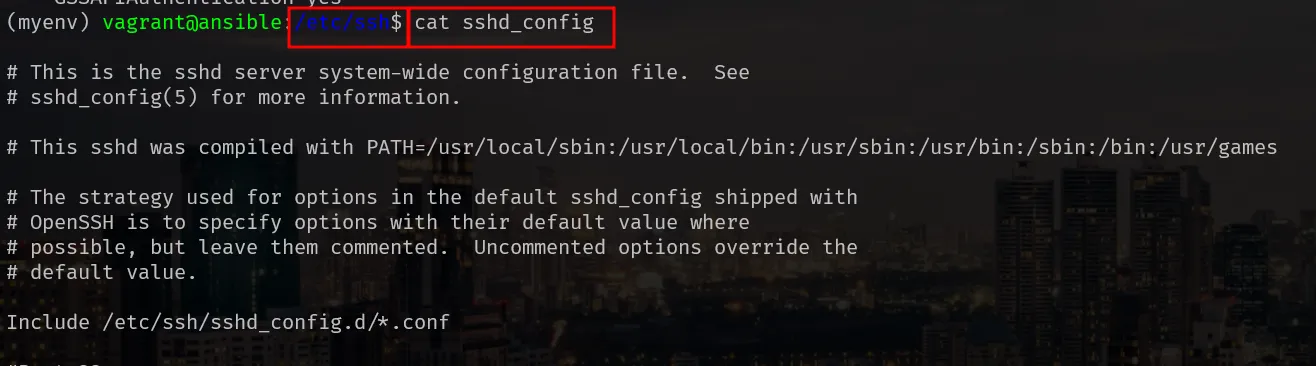

- Here in case of vagrant user the password based authentication is enable in /etc/ssh/sshd_config.d file.
- If we change it to PasswordAuthentication No then we can’t login using password.
- Check whether we can login using password or not.
- In our local machine the private key is stored in this path.
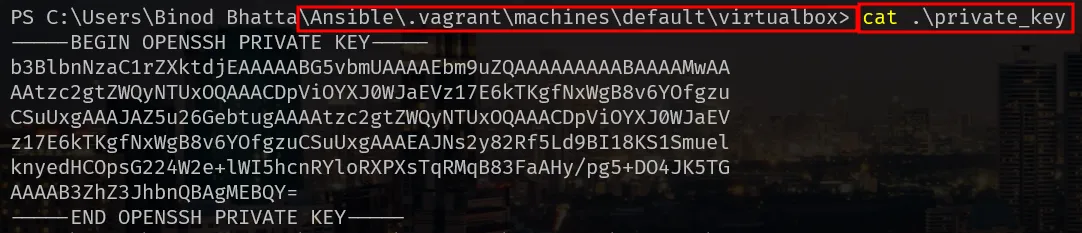
- After testing connectivity and checking whether we can login using ssh or not then let’s connect through ansible.
SSH private key authentication
ssh-key login setup
- In this case instead of using password based login i am using ssh-key login. To setup ssh -key login follow these steps.
- First in you directory generate key by using a command
- “ssh-keygen -t rsa”
- provide name for the key
- “ssh-keygen -t rsa”
- Now copy the key. you can do it manually ie;
- cat keyname.pub
- copy this content
- In another machine
- vim .ssh/authorized_keys
- paste the content here.
- OR we can copy by using command
- ssh-copy-id vagrant@192.168.56.212
- ssh-copy-id usernameofnode@ipadressofnode
- ssh-copy-id -i ansible_key.pub vagrant@192.168.56.213
- If the key has different name should mention like this
- ssh-copy-id vagrant@192.168.56.212
- cat keyname.pub
- For testing we can login to another machine by using command
- “ssh -i path_to_the_key username@ip_address”
- ssh -i ~/ansible_examples/example3/ansible_key vagrant@192.168.56.212
- “ssh -i path_to_the_key username@ip_address”
Error relate permission
Permissions 0664 for ‘/home/vagrant/ansible/example3/ansible_key’ are too open.
It is required that your private key files are NOT accessible by others.
This private key will be ignored.
Load key “/home/vagrant/ansible/example3/ansible_key”: bad permissions
>>IF you see a error like this in this case we need to change permission to 600. In this case of ssh the file can only be read by owner not other for security purpose.
chmod 600 private_key_file
Writing 1st inventory file
- let’s create a inventory file first. For this create a directory and create a inventory file inside that.

syntax: vm1 ansible_host=host_ip ansible_user=username ansible_password=host_password. To use username and password
centosvm1 ansible_host=192.168.56.212 ansible_user=vagrant ansible_ssh_private_key_file=/home/vagrant/ansible_examples/example3/ansible_key : To use ssh key base authentication
[groupname]
memer1
member2
[windows]
win_member1
win_member2
To create multiple groups and add machines.
Using Ad-hoc commands
- ansible -i inventory -m ping vm1
- -i: Is used to point inventory file, path. Need to provide filename and path if it is in current directory
- -m: This means module and for now we are using ping module.
- After running this command we will see a error like this. As we are using ssh password authentication method we need to install the sshpass as described in error.

- After installing sshpass we will see a success message.

-
“ansible -i inventory -m ping vm1” This type of command is know as “ad-hoc” command. It a quick, single-line command executed directly from the command line to perform a task on one or more managed nodes. In real projects we don’t use ad-hoc command instead of ad-hoc command we write playbooks because that will help us to main versioning.
-
Let’s install apache2 in another machine in another machine using ansible.
- ansible -i inventory -m apt -a “name=apache2 state=present” vm1
- -a means argument.
- After running this command we will face a permission issue. To remove this issue we need to use sudo privileage.
- ansible -i inventory -m apt -a “name=apache2 state=present” vm1
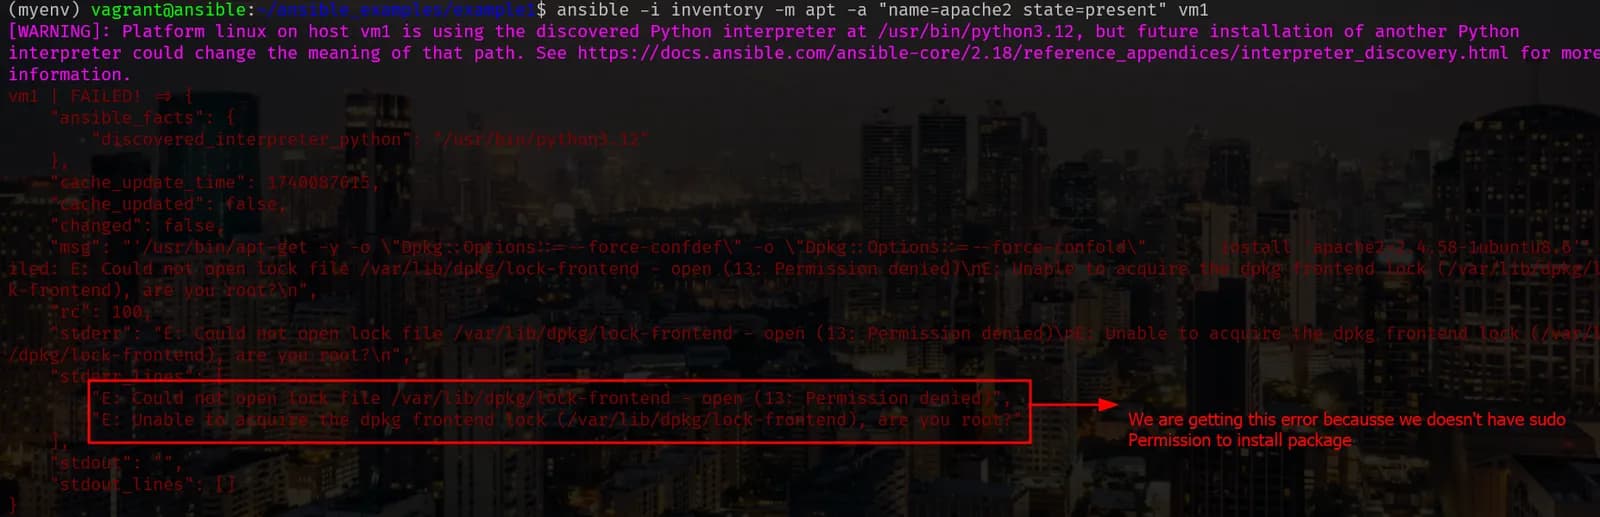
- To use sudo privilege we should add –become . This means become sudo now.
- ansible -i inventory -m apt -a “name=apache2 state=present” vm1 –become
- Now let’s run this command
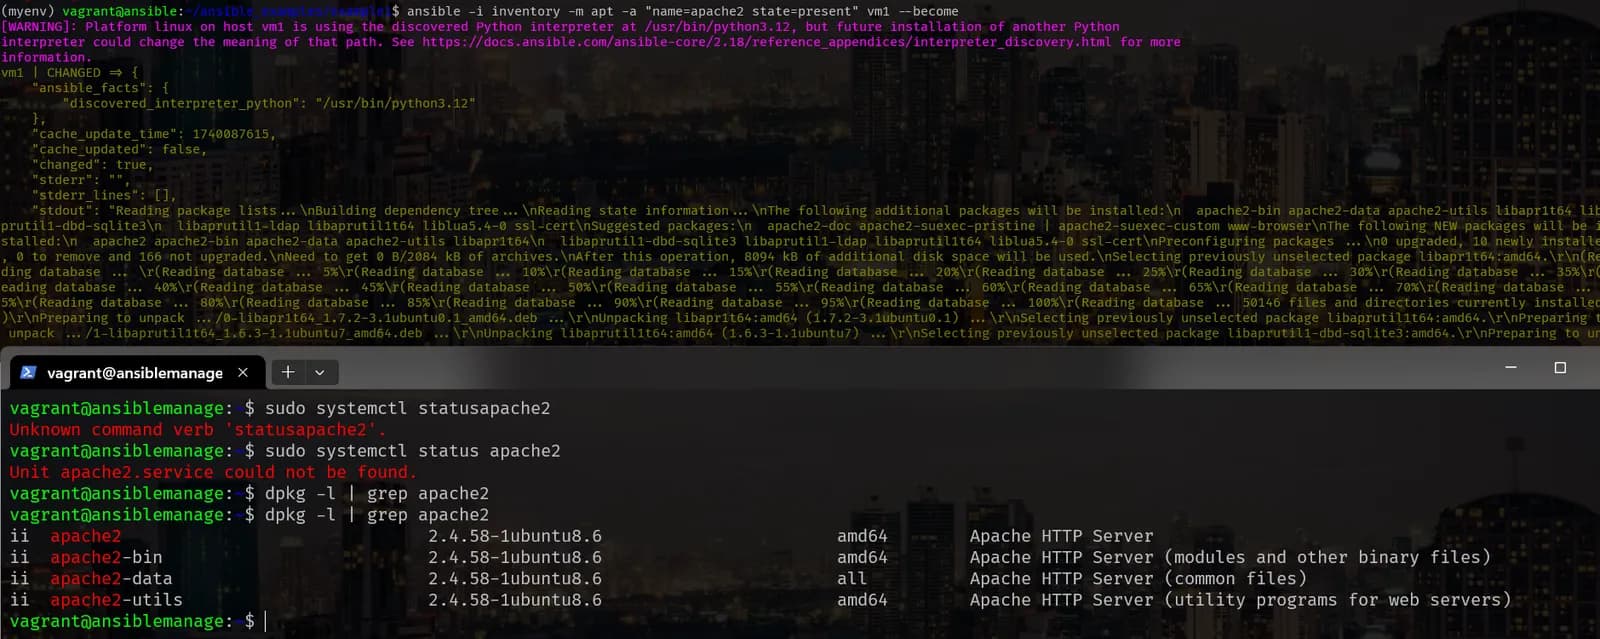
- We can see not package is is installed successfully.
- To remove the apache2 from another machine we can run command
- ansible -i inventory -m apt -a “name=apache2 state=absent’ vm1 –become
- This will remove apache2 from another machine
- Now to manage service in another machine we can use command
- ansible -i inventory -m service -a “name=apache2 state=started” vm1 –become
- To start the service
- ansible -i inventory -m service -a “name=apache2 state=started enabled=yes” vm1 –become
- To start and enable the service
- ansible -i inventory -m service -a “name=apache2 state=stopped enabled=no” vm1 –become
- To stop and disable the service
- ansible -i inventory -m service -a “name=apache2 state=started” vm1 –become
- Now to copy the file in another machine we can run
- ansible -i inventory -m copy -a “src=index.html dest=/var/www/html/” vm1 –become
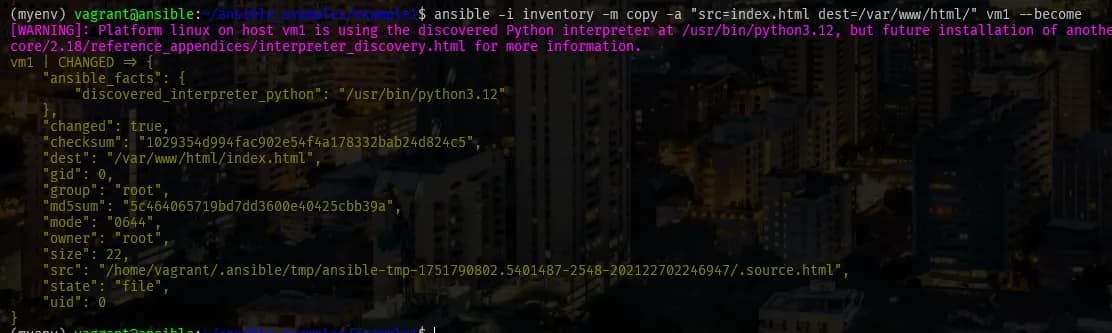
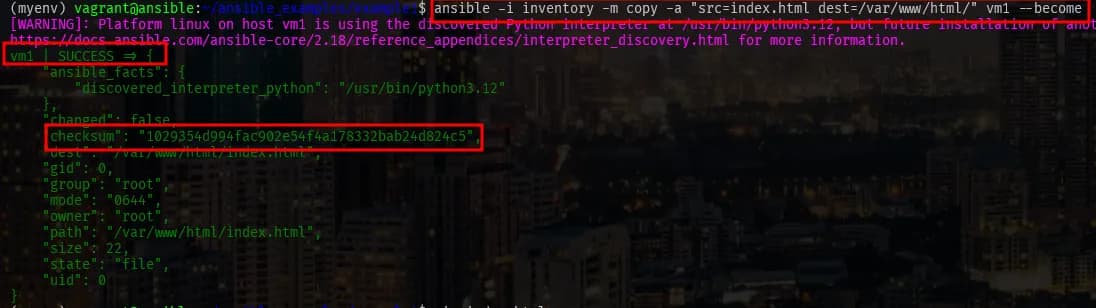
- When running same commands multiple time without making any changes in the file we will only see the “SUCCESS” status because it will look for the checksum. If the file is modified then checksum value is changed and we see the status “CHANGED”.
Ansible Configuration file
The ansible-config utility allows users to see all the configuration settings available, their defaults, how to set them and where their current value comes from. See ansible-config for more information. The priority for these files are in the order that i have written below:
ANSIBLE_CONFIG: environment variable if set
- Example: ANSIBLE_CONFIG=/home/vagrant/ansible/example4/ansible.cfg ansible-playbook deploy.yaml -e ansible_user=dipen
**ansible.cfg**: It is created in the directory where we have written all the configuration related ansible**~/.ansible.cfg**: In the home directory of the current user. For example /home/vagrant**/etc/ansible/ansible.cfg**: this is created when we install ansible using apt. But if you have installed it using pip then you cannot find this directory
To generate a fully commented-out example **ansible.cfg** file use this command.
$ansible-config init –disabled > ansible.cfg
All the details of commands are also written in that file. For example
Some of the commands in ansible.cfg
Here # and ; both are use to comment
# (path) The default root path for Ansible config files on the controller.
;home=~/.ansible
# Define password in the file and use that file here to provide sudo privilege using –become in play book.
;become_password_file=
#Ask password during login
;ask_pass=False
ask_vault_pass=
#By default it will run using sh shell
;executable=/bin/sh
#Parallely/concurrently in how much machine you want to run task at a time
;forks=5
#By default it will point to this location which is created using apt
;inventory=/etc/ansible/hosts
#Local temporary directory for ansible
;inventory=/etc/ansible/hosts
#private_key_file: Can specify private key file path here
#remote_user: Default user can be defined here
#With host_key_checking = False:
The authenticity of host ‘x.x.x.x’ can’t be established.
Are you sure you want to continue connecting (yes/no)?
SKIPS THIS PROMPT.
To see more about pipeline click this links
- #devops
- #ansible
- #ansible-playbook
- #ansible-installation
- #ansible-simple-project
- #configuration-management
- #getting-started-with-ansible
- #types-of-configuration-management
Keep reading
- Ansible playbook II
First Read ansible playbook1 before starting this section. Ansible “file” and “template” module File ownership create directory create file permission syslinks Template To understand this let’s…
- Ansible Playbook I
In this blog we will explore different playbooks example in ansible. Earlier we have used Ad-hoc command to configure another machine using ansible host. But in that approach we don’t have any data…
- Vagrant
Vagrant is an automation tool to manage VM lifecycle, right from creating avirtual machine to making any changes, deleting it, recreating it, provisioningit, anything that we do manually with VMs, we…