Ansible Playbook I
In this blog we will explore different playbooks example in ansible. Earlier we have used Ad-hoc command to configure another machine using ansible host. But in that approach we don’t have any data…

ON THIS PAGE
Ansible Playbook II
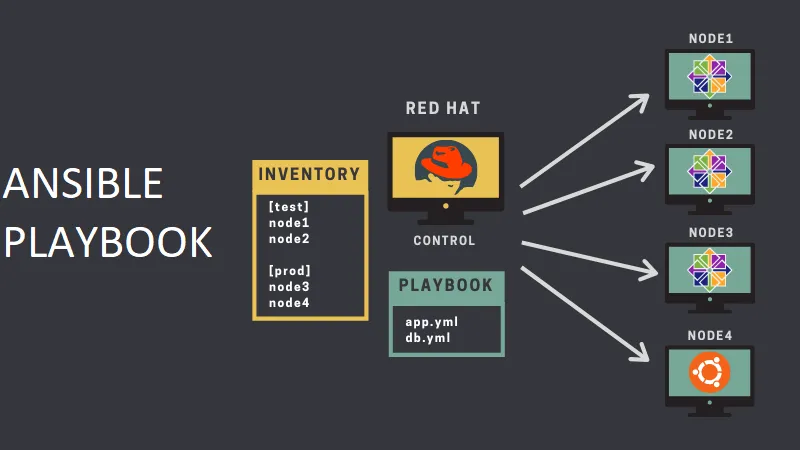
In this blog we will explore different playbooks example in ansible. Earlier we have used Ad-hoc command to configure another machine using ansible host. But in that approach we don’t have any data to see the commands we have used to setup another machine. In real life approach we used “playbooks” instead of “ad-hoc” commands. To see about ad-hoc command click this link.
To write playbook for ansible we can create file in “.yaml or .json” format. For now i am using YAML format to write playbook. First let’s discuss about some formats used to write configuration details.
Different types of files
XML Format:
<servers>
    <server>
        <name>Server1</name>
        <owner>Dipendra</owner>
        <created>12232024</created>
        <status>active</acctive>
    </server>
    <dependencies>
        <pkgname> </pkgname>
    </dependencies>
</servers>

JSON Format
{
    servers: [
    {
        name:server1
        owner: Dipendra
        created: 12232024
        status: active
    }
    ]
}

YAML Format

servers:
  - name: server1
    owner: Dipendra
    created: 12232024
    status: active
A YAML file is used to represent data, configuration data. Data is represented in it's simplest form such as key-value pair, separated by colon (:)
# is used to comment line

Key value pair:
Fruit: Apple
Vegetable: Carrot
Liquid: Carrot
Meat: Chicken

There must be space followed by : to differentiate key and value pair

Representing an array/lists
An array or list is an ordered collection of items, which can be of any type.

Fruits:
- orange
- Apple
- Banana

The - represents that it is an element of an array

For Dictionary/ Map
A dictionary is a setup of properties grouped together under an item. Mappings are used to associate key/value pairs that are unordered

Banana:
  Calories: 105
  Fat: 0.4
  Carbs: 27g
There should be equal number of indendation in each property
Banana:
  calories: 121
   fat:212
This is not valid

YAM advanced.

Key value/ Dictionary/ lists
Fruits:
  - Banana:
      Calories: 105
      carbs:27 g
  - Grape:
      Calories: 62
Fat: 0.4gExample1: To install apache2[apt: ,service: ,copy: ].
Now let’s write a simple playbook to install apache2 and enable it’s service using playbook.
- First create a file name playbook.yaml
- After that write the code in YAML format
---
- name: Setup Webserver
  hosts: vm1
  become: true
  tasks:
    - name: Install apache2 pkg
    apt:
        name: apache2
        state: present

    - name: To enable apache2 service
    service:
        name: apache2
        state: started
        enabled: yes

    - name: Updated index.html file
      copy:
        src: index.html
dest: /var/www/html/- Here we are doing three tasks.
- 1. We are installing apache2 with the help of apt module.
- 2.Then we are enabling service with service module
- 3. Copying file from the machine where we are running playbook to the machine where we are installing apache2. The index.html is in current directory same as playbook.yaml that’s why we don’t need to define path.
- Now to validate the syntax we use this command
- ansible-playbook -i inventory playbook.yaml –syntax-check
- To dry run / simulate .Helps use to see what will it do in the another machine without making any changes in the machine.
- ansible-playbook -i inventory playbook.yaml -C
- To run playbook we can use
- ansible-playbook -i inventory playbook.yaml
Example 2: Setting up database [service: ,yum: ]
- For this first let’s create a new VM for database. For this we are using “eurolinux-vagrant/centos-stream-9” centos VM.
- Then activate the python environment that we have created.
- source /myenv/bin/activate
- After that we need to communicate the database VM with ansible for this we need to add data of that machine in our inventory file.
- For this i am setting up ssh-key login so first let’s setup this and use that data in inventory file.
- Now’s add the ssh_key credentials in our inventory file.
- For ssh key setup refer to ansible document.
vm1 ansible_host=192.168.56.211 ansible_user=vagrant ansible_password=vagrant

centosvm1 ansible_host=192.168.56.212 ansible_user=vagrant ansible_ssh_private_key_file=/home/vagrant/ansible_examples/example3/ansible_key


[dbser]
centosvm1- Now let’s test the connectivity using ping command.
- “ansible -i inventory -m ping centosvm1” : For single machine
- “ansible -i inventory -m ping all”: For all machine
- ansible -i inventory -m ping “*”: For all machines
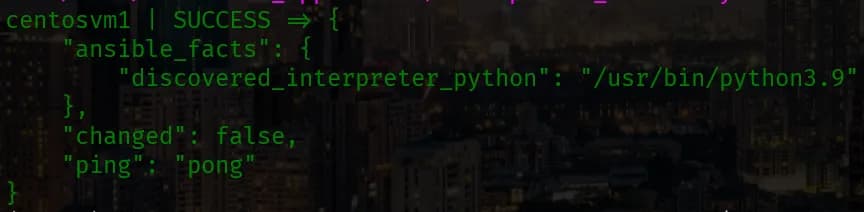
- After running this command now we can see pong response of ping command.
Inventory file
Create Groups
How to create Group
vm1 ansible_host=192.168.56.211 ansible_user=vagrant ansible_password=vagrant
centosvm1 ansible_host=192.168.56.212 ansible_user=vagrant ansible_ssh_private_key_file=/home/vagrant/ansible_examples/example3/ansible_key
[webser] #to create group
vm1
[dbser] # TO create group
centosvm1
#To create group of group
[myservergrp:children]
webser
dbser
#To define variable for group
[webser:vars]
ansible_user=vagrant
#Here in the case of precedence the host level will get 1st precedence after that variable will get precedence.
Define Environment variables
How to define environment variables
vm1 ansible_host=192.168.56.211 ansible_user=vagrant ansible_password=vagrant
#To define variable for group
[webser:vars]
ansible_user=vagrant
#Here in the case of precedence the host level will get 1st precedence after that variable will get precedence.
#For example If we use wrong username ie;
vm1 ansible_host=192.168.56.211 ansible_user=vagrant12 ansible_password=vagrant
[webser] #to create group
vm1
[webser:vars]
ansible_user=vagrant
#Here we have declared right username in variable but still it will throw error because host level entry will get priority over group_level inventory. so to solve this we can remove the ansible_user in host level entry or correct the name.
vm1 ansible_host=192.168.56.211 ansible_password=vagrant
[webser] #to create group
vm1
[webser:vars]
ansible_user=vagrant
#Now this will works fine. We can also define variables in another file and use them here.
-
Now we can do tasks using group name.
-
For example
- ansible -i inventory -m ping webser
- ansible -i inventory -m ping myservergrp
-
After writing inventory file now we can write playbook.yaml file
---
- name: Setup Webserver
  hosts: vm1
  become: true
  tasks:
    - name: Install apache2 pkg
      apt:
        name: apache2
        state: present
    - name: To enable apache2 service
      service:
        name: apache2
        state: started
        enabled: yes
    - name: Updated index.html file
      copy:
        src: index.html
        dest: /var/www/html/


- name: setup database server
  hosts: dbser
  become: true
  tasks:
    - name: Install mariadb pkg on db server
      yum:
        name: mariadb-server
        state: present
    - name: To enable service
      service:
        name: mariadb
        state: started
enabled: yes- Till now we are running this file using command
- “ansible-playbook -i inventory playbook.yaml“
- So instead of mentioning file in command let’s create a .cfg file for this. To create .cfg file
- vim ansible.cfg
- [defaults]
inventory=./inventory
- [defaults]
- Now we can run without mentioning inventory file.
- vim ansible.cfg
- “ansible-playbook playbook.yaml“
- Now mariadb is succssfully install in dbser vm. In case of centos the service in not enabled by default which we have enabled using service command.
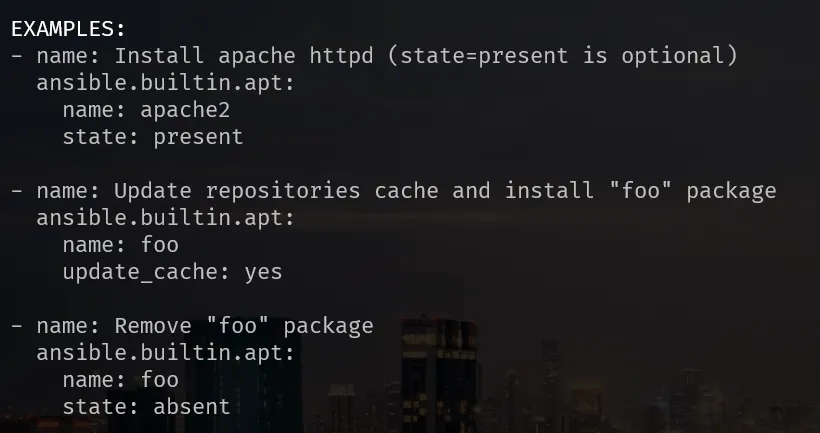
How to see details about modules like apt: , copy: , service: , etc.
Upto now we are using lots of modules. To see about module and find out different modules we can use 2 approaches
Using command line
- ansible-doc -l: To see all the present modules
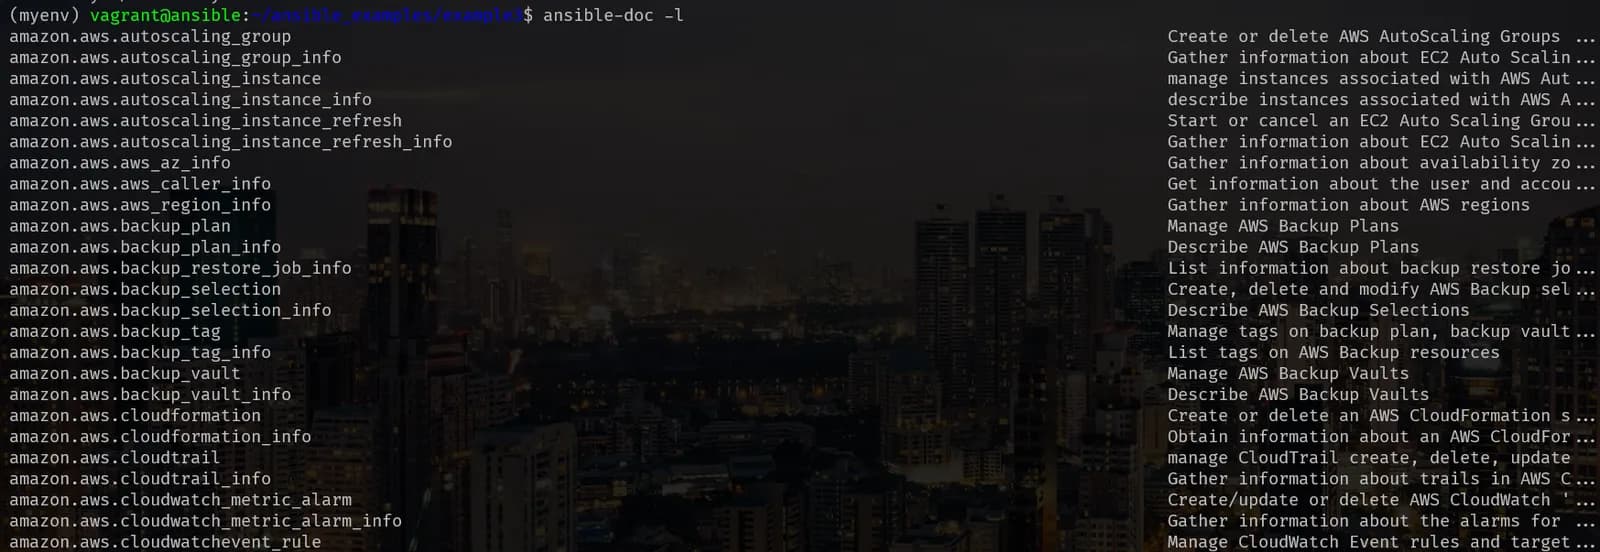
- ansible-doc apt :To see only about apt

Using Browser
- Follow this link to see details about the modules.
- Always follow official documentation.
Example 3: To create user in database [ mysql_db: , mysql_user: ]
First let’s create some files.
- inventory
web_VM ansible_host=192.168.56.211 ansible_ssh_private_key_file=/home/vagrant/ansible/example3/ansible_key

db_VM ansible_host=192.168.56.212 ansible_user=vagrant ansible_ssh_private_key_file=/home/vagrant/ansible/example3/ansible_key

[webser]  #to create group
web_VM

[webser:vars]
ansible_user=vagrant

[dbser]
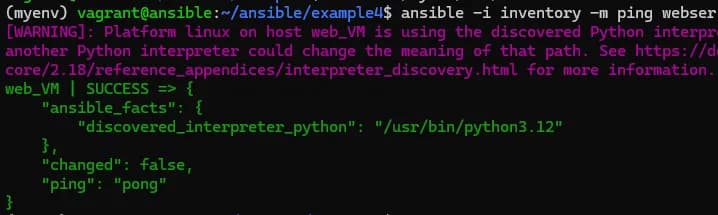
db_VM- After writing inventory file always check connectivity and see the response
- ansible.cfg
[defaults]
inventory=./inventory- playbook.yaml
- name: setup database server
  hosts: dbser
  become: true
  tasks:

    - name: Install mariadb pkg on db server
      apt:
        name: mariadb-server
        state: present

    - name: To enable service
      service:
        name: mariadb
        state: started
        enabled: yes


    - name: Install python3-pymysql pkg
      apt:
        name: python3-pymysql
        state: present

    - name: Create a new database with name 'devopsdb'
      mysql_db:
        name: devopsdb
        state: present
login_unix_socket: /var/run/mysqld/mysqld.sock- Here the main things we need to know are
- Always install “python3-pymysql” before creating database because Python MySQL client library (such as
PyMySQL) should be installed on the target host (database server) to create a database using Ansible’smysql_dbmodule. - We need to provide login_unix_socket otherwise it will throw error like this “unable to find /root/.my.cnf”
- To create database we are using mysql_db module.
- Always install “python3-pymysql” before creating database because Python MySQL client library (such as
Now let’s add task in playbook to add user for database.
     - name: Create database user with name 'devops' and password '12345' with all database privileges
       mysql_user:
         name: devops
         password: 12345
         priv: '*.*:ALL'
         state: present
login_unix_socket: /run/mysqld/mysqld.sock- Here we have created a user devops and granting all privelages to him.
*.*- The first
*refers to all databases in the MySQL server. - The second
*refers to all tables within each database. - So,
*.*together means “all tables in all databases“.
- The first
ALL- Grants all privileges to the user on the specified databases and tables.
- Equivalent to
ALL PRIVILEGES, including SELECT, INSE RT, UPDATE, DELETE, CREATE, DROP, and administrative privileges (depending on MySQL version and context).
Now let’s add variables and use debug module in playbook.yaml
Variable Declaration [vars: ]
Let’s declare the variable in the playbook.yaml file directly
- name: setup database server
  hosts: dbser
  become: true
  vars:
    dbname: devopsdb
    dbuser: devops
    dbpass: devops@123
  tasks:
     - debug:
         var: dbname

     - debug:
         msg: "value of dbuser is  {{dbuser}}"


     - name: Install mariadb pkg on db server
       apt:
         name: mariadb-server
         state: present

     - name: To enable service
       service:
         name: mariadb
         state: started
         enabled: yes


     - name: Install python3-pymysql pkg
       apt:
         name: python3-pymysql
         state: present
           #autoremove: yes
           #purge: yes


     - name: Create a new database with name 'devopsdb'
       mysql_db:
         name: '{{dbname}}'
         state: present
         login_unix_socket: /run/mysqld/mysqld.sock

     - name: Create database user with name 'devops' and password '12345' with all database privileges
       mysql_user:
         name: "{{dbuser}}"
         password: "{{dbpass}}"
         priv: '*.*:ALL'
         state: present
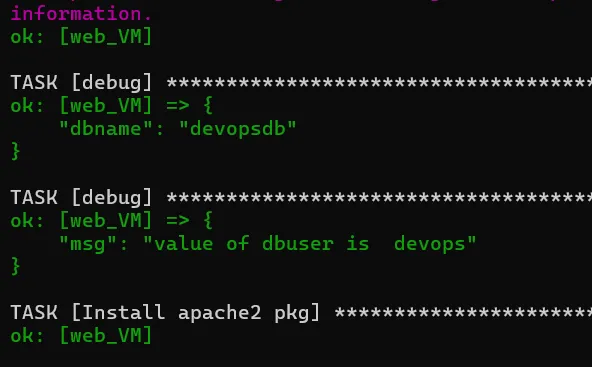
login_unix_socket: /run/mysqld/mysqld.sockUsing debug task we will see output like this. This indicates that our variable declaration is correct and working fine.
Let’s declare the variables in file and use them in the code
- To declare the variable for host create a directory called host_vars and create a file name same to the host name.
- mkdir host_vars
- vim db_VM
- dbname: devopsdb
- dbuser: devops
- dbpass: devops@123
- To declare the variable for groups create a directory called group _vars and declare the variable inside a file named same as group.
- mkdir group_vars
- vim dbser
- define values here
- dbname: devopsdb
- dbuser: devops
- dbpass: devops@123
- course: DevOps
- Note if we create a file named all then it will work for all groups if created inside group_vars and for all host if created inside host_vars.
setup Module [setup]
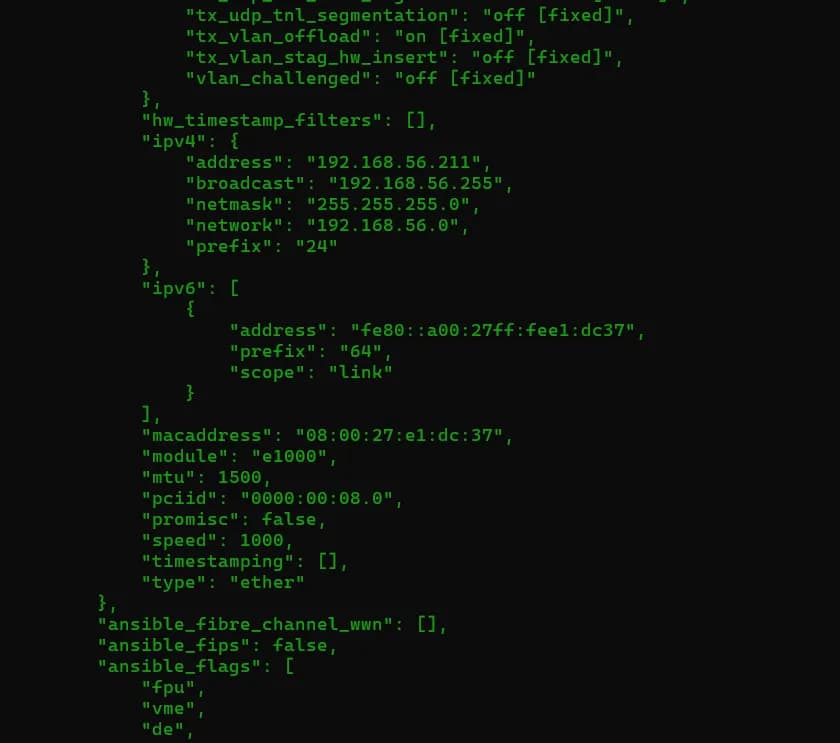
To gather facts about a remote machine using Ansible, you can utilize the setup module or the gather_facts module (which internally uses setup).
- ansible -i -m “setup”
- ansible -m “setup” web_VM
- Shows all the data of the machine For example:
- ip address
- hostname
- username
- mac address
- memory, etc.
Decision making in ansible [when:]
In a playbook, you may want to execute different tasks or have different goals, depending on the value of a fact (data about the remote system), a variable, or the result of a previous task. You may want the value of some variables to depend on the value of other variables. Or you may want to create additional groups of hosts based on whether the hosts match other criteria. You can do all of these things with conditionals.
Installing package based on their distribution
“when” Package is used to achieve this.
---
- name: Conditionals Practice
  hosts: all
  become: yes
  tasks:
    - name: Install apt ackages
      apt:
        name: apache2
        state: present
      when: ansible_distribution == "Ubuntu"

    - name: Install yum packages
      yum:
        name: mariadb-server
        state: present
      when: ansible_distribution == "CentOS"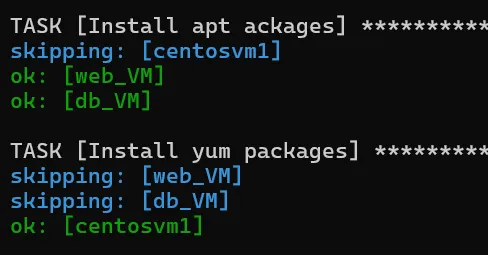
- In this case it is skipping centos because its distribution is centos whereas db_Vm and web_VM distribution is ubuntu so there is package installed succesfully.
Loops [loop:]
- Using loop we can install multiple packages, add multiple user and do a lot of other stuffs. A simple example of loop to install multiple packages is show below. It is not compulsory to use when using with loop.
“loop” package is used to use loop
To install multiple packages
---
- name: Install multiple package in ubuntu
  hosts: all
  become: yes
  tasks:
    - name: Installed multiple packages on ubuntu
      apt:
        name: "{{item}}"
        state: present
      when: ansible_distribution == "Ubuntu"
      loop:
        - apache2
        - git
        - wget
        - net-tools
        - chrony

    - name: Installed packages
      yum:
        name: mariadb-server
        state: present
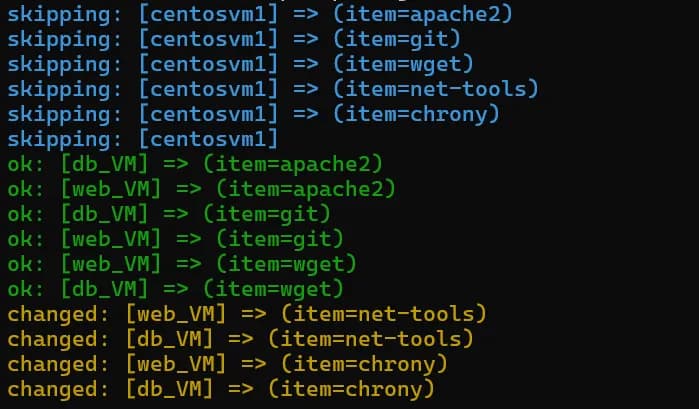
when: ansible_distribution == "CentOS"Here we can see multiple packages are installed based on the distribution.
To add multiple users
- name: Install multiple package in ubuntu
  hosts: all
  become: yes
  tasks:
    - name: Installed multiple packages on ubuntu
      apt:
        name: "{{item}}"
        state: present
      when: ansible_distribution == "Ubuntu"
      loop:
        - apache2
        - git
        - wget
        - net-tools
        - chrony

    - name: Installed packages
      yum:
        name: mariadb-server
        state: present
      when: ansible_distribution == "CentOS"

    - name: Add group devopsgrp
      group:
        name: devopsgrp
        state: present

    - name: Add multiple_users
      user:
        name: "{{item}}"
        group: devopsgrp
loop: "{{usernames}}"- For this demo we are using environment variables that we have placed inside group_vars.
- mkdir group_vars
- vim all
- usernames:
- – user1
- – user2
- – user3
- – user4
- – user5
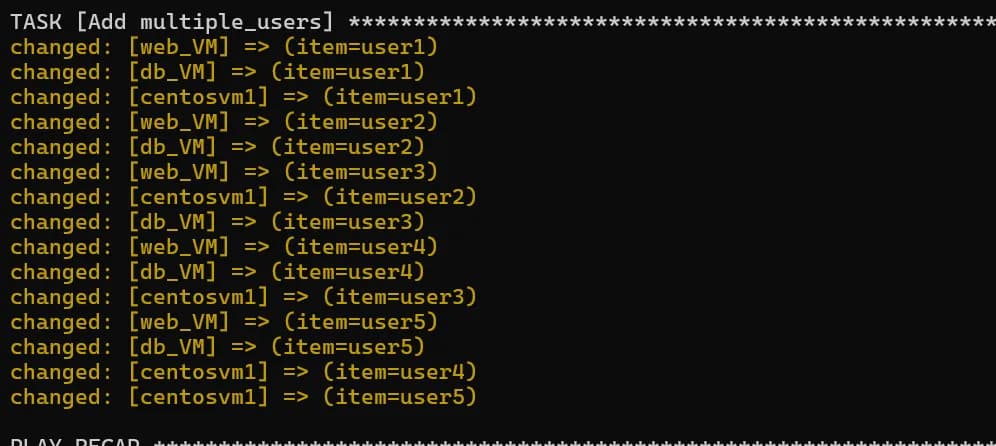
- After doing if we run this file this will create multiple users in centos vm and ubuntu vm.
Keep reading
- Ansible playbook II
First Read ansible playbook1 before starting this section. Ansible “file” and “template” module File ownership create directory create file permission syslinks Template To understand this let’s…
- Ansible
We can do basic automation using shell scrips like installing packages, build docker images and other basic tasks. Python scripting: Using python scripting it is a bit simpler because it has lots of…
- Vagrant
Vagrant is an automation tool to manage VM lifecycle, right from creating avirtual machine to making any changes, deleting it, recreating it, provisioningit, anything that we do manually with VMs, we…