Linux Commands
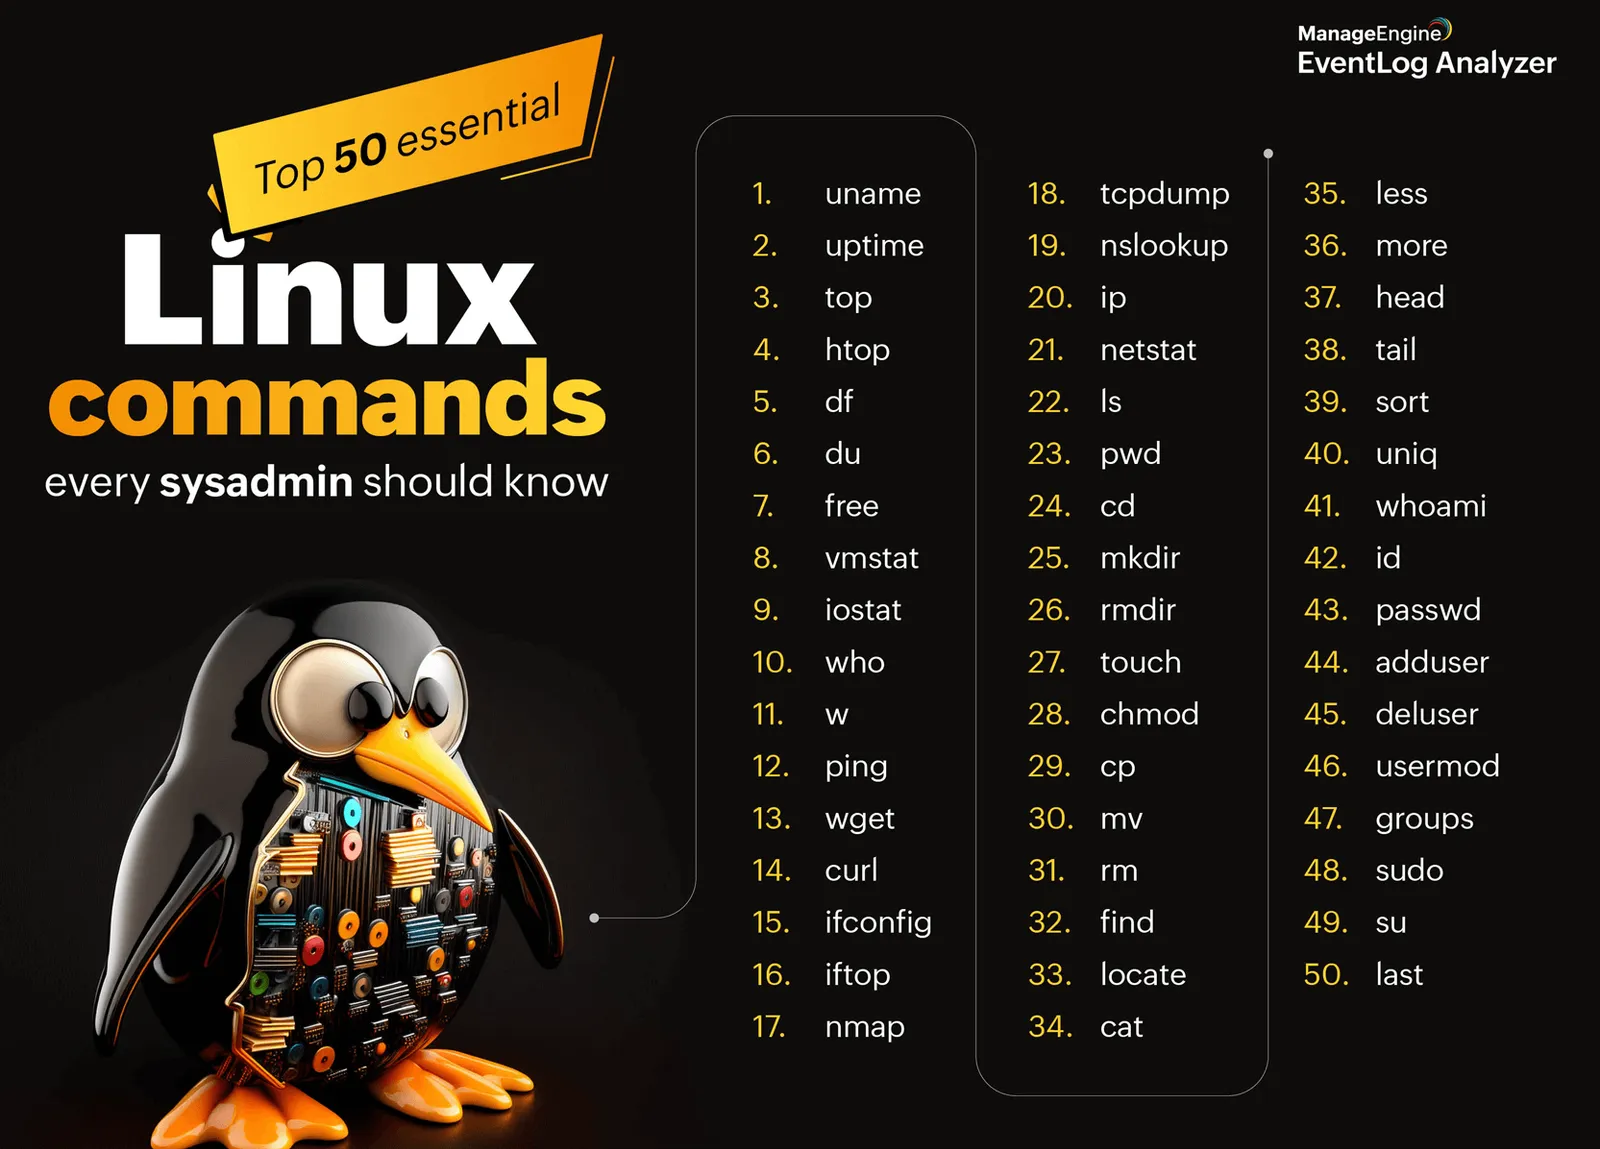
To see Ip address of the machine ip addr show :Shows all the interfaces ip ip -4 addr show: Show only ipv4 address ifconfig: Same as ip addr show but it needs net tools to show ip address. Systemctl…

ON THIS PAGE
To see Ip address of the machine
- ip addr show :Shows all the interfaces ip
- ip -4 addr show: Show only ipv4 address
- ifconfig: Same as ip addr show but it needs net tools to show ip address.
Systemctl commands
- sudo systemctl start servicename: To start the service
- sudo systemctl stop servicename: To stop the service
- sudo systemctl enable servicename: To enable the service
- sudo systemctl disable servicename: To disable the service
- sudo systemctl is-active servicename: To see whether the service is active or not
- Service command:
- [service] [service_name] [command]
- service apache2 status
- commands in service can be ie;start, restart, reload, status, stop
- [service] [service_name] [command]
Change directory [cd]
| Command | Description |
|---|---|
| cd /filename | To change the directory to the certain file name Ex: cd /opt, cd /tmp, cd /var |
| cd ../ | To go 1 step back from current position |
| cd ../../ | To go 2 step back from current position |
| cd – | To go to the recently used directory |
| cd ~ | To go to the home directory |
| sudo -i | To go to the root user home directory Ex: root@jenkins:~# |
Listing command [ls]
| Command | Description |
|---|---|
| ls | Simply list all the contents available in the directory |
| ls -a | List all the files including hidden files |
| ls -l | Long list all the contents of the directory |
| ls -al | Long list all the contents of the directory including hidden files |
| ls -hl | Long list all the contents of the directory in human readable form |
| ls -lr | Long list all the contents of the directory in reverse order |
| ls -lu | Long list all the contents of the directory based on the recently accessed files and directories at the top |
| ls -i | Long list all the contents of the directory and also show the inode number |
| Note: | while long listing if the file starts with these symbols it determines the file type – : text file d : directory . : hidden files l : linked files |
Basic commands
- date: To see the current date
- timedatectl: To print date, region all the details
- sudo timedatectl set-ntp true: to set ntp to true in case of sync issue
- sudo timedatectl set-timezone Asia/Kathmandu: To change timezone
- whoami: Print username
- who: Print who have accessed the machine
- hostname: To see the hostname
- sudo hostnamectl set-hostname hostname_you_want_to_write: To change the hostname
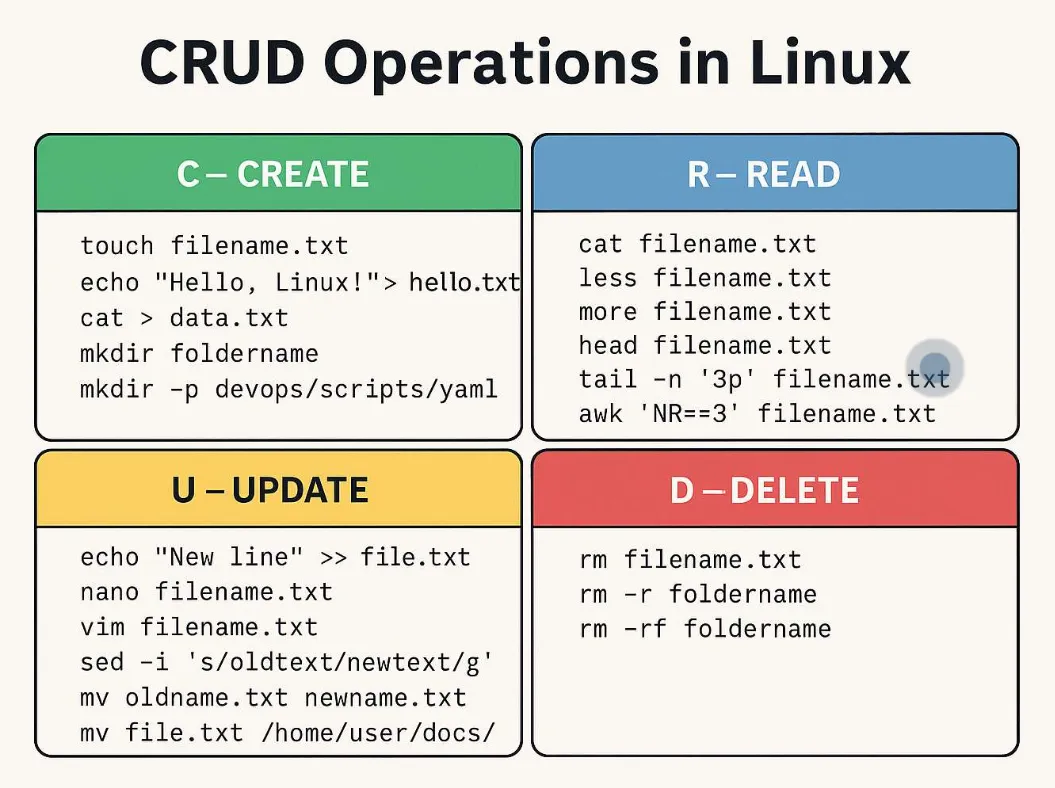
- cat filename: Print the file content
- cat -n filename: To print the content with line number
- cat filename1 filename2: TO print multiple files
- tac filename: Concatenate and display file content in reverse
- Shows the content of file that is at top in bottom.
- uniq – Report or omit repeated lines
- uniq filename
- stat – Display file or file system status
- stat filename
- clear: To clear the screen
- mkdir dirname: To create the directory
- mkdir dirname{1..5} : It will create 5 directories
- passwd: To change the password of the machine
- file filename/dirname: To see file type of any file
- wc filename : To see the word count of any files
- Ex: wc cd/var/log/syslog ;Very powerful log file that has all the logs of system
- history: To see all the past commands that we have ran in the machine.
- !136: To run the 136 number command
- !!: To run the recently used command
- df -h: Display the result of disk utilization
- df -hi: used to display filesystem inode usage information in a human-readable format.
- free -m : Shows memory utilization data
**stat filename**: Used to display detailed information about a file or filesystem, including metadata like permissions, size, ownership, timestamps, and inode details.- which apt: To see pat path
- which $SHELL: To see the used shell
- echo $?: To check status of last command
- 0 for success
- 1 if command fails
- tree: TO see output in tree like structure
- tree -a: To see hidden files also
Copy command
- cp sourcefile targetfile
- Ex: cd /home/user/doc/report.txt /home/usr/backup/destination
- cp -i: To get prompt while copying
- cp -r: To recursively copy [means all in the directory]
- Ex: cp -r dir1/* dir2/*
Move command
- mv file1 file2: To rename the file and also move the contents of the file
- mv -i file1 file2: To get prompt while moving contents of the file
- mv dir* dir1: To move all the contents of the directory to dir1.
- mv dir1 dir2: Moves the dir 1 to the dir2.
- NOTE: While moving contents between the files we don’t need to specify -r flag. By default it will move the contents recursively.
Remove Command
- rm filename: To remove the file
- rm -i filename: To get prompt while removing the file
- rm -r dirname: To remove the directory we need -r flag
- rm -rf dirname: To remove the directory forcefully
- rm -d dirname: To remove the directory
- rmdir: To remove the directory
To get help and see suggestion in linux
- tab: It will auto complete the word when you are accessing some directories or accessing some files.
- double tab: Shows all the files and directories in current path
- info command_name: To see detailed information of any command
- info ls
- info cat
- command –help: To see options we can use with that command.
- grep –help
- touch –help
- man command: To see manual page of any command.
- man cat
- If we forgot the command but we want to do certain task then we can write the apropos task_name and if we show all related to that task.
- Example: apropos copy ;Shows all commands related to the copy
- apropos move ; Shows all the commands related to move
To view/print contents of file
Head
- Print the data from top
- Example:
- head syslog: Print 10 lines from the top ie;by default
- head -n 20 syslog: Print 20 lines from the top. We can define how many lines we want to print by using -n flag.
- NOTE:
- Logs files cd /var/log
- cloud.init.log: Scripts running during bootstrap output is in this directory.
- dpkg.log: Logs during the package installation
- sys.log: Details of all the services logs {Very powerful log file}
- Example:
Tail
- To print the data from the bottom.
- Example:
- tail syslog: By default it will print 10 lines.
- tail -n 20 syslog: It will print 20 lines
- tail -f syslog: To see real time log
- Example:
More
- To read contents line by line and page by pafe
- Press Enter to move to the next line
- Press Space to move to the next page
Less
- Similar to the move but is more powerful
- d: Move to next page
- b: move to the previoys page
- /text_you_want_to _look_for : Search anything through the any file
Find
- To find anything with the name, type, user and group
- syntax:
- sudo find / -name filename:→ find file named test1.txt in root dir and subdirectories
- find . -name dpkg.log: → find all files whose name is dpkg.log in current directory
- -name:To search based on the name
- -inum: To search based on inode number
- -type: To search based on the type
- -user : For files whose owner is a particular user
- -group : For files belonging to particular group
- Example:
- find / -name dpkg.log
- find /etc/ -group shadow -ls
- find / -type l -ls → find files with symbolic link
- find / -type d -name Pictures
- find . -type d -name “terraform“: Took for directory
- If you don’t know full name you can use “*terraform*” also.
- NOTE:
- / Absolute path: It will start search after going to the home.
- . Relative path: It will start looking for the file from the current directory
Locate
- The locate command works reading contents from the database.
- Find files by name
- apt-get install mlocate
- The db must be updated
- sudo updatedb
- Example:
- locate dpkg.log
- locate -i readme.md
Grep
Tool to search string in a file. Basically are a character or group of characters that
represents certain things in a string. We can look for anything in the file using this command.
Commands:
- grep -n: Print content along with the line number.
- grep name test.txt: Print line having name {case sensitive}.
- grep -i name filename: To ignore the case. Not case sensitive.
- grep ^name: To search for the line which word startswith with name.
- grep name$: To search for ends with word.
- grep [nN]ame: Look for both case for n word.ie: name and Name also.
- grep [0-9][0-9]$: Look for the line that have at least two numerical value at the end. Here [0-9][0-9] determines the total number of the words.
- grep -v hello word.txt: Except hello word it will print all and ignore the hello.
Sed [Stream Editor]
sed stands for stream editor, which is used to search a word in the file and
replace it with the word required to be in the output.
Also used to look for specific lines from the file
sed -n ‘3p’ filename.txt # Show 3rd line
syntax: sed -e ‘s/find this/replace with this/g’ /etc/passwd
Here:
- Here -e indicates giving some expression.
- s indicates find.
- Find this, contents to be replaced.
- Replace with this, contents that replace the existing one.
- g indicates global search and replace
Example:
- sed -e ‘s/ansible/devops/g’ /etc/passwd
- sed -n ‘2p’ /etc/passwd
- Here -n flag (silent/negation) ignores all the non important lines. p is
for printing and 2 is for the 2nd line.
- Here -n flag (silent/negation) ignores all the non important lines. p is
- sed -n ‘$p’ /etc/passwd
- Print last line
- sed -n ‘3,6!p’ /etc/passwd
- Print all lines except 3rd to 6th line
- sed -i ‘s/Suryaraj/raj/g’ abc.txt
- -i option allows to write on the same file
- sed -e ‘s/…../………./g’ word.txt >newtmp.txt
- Modify the word.txt file and redirect the output to the newtmp.txt
- sudo -u www-data -i ‘s/database_name_here/wordpress/’ /srv/www/wordpress/wp-configuration
- Here -u :As the user www-data
- /srv/www/wordpress/wp-configuration: Path to the file
- Note: sed -i is a bit dangerous than sed -e
so instead of original file always check by making another file or by creting backup.
Cut
Helps to extract data column by column
- Examples:
- cut -c1 /etc/passwd
- To print the 1st character of every row of the 1st column.
- cut -c1-5 /etc/passwd
- To print the 1st to 5th character.
- cut -d ‘:’ -f1 /etc/passwd
- Here -d is the delimiter(breaks) and f1 represents field1 column 1.
- cut -d ‘:’ -f2-3 /etc/passwd
- Here f2-3 represents the fields 2 to field 3.
- To delimit spaces and print the field
- cut -d ” ” -f1 filename
- cut -d -f filename(where d stands for delimiter eg. :, ” ” f stands for field)
Here Delimeter means fields/colums are seperated by special character that is known as delimter.
AWK
AWK is a family of tools that are primarily used for processing texts files.
The most basic use of AWK is parsing the files and generating reports.
Syntax: awk ‘/search pattern/ {Actions}’ file
- Search pattern in a regular expression.
- Actions – Statements to be performed.
- Several patterns & actions are possible in AWK.
- File – Input file
- Single quotes around the program is to avoid shell not to interpret any
of its special characters.
‘Print only specific field’. AWK has a number of built-in variables. For each record i.e line, it splits the record delimited by whitespace character by default & it stores in the $n variables.
E.g If the line has 4 words, it will be stored in $1, $2, $3, $4.
$0 represents the whole line.
awk -F ‘:’ ‘{print $1}’ /etc/passwd , df -h | awk -F ” ” ‘{print $2}’
- Single quotes around the program is to avoid shell not to interpret any
VIM
VI: Visual display editor
VIM: Visual display Improved
TO install:
sudo yum install vim
sudo apt-get install vim
VIM Mainly have three modes. They are
| Normal mode(command mode) | This mode provides you an efficient way navigate and manipulate text. ESC to go to the normal mode |
|---|---|
| Insert mode | you can write text as in any normal editors Press I to go to the insert mode |
| Extended normal mode(command mode) | extended mode provides the ability to save, quit functionalities : this is extended mode. |
Navigation
| Basic Navigation | h : move to the left j : move to the down k : move to the up l : move to the right |
|---|---|
| Word by word navigation | w : moves to the start of next word in a sentence e : moves to the end of the word b : moves to the beginning of the word [Reverse order] nw: To skip multiple words [forward order, 3w,5w] nb: To skip multiple words [Reverse order] |
| Finding a character. | f : for next occurrence of a character. F : for the previous occurrence of the character. Note: you can combine f with the number for multiple occurrence of a character. |
| Go to the start or end of a sentence | 0 : for the beginning of the sentence. $ : for the end of the sentence. |
| Finding the word under cursor | *: for the next occurrence of the word #: for the previous occurrence of the word. |
| To move courser in whole file | gg: To move the cursor to the beginning of the file G: To move the cursor to the end of the file 2G: To go to the line two |
| To search in the file | / followed_by_text. after that press n for next And N for the previous |
| Insert new line. | o: Below O: Above |
| Removing a character | x : deletes the character under cursor X : deletes the character to the left of the cursor |
| Replacing character under cursor | press r |
| Delete command | d is the delete command dw deletes the first word on the right side of the cursor dd deletes a line ndd delete n lines d2e removes two words to the right of the cursor |
| Undo the changes | u to undo last change(word) shift+u undo last change(sentence) Ctrl + r to redo |
| Copy and Paste | yy to copy a line nyy: to copy n lines p to past a line below shift+p to paste a line above |
| Visual Mode | Visual mode is the another mode of VIM editor In this mode you can select text using the movement keys before deciding any actions. Go to visual mode by pressing v Select word with e After selecting you can remove it by pressing d |
Extended mode
- ESC+:w : to save
- ESC+:q : to quit
- ESC+wq : Save and quit
- ESC+w! : Save forcefully
- ESC+q! : Quit forcefully
- ESC+wq! : Save and Quit forcefully
- ESC+:x : To save and quit
- ESC+:2(n) : Go to line no 2o or n
- ESC+:se nu : Set line number
- ESC+:se nonu : Remove line number
- / search word in a file
- :help for vim help
- Note:
- vim +7 test.txt: Go to the line no 7 when opening in text editor
- %s/Look_for/replace_with: Look for the certain text and replace it Only replace the first occureance.
- %s/Look_for/replace_with/g: Look for the certain text and replace it globally.
Input/Output redirection
Redirection means we can redirect the standard output, standard errors and standard input to any files and also can change the direction of input/output from terminal to files.
Standard Input
- wc
→ gives no. of lines, words and no. of characters. - wc
→ Waits for the standard input if no argument is passed. Give some standard
input and press ctrl+d to exit and see the output. If you provide a file name, it operates on filename. If you do not give the file name, it operates on standard input.
Standard output - ls
- whoami
- date
Standard Errors - $ lss
→ command not found - $ ls /binn
→ No such file or directory - $ cat /etc/shadow
→ permission denied
Input redirection
The < sign is used to redirect the standard input that we pass to any file.
syntax:
command << delimeter
content or commands
that you want to redirect.
delimiter
Example:
wc -l << EOF
This is a simple program
EOF
- tee: overwrites the file
- tee -a: append to the file
-
tee -a filename <<EOF
We are adding some content in
the file filename.
EOFThis will add the content to the file filename.
-
Output redirection
This is used to redirect standard output or error to any files.
1>: Redirect only standard output to the file
2>: Redirect only error to the file
&>: Redirect all output and error to the file
Example:
1>/dev/null : This command will redirect standard output to the file /dev/null which is like a blackhole.
who > user.txt :Here the output of who is redirected to the user.txt instead of terminal. It overwrites the content.
Append
$ date >> command.out –> Appends the new contents in old contents, does not replace.
$ whoami >> command.out
cat command.out
Note:
>:Used to rewrite or redirect only
>>: Used to overwrite the content
Standard error output
$ lss 2> error.out –> standard error output redirected into the file.
To append:
$ lss /binn 2>> error.out –> appends
$ cat error.out
To download using links
- wget url: To download remotely with link
- curl -o URL : To download remotely and select directory for download
- curl -k url : For insecure website
- curl localhost: To curl local host
- Difference between Apache web server and nginx web server
- To install apache2
- Commands
- Apache2 configuration overview
- To load a website in apache2
Shell Scripting
- Writing our first script
- Variable
- To take input from user we use
- Positional Argument
- Command substitute
- If
- For
- While
- Linux Links
- Packet Management
- Users and Groups
- File permissions
- Archiving and Compressing
- Sudo
- Processes
Linux Introduction
- Overview
- Architecture
- Linux Terminology
- Linux File Structure
- / – Root
- /bin – User Binaries.
- /sbin – System Binaries
- /etc – Configuration Files
- /dev – Device Files
- /proc – Process Information
- /var – Variable Files
- /tmp – Temporary Files
- /usr – User Programs
- /home – Home Directories
- /boot – Boot Loader Files
- /lib – System Libraries
- /opt – Optional Add-on Applications
- /mnt – Mount Directory
- /media – Removable Media Devices
- /srv – Service Data
- Interface and logging in via terminal
- Linux File system
Keep reading
- Shell Scripting
It is a way to automate tasks by writing a series of commands in a text file called script that Linux shell can execute. It’s like creating a ‘to do list’ for your computer to follow step by step…
- Apache web server
The Apache HTTP server, commonly known as Apache is a free and open-source web server, that delivers web content through the internet. As open-source software, its original source code is freely…
- Linux commands[2]
Linux Links Soft links Aka Symbolic link It is a pointer to the original file Just like a shortcut in windows and smaller file size Different inode number If we delete the original file, the soft…