Jenkins pipeline
Introduction Jenkins Pipeline (or simply “Pipeline” with a capital ‘P’) is a suite of plugins which supports implementing and integrating continuous delivery pipelines into Jenkins. Continuous…

ON THIS PAGE
Introduction
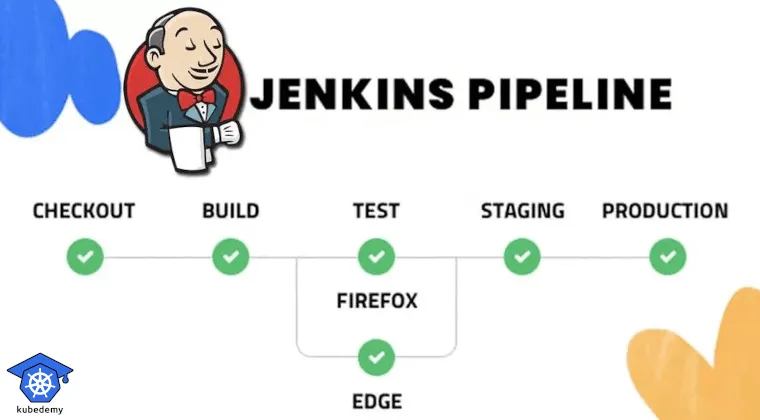
Jenkins Pipeline (or simply “Pipeline” with a capital ‘P’) is a suite of plugins which supports implementing and integrating continuous delivery pipelines into Jenkins.
Continuous delivery pipelines are automated sequences of processes to deliver software from version control like git to customers and end-users. Each software change a developer commits in source control passes through a set of automated processes before being released to production. The pipeline involves building software using repeatable, reliable steps and pushing the build through various testing and deployment stages.
Pipeline is typically written into a text file (called a **Jenkinsfile**) which in turn is checked into a project’s source control repository. Jenkinsfile is written in groovy syntax and use Ruby language.
Declarative versus scripted pipeline
Declarative and Scripted Pipelines are constructed fundamentally differently. Declarative Pipeline is designed to make writing and reading Pipeline code easier, and provides richer syntactical features over Scripted Pipeline syntax. Declarative pipeline is written generally in YAML like file structure and scripted pipeline is written in groovy syntax. The community adaption of declarative pipeline is higher and scripted pipeline has moderate adaption and used for complex setup.
Why pipeline?
- Code: They can be implemented in code giving teams the ability to edit, review, and iterate upon their delivery pipeline.
- Durable: They can survive both planned and unplanned restarts of the Jenkins controller.
- Pausable: We can optionally stop the pipeline and wait for the human approval to run the pipeline.
- Versatile: Supports complex real-world CD requirements, including the ability to fork/join, loop, and perform work in parallel.
- Extensible: The Pipeline plugin supports custom extensions to its DSL and multiple options for integration with other plugins.
Pipeline concept
Pipeline
A Pipeline is a user-defined model of a CD pipeline. A Pipeline’s code defines your entire build process, which typically includes stages for building an application, testing it and then delivering it.
Node
A node is any machine in which we are running builds/jobs is known as Node. A node is a machine which is part of the Jenkins environment and is capable of executing a Pipeline. Can specify node/agent in pipeline.
Stage
A stage is the block of code in which we can perform e.g. “Build”, “Test” and “Deploy” stages. We can create multiple stages and write code to perform different task in stage.
Step
We write steps inside stage. A step is a single task tells Jenkins what to do at a particular point in time. For example, to execute the shell command make, use the sh step: sh 'make'.
Creating the first pipeline [Pipeline script]
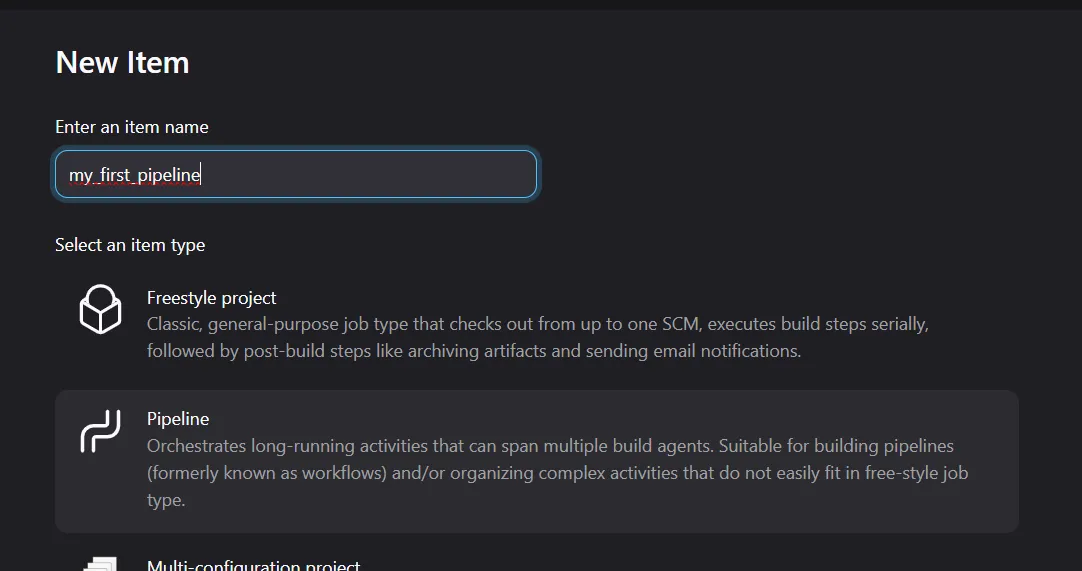
In new item create a new project and select pipeline and then create it.
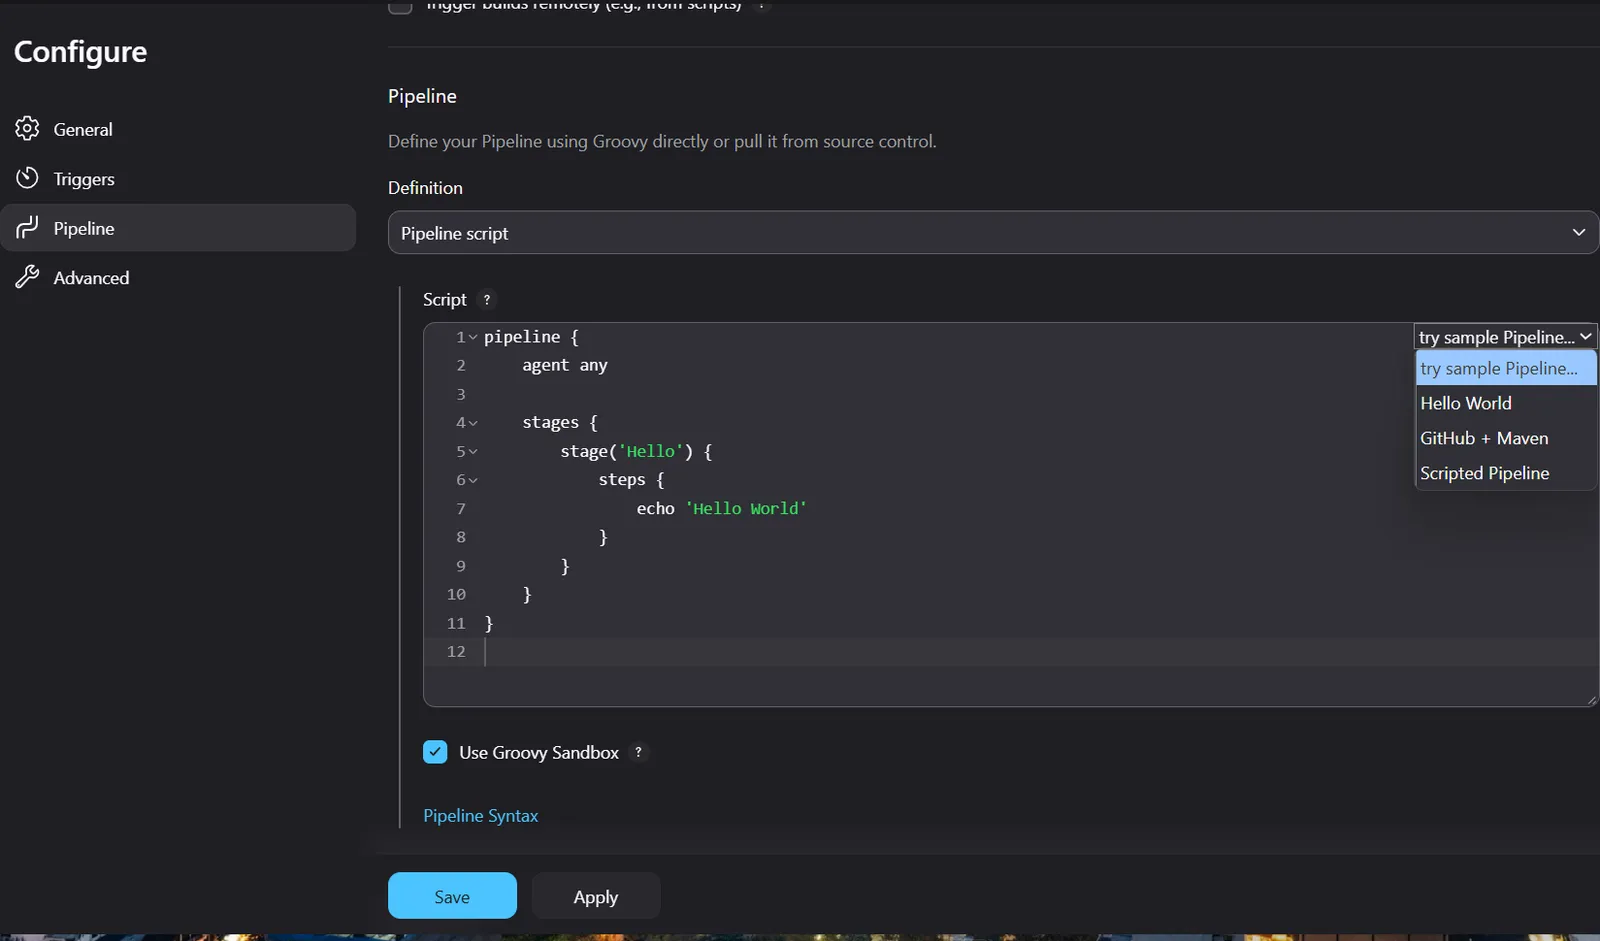
Try sample hello world. And save this after saving this you will see a interface like this
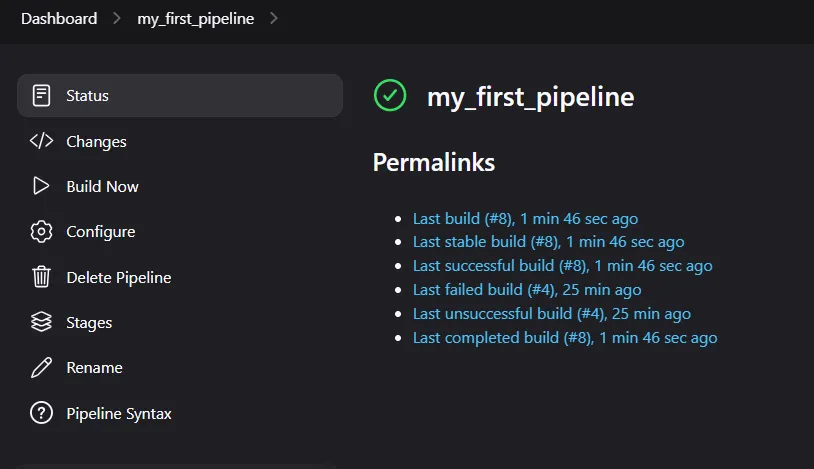
Here all the things are same except pipeline syntax and stages. Pipeline syntax can be used to generate various syntax that we can use in our code. For example:
To generate the syntax for copying artifact we can use this and it will generate the pipeline script. We can also generate pipeline syntax from configure.
Stages:
In stages we can see the status of different stages.
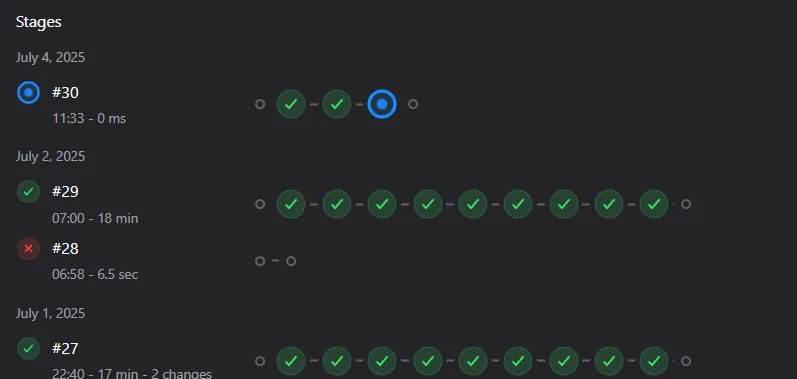
- When we build the project and click on any build number we will see the interface like this.
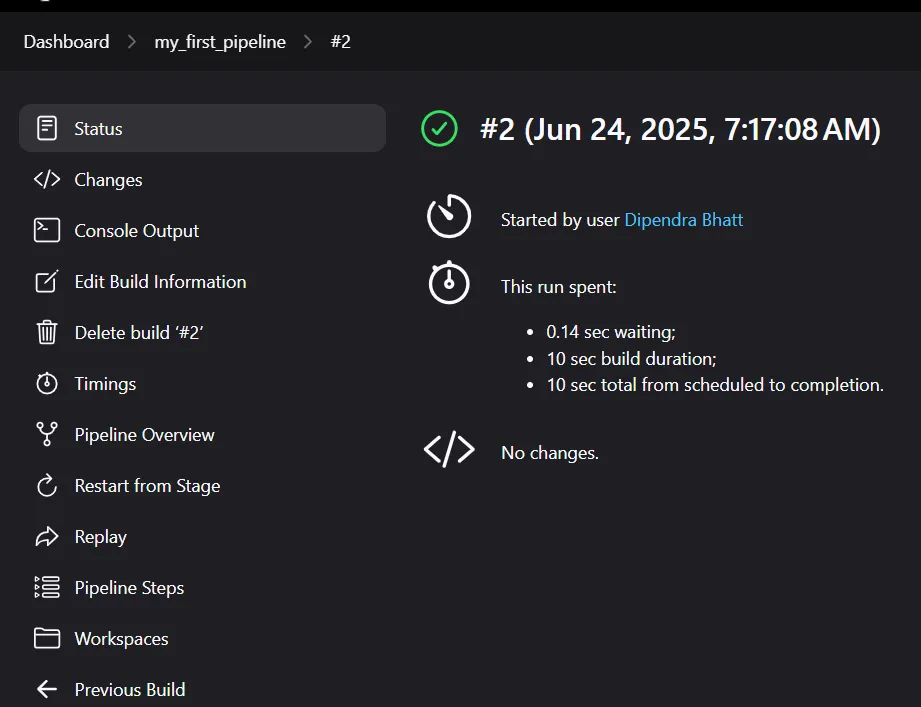
- status: To see it’s status
- Console output: To see the output of the project. Similar to viewing logs.
- Pipeline overview: To see overall pipeline stages and what happen in the individual stage.
- Restart from the stage; If we have multiple stages then we can run from the particular stage.
- Replay: To rerun the script. If can be done by making some changes or without making any change. If we make changes using replay it won’t affect the original code or file.
- Pipeline steps: To see the output of each steps.
Now let’s add some more stages in the code
pipeline {
    agent any

    stages {
        stage('Compile the code') {
            steps {
                echo 'We are compiling the code'
            }
        }
         stage('Unit test') {
            steps {
                echo 'Running unit test'
            }
        }
         stage('Security scan') {
            steps {
                echo 'Run security scan'
            }
        }
         stage('Build docker image') {
            steps {
                echo 'Creating docker image'
            }
        }
        stage('Push image to the registry') {
            steps {
                echo 'Pushing image to the registry'
            }
        }
    }
}After adding this code now we can see multiple stages in the pipeline overview section
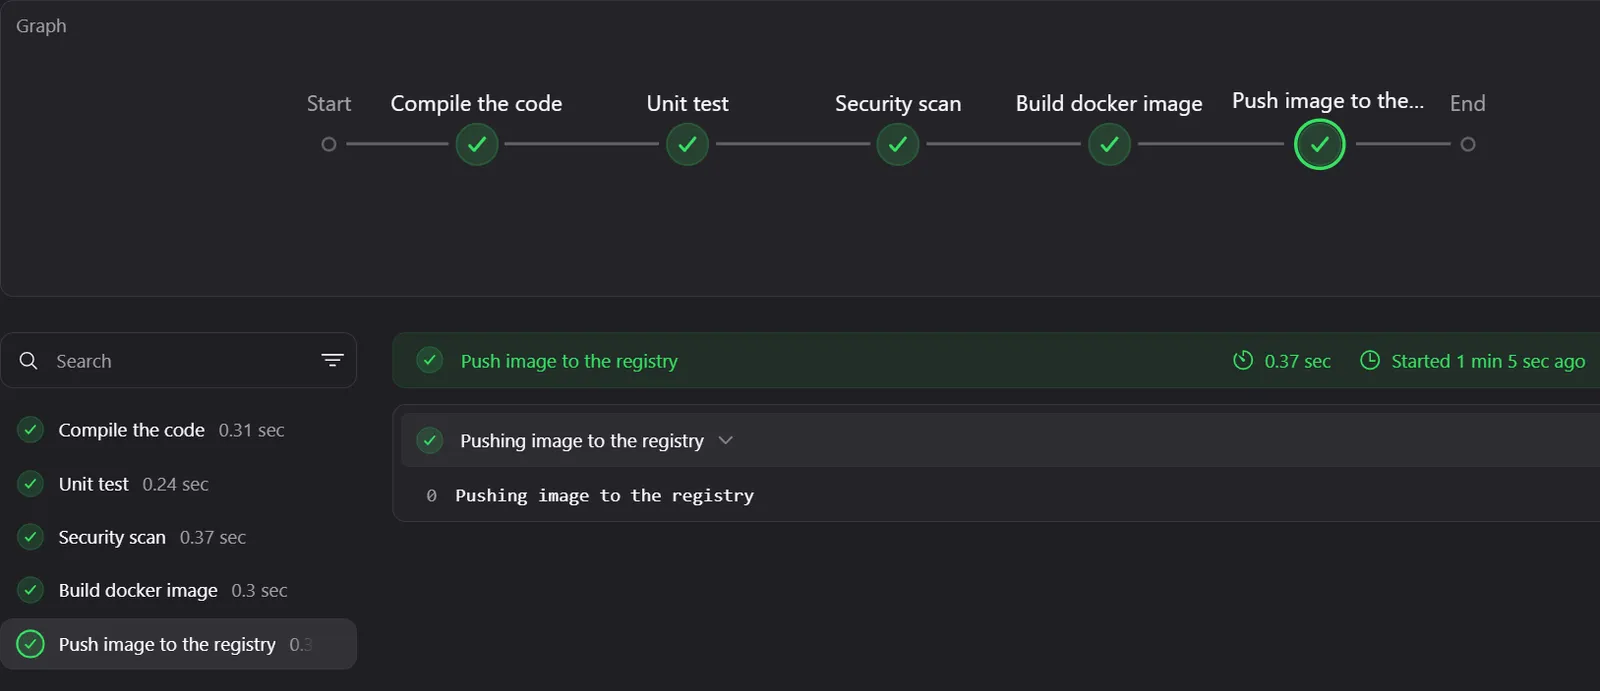
We can add real time code in steps to do different task that we will discuss below.
Creating the first pipeline [SCM]
While working in real life we generally don’t write code directly in the Jenkins UI. Instead we pull the code from GitHub. Let’s do a quick demo.
- First push your Jenkinsfile in the GitHub repository.
- After that select SCM instead of pipeline script.
- Then provide URL of GitHub, credentials if it is private. If it is public then we don’t need to provide credentials. Then specify the branch.
- Specify the filename if filename has different name rather by default it is Jenkinsfile.
- Now save the project and build it. Now it will build using the GitHub file.
- It will by default clone the GitHub file and build the project.
- We are building the maven project that we have build manually ie; maven project. To see its manual steps click this.
- The Jenkinsfile that we are writting to build this project is
- NOTE: The source code for the app that we are building through pipeline is also in the same github repository in which we have jenkins file.
pipeline {
    agent any

    stages {
        stage('Compile the code') {
            steps {
                echo 'packaging the code'
                sh 'mvn clean package'
            }
            post {
                success {
                  echo "Archiving the Artifacts...."
                  archiveArtifacts artifacts: '**/*.war'
                }
            }
        }
         stage('Unit test') {
            steps {
                echo 'Running unit test'
            }
        }
         stage('Security scan') {
            steps {
                echo 'Run security scan'
            }
        }
         stage('Build docker image') {
            steps {
                echo 'Creating docker image'
            }
        }
        stage('Push image to the registry') {
            steps {
                echo 'Pushing image to the registry'
            }
        }
    }
}So now let’s build docker image today for this project and use push the docker file to GitHub and build the image.
For manual build of docker image [Optional}
- First install docker in Jenkins Vm.
- First let’s build the image locally with only source code so that we can test whether our docker file is correct or not.
- For this create a Docker file in the directory in which we have Maven source code. For example

- Now let’s write code for Docker file. You can also take reference from the tomcat Dockerfile to write this.
FROM tomcat:9.0.106-jdk8-corretto


LABEL "version"="1.0"


WORKDIR /usr/local/tomcat

COPY **/*.war /usr/local/tomcat/webapps/ROOT.war

EXPOSE 8080

CMD [ "catalina.sh", "run" ]-
After writing this code now let’s build the image and run the container using docker commands.
- docker image build -t mylocalimage:v1 .
- docker container run -it –name mytomcat -p 8085:8080 imageid/name bash
-
After running this we are directly logged in container. If you don’t want to login because we are running in -it mode. To run in detach mode run this command
- docker container run -d–name mytomcat -p 8085:8080 imageid/name
-
Now if we are logged in the container so let’s explore how container works internally. ie;
- code is copied to webapps of container and ROOT.war is extracted successfully because we run catalina.sh
- If ROOT.war extraction is failed we have to manually extract it by running command like ‘catalina.sh start‘
- code is copied to webapps of container and ROOT.war is extracted successfully because we run catalina.sh
-
Now we access the website through chrome using ipaddress:port. We can successfully see the website launching.
-
Now let’s push this code to GitHub and build it with the help of pipeline.
- git push origin branchname
To test manually to deploy is jenkins is totally optional. If you are familiar with Dockerfile and know it’s gonna work fine then you can directly write docker image and push it to your report and write your pipeline. After doing all this let’s update our script to build docker image using pipeline.
ADDING STAGES STEP BY STEP TO KNOW HOW IT WORKS
BUILDING DOCKER IMAGE
For image name i have used environment variable:
environment {
mydockerimage = “deependrabhatta/jenkins_data”
}
Here deependrabhatta/jekins_data is the name that i have taken from docker hub repository which we need while pushing image to dockerhub registry that i have explained in pushing image section.
pipeline {
    agent any
    environment {
        mydockerimage = "deependrabhatta/jenkins_data"
    }

    stages {
        stage('Compile the code') {
            steps {
                echo 'packaging the code'
                sh 'mvn clean package'
            }
            post {
                success {
                    echo "Archiving the Artifacts...."
                    archiveArtifacts artifacts: '**/*.war'
                }
            }
        }

         stage('Build docker image') {
            steps {
                echo "Building docker images'"
                sh 'docker image build -t $mydockerimage:$BUILD_NUMBER .'
            }
        }
         stage('Unit test') {
            steps {
                echo 'Running unit test'
            }
        }
         stage('Security scan') {
            steps {
                echo 'Run security scan'
            }
        }
        stage('Push image to the registry') {
            steps {
                echo 'Pushing image to the registry'
            }
        }
    }
}- Here we have added a code to build a docker image. After writing this code push it to the GitHub repo and build the project. While building the docker file we will face a error like this one.

- Because Jenkins user do not have permission to run the Docker commands and build docker images. So to resolve this issue we need to add Jenkins user in docker group so that it can run docker commands.
- sudo usermod -aG docker jenkins
- logout of the machine and login again i.e.; VM
- sudo systemctl restart jenkins
- Now if we build then the build will the successful and image can be seen in the machine
- Here $BUILD_NUMBER is jenkins pre defined environment variable. Based on the build number it will automatically use this as image tag. To know more about environment variables in jenkins this click link below.
- sudo usermod -aG docker jenkins

SCANNING THE IMAGE THAT WE HAVE BUILT
Now today let’s scan the image that we have build and push it to the remote repo like docker hub or harbor registry and finally deploy the image as a container.
- To scan the image we are using trivy.
- To install trivy on Linux click this link.
- After installing trivy let’s scan the file manually. For this use command
trivy image imagename:tag
and you will see a output like this.
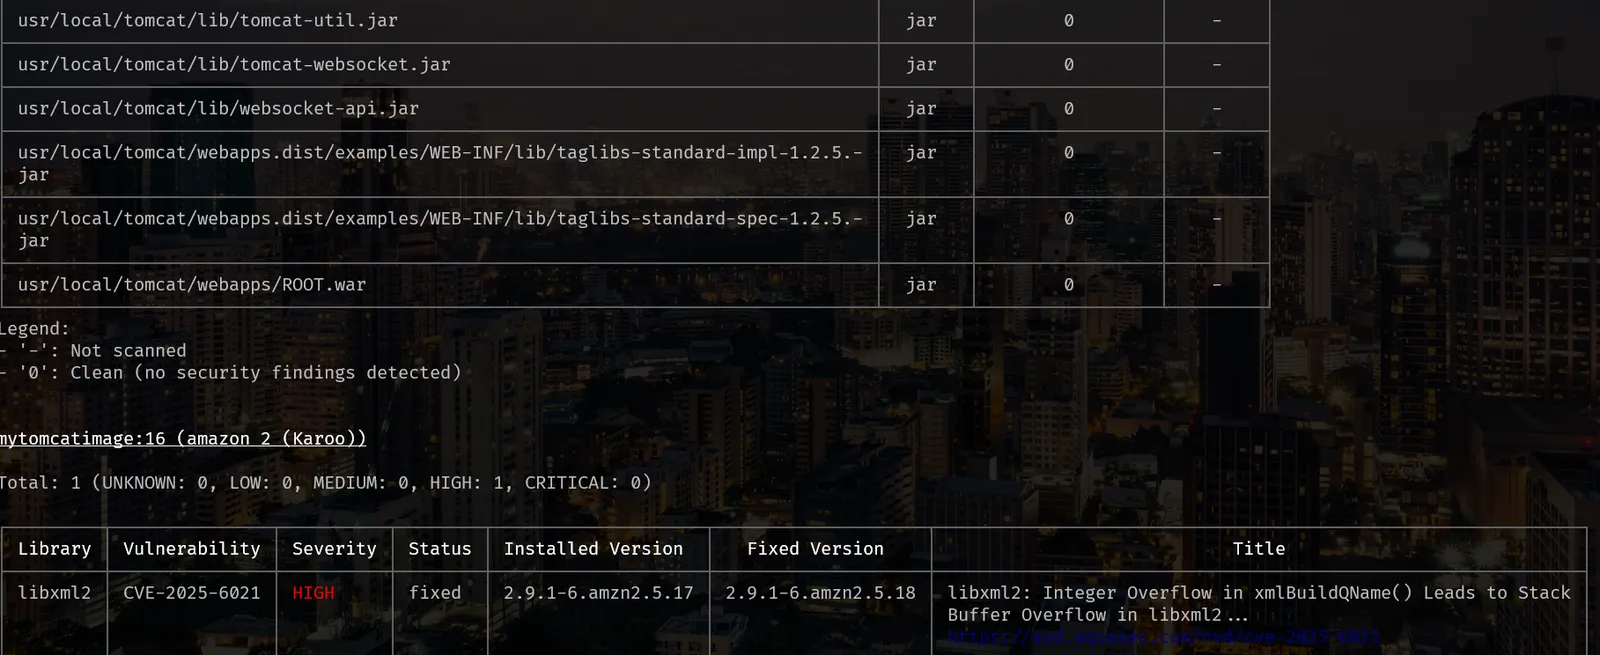
To study more about this check it’s GitHub page.
- Now let’s add this in our code.
         stage('Image scanning with trivy') {
            steps {
                echo "Scanning image vulneriblity"
                sh 'trivy image $mydockerimage:$BUILD_NUMBER'
        }
}PUSHING IMAGE TO DOCKER REGISTRY
- To push image to docker registry we need to add credentials. To add credential go to manage jenkins >>credentials and add credentials there. Add your username{example ‘bhattad625@gmail.com’} and password in credentials. And give a ID to credential and use that id in the code below.
- For password generate personal access token in docker hub and use that as your password.
- To generate personal access token go to account setting>>personal access token. Generate PAT from there.
- For password generate personal access token in docker hub and use that as your password.
- After install a plugin called Docker pipeline.
    stage('Pushing docker image to dockerhub') {
            steps {
                echo "pushing image"
                withDockerRegistry ([credentialsId: 'jenkinsdockercred', url: '']) {
                    sh '''
                    docker push $mydockerimage:$BUILD_NUMBER
                    '''
                }
            }
}- Here in the place of url we can provide url of docker harbor registry url or other registeries url. In case of docker hub we don’t need to mention any url.
- sh ”’
…..
””
Used to insert multiple commands inside a single sh. - NOTE:
-
To push image to the registry you need create tag so that image can be pushed. For example
docker push deependrabhatta/jenkins_data:tagnameWe need similar tag to push image that we seen see in our repository. Make sure while building image you should either build with this name or rename it later using docker tag command before pushing it to your registry otherwise you will face error.
-
For now i am passing my repo name in environment variables.
-
    environment {
        mydockerimage = "deependrabhatta/jenkins_data"
}DEPLOYING THE CONTAINER
- So now let’s deploy the container in our machine.
- We can deploy in ansible, kubernetes, swarm cluster.
 stage('Deploy to devenv ') {
            steps {
                echo 'Running a container now'
                sh '''
                docker container stop ${mydockerimage}:${BUILD_NUMBER} || true
                docker container rm ${mydockerimage}:${BUILD_NUMBER} || true
                docker run -d --name mytomcatapp -p 8081:8080 ${mydockerimage}:${BUILD_NUMBER}
                '''
            }
}- || true . We are using this because at initial stage if the command fails still it will move to the next line. It won’t cause error.
- In real life we don’t deploy container in same machine. We build in one machine and deploy it in another machine. It is not good practice to build and deploy the container in the same machine.
Here in above deployment it is deployed automatically. So if we want to add manual interference to deploy the container then we need to add this in the code.
stage('Deploy Production Environment') {
            steps {
                timeout(time:5, unit:'DAYS'){
                input message:'Approve PRODUCTION Deployment?'
                }
                echo "Running app on Prod env"
                sh '''
                docker stop mymanualdeployapp || true
                docker rm mymanualdeployapp || true
                docker run -itd --name mymanualdeployapp -p 8083:8080 $mydockerimage:$BUILD_NUMBER
                '''
            }
}- Here in this code we have simply added a new stage to get prompt if we want to deploy the container or not. If we approve then the deployment will be successful otherwise it will fail. We can set timeout to wait. We have written this code because we don’t push everything to production. So we have added a step to push the image.
SENDING NOTIFICATION TO TEAM AFTER BUILD
- We can send notification to the in any medium like teams, email, slack channel, etc when build is success or fail to aware the team about the status of the pipeline.
- The build might fail in different stages so to make aware where the build is failed we can setup email notification.
- To send notification we need to setup post build actions.
Conditions to run post build actions
**always**: Run the steps in thepostsection whether the build is successful or failed.**changed**: Only run steps if there is change in completion status.**fixed**: Only run if the current build is successful and previous is failed**regression**: If current build is failed, unstable and aborted but previous build is successsful**aborted**: If the build is aborted usually due to being manually aborted.**failure**: If the build has failed status.**success**: If the build has success status.unstable: If the build has unstable status**unsuccessful**: If the build has not “success” status.**cleanup**: After every otherpostcondition has been evaluated, regardless of the Pipeline or stage’s status.
Simple example
pipeline {
    agent any
    stages {
        stage('Example') {
            steps {
                echo 'Hello World'
            }
        }
    }
    post {
        always {
            echo 'I will always say Hello again!'
        }
    }
}
#Always check the position of how curly bracket are opened and closed otherwise it will cause error.
#Here post build action are outside the stage but is inside the pipelineHere after build is completed regardless of it’s status it will always run post build action because we have set “always” in post build condition. We can also use other conditions here.
Now, let’s setup post build action to send email notification. For demo let’s setup to send notification in gmail.
- First got to mange jenkins>>system and at last we can see the interface to add configuration to send email.
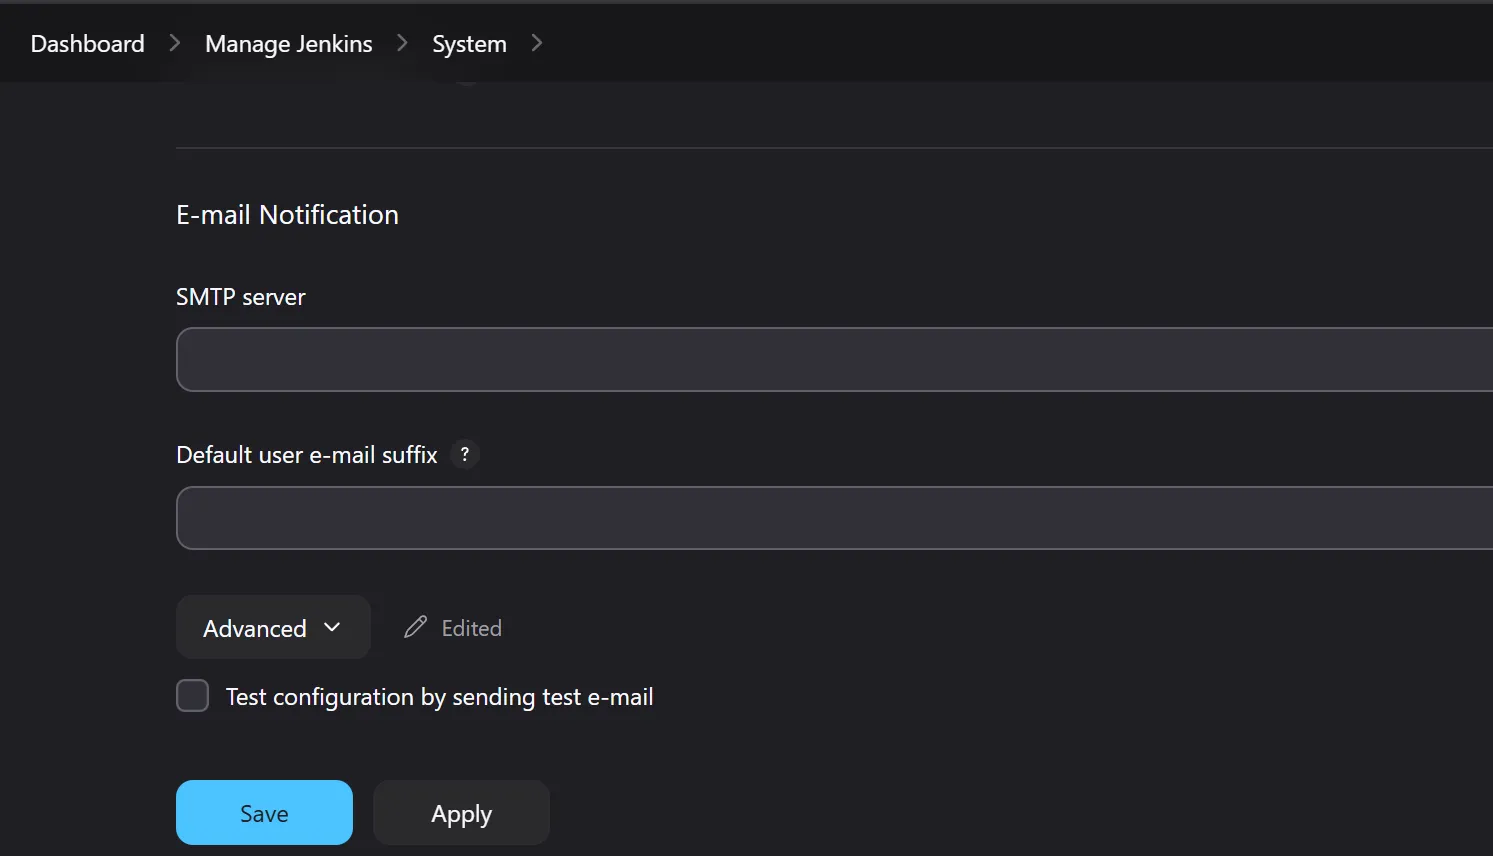
- So Now lets add details
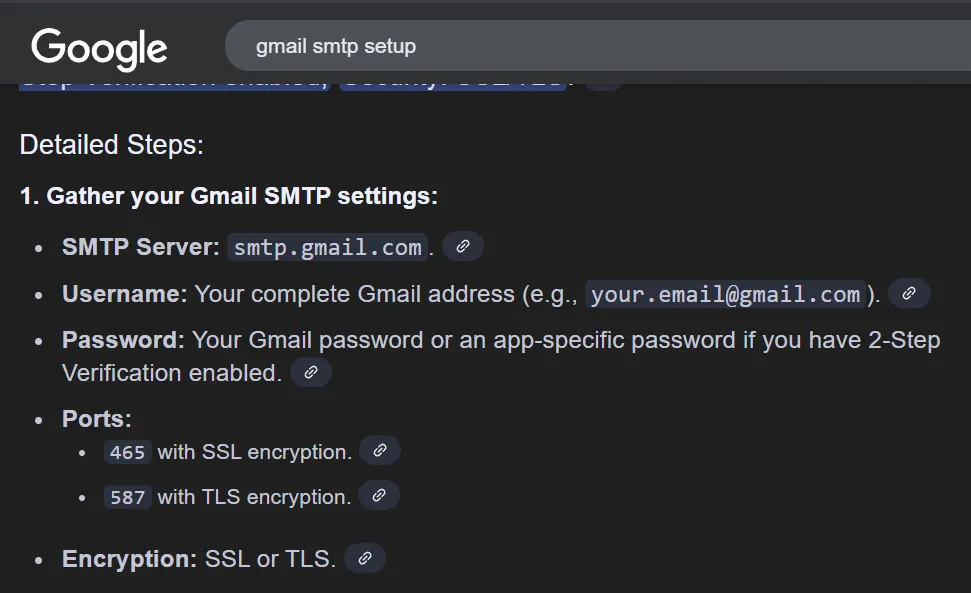
- SMTP address: smtp.gmail.com
- For SMTP address is “smtp.gmail.com” . If the organization has it’s own gmail server then we need to add that server details.
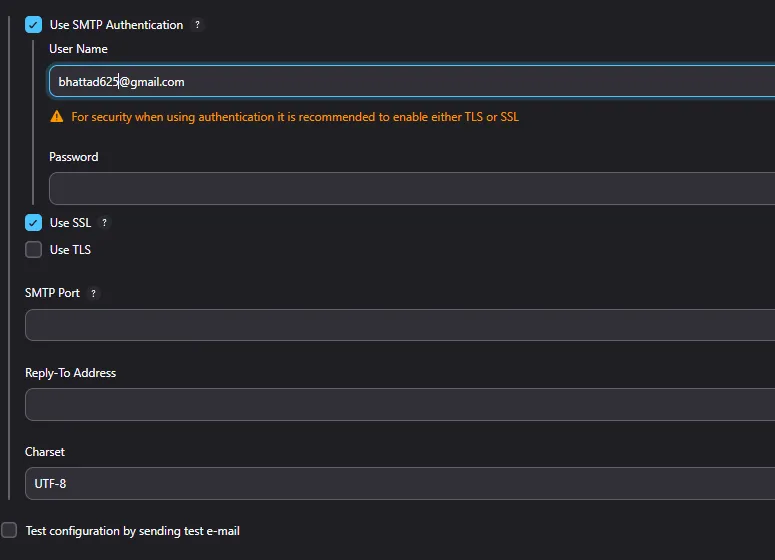
- Now in advanced section.
- UserName: In this section we define from which email we want to send notifications.
- In this case i am using bhattad625@gmail.com
- Password: In this section we don’t enter the password of our gmail. Instead of that we generate the tokken to use that as password.
- Go to gmail>>manage your google account>>In search bar type app password>> verify your credentials >> appname>> and you will see a popup of app password.
- Use the generated password in the place of password after that click apply and now run this test configuration section.
- UserName: In this section we define from which email we want to send notifications.
- SMTP Port:
- For SSL: 465
For TSL: 587 - For now i am using SSL so i am using 465 port.
- For SSL: 465
- Now sent the test configuration message to verify whether its working or not.

- After doing all this now save the setting.
- Note: We can also send email notification in freestyle job project also by configuring in post build action.
- After configuring all this let’s write script in pipeline to send notification.
- The mail writing format is very similar to when we write mail in gmail that has subject, body , to whom we want to send, CC, BCC etc.
    post {
         always {
            mail to: 'animeislove1657@gmail.com',
            subject: "Job '${JOB_NAME}' (${BUILD_NUMBER}) is waiting for input",
            body: "Please go to ${BUILD_URL} and verify the build"
        }
        success {
            mail bcc: 'dipakbhatt363@gmail.com',
            body: """Hi Team,
            Build #$BUILD_NUMBER is successful, please go through the url
            $BUILD_URL
            and verify the details.
            Regards,
            DevOps Team""",
            cc: 'bhattad625@gmail.com',
            from: 'bhattad625@gmail.com',
            replyTo: '',
            subject: 'BUILD SUCCESS NOTIFICATION',
            to: 'bhattadeependra05@gmail.com'
        }
        failure {
            mail bcc: '',
            body: """Hi Team,
            Build #$BUILD_NUMBER is unsuccessful, please go through the url
            $BUILD_URL
            and verify the details.
            Regards,
            DevOps Team""",
            cc: 'dipakbhatt363@gmail.com',
            from: 'bhattad625@gmail.com',
            replyTo: 'bhattadeependra05@gmail.com',
            subject: 'BUILD FAILED NOTIFICATION',
            to: 'bhattadeependra05@gmail.com'
}| Field | Meaning | Why it is used |
|---|---|---|
| to: | Main receipt of the email | The person or team you want to officially notify. |
| cc | Carbon Copy recipient. | This person gets a copy visibly, so others know they were informed. |
| bcc | Blind Carbon Copy | Sends the email to someone secretly. Not visible to other recipients. |
| from | Sender’s email address | Shows who sent the email. Should match a configured SMTP user in Jenkins. |
| replyTo | Where replies should go | If someone clicks “Reply,” it will go to this address (can be left blank) |
| subject | Title of the email | Helps recipients quickly understand what the email is about (e.g., “Build Success”) |
- Here i have added the source code for the condition like always, on success, and on failure. You can customize the message and send them based on your needs.
Final Code:
pipeline {
    agent any

    environment {
        mydockerimage = "deependrabhatta/jenkins_data"
    }

    stages {
        stage('Compile the code') {
            steps {
                echo 'packaging the code'
                sh 'mvn clean package'
            }
            post {
                success {
                    echo "Archiving the Artifacts...."
                    archiveArtifacts artifacts: '**/*.war'
                }
            }
        }

         stage('Build docker image') {
            steps {
                echo "Building docker images'"
                sh 'docker image build -t ${mydockerimage}:${BUILD_NUMBER} .'
            }
        }
         stage('Image scanning with trivy') {
            steps {
                echo "Scanning image vulneriblity"
                sh 'trivy image ${mydockerimage}:${BUILD_NUMBER}'
        }
        }
         stage('Pushing docker image to dockerhub') {
            steps {
                echo "pushing image"
                withDockerRegistry ([credentialsId: 'jenkinsdockercred', url: '']) {
                    sh '''
                    docker push $mydockerimage:$BUILD_NUMBER
                    '''
                }
            }
        }
        stage('Deploy to devenv ') {
            steps {
                echo 'Running a Development environment'
                sh '''
                docker container stop myapp || true
                docker container rm myapp || true
                docker run -d --name myapp -p 8089:8080 ${mydockerimage}:${BUILD_NUMBER}
                '''
            }
        }
        stage('Deploy Production Environment') {
            steps {
                timeout(time:5, unit:'DAYS'){
                input message:'Approve PRODUCTION Deployment?'
                }
                echo "Running app on Prod env"
                sh '''
                docker stop mymanualdeployapp || true
                docker rm mymanualdeployapp || true
                docker run -itd --name mymanualdeployapp -p 8083:8080 $mydockerimage:$BUILD_NUMBER
                '''
            }
        }
    }
    post {
         always {
            mail to: 'animeislove1657@gmail.com',
            subject: "Job '${JOB_NAME}' (${BUILD_NUMBER}) is waiting for input",
            body: "Please go to ${BUILD_URL} and verify the build"
        }
        success {
            mail bcc: 'dipakbhatt363@gmail.com',
            body: """Hi Team,
            Build #$BUILD_NUMBER is successful, please go through the url
            $BUILD_URL
            and verify the details.
            Regards,
            DevOps Team""",
            cc: 'bhattad625@gmail.com',
            from: 'bhattad625@gmail.com',
            replyTo: '',
            subject: 'BUILD SUCCESS NOTIFICATION',
            to: 'bhattadeependra05@gmail.com'
        }
        failure {
            mail bcc: '',
            body: """Hi Team,
            Build #$BUILD_NUMBER is unsuccessful, please go through the url
            $BUILD_URL
            and verify the details.
            Regards,
            DevOps Team""",
            cc: 'dipakbhatt363@gmail.com',
            from: 'bhattad625@gmail.com',
            replyTo: 'bhattadeependra05@gmail.com',
            subject: 'BUILD FAILED NOTIFICATION',
            to: 'bhattadeependra05@gmail.com'
        }
    }
}Keep reading
- GITHUB Actions
From Zero to Deploy: Building a MERN Stack CI/CD Pipeline with GitHub Actions Continuous Integration (CI) and Continuous Deployment (CD) have become essential pillars of modern software development…
- SonarQube
Installation To install sonarqube you can simply use this script. After installing this you can simply browse this machine in the ip address of the machine and the port 9000. This is the home page of…
- Github Hooks in Jenkins
🚀 Step 1: Install Required Jenkins Plugins Go to Jenkins Dashboard → Manage Jenkins → Manage Plugins. GitHub Integration GitHub Plugin Pipeline: GitHub (if not installed) Install and Restart…