EC2 [Elastic Computing Services]
Introduction Amazon EC2 (Elastic Compute Cloud) is a core service within Amazon Web Services (AWS) that provides scalable, on-demand virtual servers or instances for running applications in the…

ON THIS PAGE
![EC2 [Elastic Computing Services] screenshot 2](/_next/image?url=https%3A%2F%2Fzypelxywckyusgamhdpc.supabase.co%2Fstorage%2Fv1%2Fobject%2Fpublic%2Fpost-images%2F7b3e2030-9c28-4751-b36f-a6ac29233e57%2F02-image-129.webp&w=3840&q=75)
Introduction
Amazon EC2 (Elastic Compute Cloud) is a core service within Amazon Web Services (AWS) that provides scalable, on-demand virtual servers or instances for running applications in the cloud. Users can launch, configure, and manage virtual machines with varying combinations of CPU, memory, storage, and networking resources depending on their workload needs.
Creating a “Normal” VM (On-Prem)
- First, pick your hypervisor (e.g., VirtualBox, VMware Workstation).
- Assign VM name.
- OS image (attach an ISO of Ubuntu, Windows, etc.).
- Hardware spec configuration (CPU cores, RAM).
- Network Configuration (NAT vs. bridged, port-forwarding).
- User configuration (create user accounts inside the VM).
- Packages Installation (install Docker, web server, etc.).
Creating a VM in AWS EC2 [Basic Overvieww]
- Hypervisor: AWS manages this—your “hypervisor” is the EC2 service.
- Go to EC2 → Instances: shows your existing VMs (instances).
- Click “Launch Instance.”
- Assign name (via the Name tag), e.g.
My_Demo_VM. - Application and OS images
- AMI (Amazon Machine Image): the template that stores OS + apps.
- You can launch hundreds or thousands of instances from the same AMI.
- Available AMIs: Amazon Linux, macOS, Ubuntu, Windows, Red Hat, SUSE Linux, Debian, etc.
- When you pick Ubuntu, choose a version (view its AMI ID, architecture, published date).
- Here the OS is installed already. Similar to virtual box when we export appliance there it will create a template of that machine and when we want to install the similar machine we can use that exported file. It will make installation fast.
- You can save the machine made by you as a AMI and share with other people based on your need.
- You can make you AMI public, private.
- There are more than 1000 AMI in aws.
- Instance Type
- Instead of manually setting CPU/RAM, pick a predefined type (e.g.
t3.micro) that bundles vCPU, memory, and network performance.
- Instead of manually setting CPU/RAM, pick a predefined type (e.g.
- Key Pair Login
- Upload your public key (from your local machine), or
- Let AWS generate one for you and download the private key (
.pem).
- Network Configuration
- Choose VPC and subnet, decide on public IP assignment.
- Security Group = virtual firewall (e.g. allow SSH 22 from your IP).
- Storage
- Attach one or more EBS volumes: choose type (gp3, gp2, etc.), size, and whether to delete on termination.
- Optional: IAM Role
- If this instance needs to call other AWS services (e.g. write logs to S3), attach an IAM role with minimal permissions.
- Optional: User Data
- Paste a shell script (bash or CloudInit) to run at first boot for provisioning (installing packages, configuring services).
- Review & Launch
- Confirm all settings, acknowledge your key pair choice, and click Launch.
- Your new EC2 instance will spin up in a minute.
Types of EC2 instances
General Purpose Instances
Definition: A balanced mix of CPU, memory and network—your “Swiss Army knife” for everyday workloads. They burst CPU when needed and throttle back when idle.
Real-life Scenario:
- Startup Blog/CMS: Your new travel blog on WordPress might see occasional traffic spikes when you share a post on social media. A burstable instance scales up smoothly and then credits down during lulls—saving cost.
- Dev/Test Environment: Spinning up multiple small servers to test microservice interactions, without over-paying for unused capacity.
- Lightweight E-commerce Store: Handles the web server, a small RDBMS, and background jobs on the same instance.
Example Series to Know:
- t3, t4g (burstable, low-cost)
- m5, m6i, m6g (balanced sustained performance)
Compute Optimized Instances
Definition: High-clock-speed CPUs and dedicated compute capacity—ideal when your app is doing heavy number-crunching.
Real-life Scenario:
- Video Transcoding Service: Converting user-uploaded videos on the fly into multiple resolutions/formats.
- High-Performance Web/API Servers: Handling thousands of requests per second for a real-time bidding ad platform.
- Scientific Simulations: Running finite-element analysis for engineering stress tests or molecular modeling in biotech.
Example Series to Know:
- c5, c5n (Intel Xeon)
- c6g, c7g (ARM-based Graviton)
- c6i (latest Intel)
Memory Optimized Instances
Definition: Lots of RAM per vCPU—perfect for applications that keep entire data sets in memory.
Real-life Scenario:
- In-Memory Caches: Hosting Redis or Memcached clusters to accelerate database-driven web apps.
- Real-Time Analytics: Streaming data from IoT sensors into an in-memory analytics engine for immediate insights.
- Enterprise Databases: Running SAP HANA or Microsoft SQL Server with large buffer pools.
Example Series to Know:
- r5, r6g, r6i (memory-heavy)
- x1e, x2idn (extreme memory footprint)
- u- (ultra-large, up to multiple TBs of RAM)
Accelerated Computing Instances
Definition: Equipped with GPUs or FPGAs to offload specialized compute tasks, like AI training or hardware-accelerated video.
Real-life Scenario:
- Machine Learning Training: Training a convolutional neural network on millions of images—for fraud detection or medical imaging.
- 3D Rendering: A VFX studio offloading Blender renders to GPU clusters for fast turnaround on animated shorts.
- Hardware-Accelerated Crypto: Using FPGA instances to speed up blockchain hashing or custom encryption workloads.
Example Series to Know:
- p2, p3, p4 (NVIDIA GPUs for training/inference)
- g4dn, g5 (lower-cost GPU for inference, graphics)
- f1 (Xilinx FPGAs for custom logic)
Storage Optimized Instances
Definition: High I/O throughput to local NVMe SSDs—your go-to for data-intensive, disk-bound workloads.
Real-life Scenario:
- NoSQL Databases: Running Cassandra or MongoDB on local SSD for ultra-low-latency reads/writes.
- Log Processing Pipelines: Ingesting and indexing terabytes of log data per hour into Elasticsearch.
- Data Warehousing: Temporary staging of large CSV/Parquet files before pushing to S3 or Redshift.
Example Series to Know:
- i3, i3en (NVMe SSD optimized)
- d2, d3en (dense HDD storage)
- im4gn, is4gen (Graviton-powered)
HPC Optimized Instances
Definition: Built for tightly-coupled, parallelized compute across dozens or hundreds of nodes with extremely low-latency networking.
Real-life Scenario:
- Molecular Dynamics: Simulating protein folding across 128 nodes to drive new drug discoveries.
- Weather Forecasting: Running high-resolution climate models that exchange data every millisecond.
- Computational Fluid Dynamics: Designing new aircraft wings by solving Navier-Stokes equations at scale.
Example Series to Know:
- hpc6a (AMD EPYC + HDR networking)
- hpc7g (Graviton3 + high-speed fabric)
Summary of Instances
| Instance Family | Definition | Key Use Cases | Example Series |
|---|---|---|---|
| General Purpose | Balanced mix of CPU, memory & network for everyday workloads | Blogs/CMS, Dev/Test, Small e-commerce | t3, t4g, m5, m6i, m6g |
| Compute Optimized | High-clock-speed CPUs for compute-intensive tasks | Video transcoding, High-TPS APIs, Scientific sims | c5, c5n, c6g, c6i, c7g |
| Memory Optimized | Large RAM-to-CPU ratio for in-memory processing | Redis/Memcached caches, Real-time analytics, DBs | r5, r6g, r6i, x1e, x2idn, u- series |
| Accelerated Compute | Hardware accelerators (GPUs/FPGAs) for specialized compute | ML training/inference, 3D rendering, FPGA workloads | p2, p3, p4, g4dn, g5, f1 |
| Storage Optimized | Very high local disk I/O throughput | NoSQL DBs, Log ingest/indexing, Data warehousing | i3, i3en, d2, d3en, im4gn, is4gen |
| HPC Optimized | Ultra-low-latency networking & parallel compute at scale | Weather & climate models, Genomics, CFD sims | hpc6a, hpc7g |
Creating First EC2 Machine
Basic Setup
- Provide a unique name and tag for the machine. Tags are very important so it will be a good practice to use tags.
![EC2 [Elastic Computing Services] screenshot 3](/_next/image?url=https%3A%2F%2Fzypelxywckyusgamhdpc.supabase.co%2Fstorage%2Fv1%2Fobject%2Fpublic%2Fpost-images%2F7b3e2030-9c28-4751-b36f-a6ac29233e57%2F03-image.webp&w=3840&q=75)
- Now select the image
- Example: Ubuntu 24.04
- There are lots of images for OS. You can see them here.
![EC2 [Elastic Computing Services] screenshot 4](/_next/image?url=https%3A%2F%2Fzypelxywckyusgamhdpc.supabase.co%2Fstorage%2Fv1%2Fobject%2Fpublic%2Fpost-images%2F7b3e2030-9c28-4751-b36f-a6ac29233e57%2F04-image-19.webp&w=3840&q=75)
- Architecture
- x86 or Arm
- For now i am using x86
![EC2 [Elastic Computing Services] screenshot 5](/_next/image?url=https%3A%2F%2Fzypelxywckyusgamhdpc.supabase.co%2Fstorage%2Fv1%2Fobject%2Fpublic%2Fpost-images%2F7b3e2030-9c28-4751-b36f-a6ac29233e57%2F05-image-1.webp&w=3840&q=75)
- Here we can see the name of the image, architecture AMI ID and username
- AMI ID can be different based on the regions
- Username is the name that will be used during loggin in.
- This is the username by default.
- Instance type
- Now select the instance type based on your requirement.
- For now let’s use t3.micro. It will be sufficient for us.
- Key pair(login)
- We cannot login using username and password.
- AWS cannot support username and password.
- In the case of windows you can use administrator username and password but in the case of Linux you will need key pair login.
- If you have already created key-pair then you can use from drop down.
- If not you can create key- pair from here
- Can use any method.
![EC2 [Elastic Computing Services] screenshot 6](/_next/image?url=https%3A%2F%2Fzypelxywckyusgamhdpc.supabase.co%2Fstorage%2Fv1%2Fobject%2Fpublic%2Fpost-images%2F7b3e2030-9c28-4751-b36f-a6ac29233e57%2F06-image-2.webp&w=3840&q=75)
![EC2 [Elastic Computing Services] screenshot 7](/_next/image?url=https%3A%2F%2Fzypelxywckyusgamhdpc.supabase.co%2Fstorage%2Fv1%2Fobject%2Fpublic%2Fpost-images%2F7b3e2030-9c28-4751-b36f-a6ac29233e57%2F07-image-3.webp&w=3840&q=75)
- Can generate here in aws or you can import from your local machine. id;
- ssh-keygen -t rsa
- So we can import key generated by this command
- We need to import only public key. Aws doesn’t need our private key.
- ssh-keygen -t rsa
![EC2 [Elastic Computing Services] screenshot 8](/_next/image?url=https%3A%2F%2Fzypelxywckyusgamhdpc.supabase.co%2Fstorage%2Fv1%2Fobject%2Fpublic%2Fpost-images%2F7b3e2030-9c28-4751-b36f-a6ac29233e57%2F08-image-4.webp&w=3840&q=75)
- So let’s generate key here for now.
![EC2 [Elastic Computing Services] screenshot 9](/_next/image?url=https%3A%2F%2Fzypelxywckyusgamhdpc.supabase.co%2Fstorage%2Fv1%2Fobject%2Fpublic%2Fpost-images%2F7b3e2030-9c28-4751-b36f-a6ac29233e57%2F09-image-5.webp&w=3840&q=75)
- Now after that click on create new key pair.
![EC2 [Elastic Computing Services] screenshot 10](/_next/image?url=https%3A%2F%2Fzypelxywckyusgamhdpc.supabase.co%2Fstorage%2Fv1%2Fobject%2Fpublic%2Fpost-images%2F7b3e2030-9c28-4751-b36f-a6ac29233e57%2F10-image-6.webp&w=3840&q=75)
- Now we can see the key pair is downloaded successfully. This is the private key. We need this file to connect. If we create resources we need to this file to connect to them. If by mistakely it is deleted then the only option is to create new key pair.
- Now we can see the key pair in the drop down menu.
![EC2 [Elastic Computing Services] screenshot 11](/_next/image?url=https%3A%2F%2Fzypelxywckyusgamhdpc.supabase.co%2Fstorage%2Fv1%2Fobject%2Fpublic%2Fpost-images%2F7b3e2030-9c28-4751-b36f-a6ac29233e57%2F11-image-7.webp&w=3840&q=75)
Security group and VPC
-
After that we need to configure VPC.
- VPC means virtual private cloud. This is different environment. We can do anything in this cloud. We can also create custom VPC.
- In the case of ip
- Earlier there is no need to pay for ipv4 ip. But now it is charging money because ipv4 ip are now becoming shortage. So to promote the use of ipv6 it is taking charge for ipv4 and providing ipv6 freely.
- Firewall (security groups)
- A security group is a set of firewall rules that control the traffic for your instance. Add rules to allow specific traffic to reach your instance.
- Create security group
- Select existing security group
-
We can configure traffic in this section
- Which machine can access /// Which network can access
- What kind of access we are going to provide
- SSH/ FTP/ HTTP/ HTTPs
- Security groups are always stateful //very very important for exam
-
Simple Example
- Traffic is always incoming and outgoing. If i am logging into the AWS machine from my local machine then AWS is receiving incoming traffic of ssh and then it will send response to my machine which is outgoing traffic.
Stateful (Security Groups):
- Security Groups track the state of connections. If an inbound rule allows traffic, the corresponding outbound response traffic is automatically permitted, regardless of explicit outbound rules.
- **Example:**If you allow inbound HTTP (port 80) traffic to an EC2 instance, the instance’s responses to those HTTP requests are automatically allowed to leave, even if there’s no specific outbound rule for port 80.
Stateless (Security Groups):
- Each incoming and outgoing packet is evaluated independently against the rules. Therefore, separate rules are required for both inbound and outbound traffic.
- **Example:**If you allow inbound HTTP (port 80) traffic through a NACL, you must also explicitly create an outbound rule to allow the corresponding HTTP response traffic to leave. Without the outbound rule, the response would be blocked.
Let’s create a security group
![EC2 [Elastic Computing Services] screenshot 12](/_next/image?url=https%3A%2F%2Fzypelxywckyusgamhdpc.supabase.co%2Fstorage%2Fv1%2Fobject%2Fpublic%2Fpost-images%2F7b3e2030-9c28-4751-b36f-a6ac29233e57%2F12-image-8.webp&w=3840&q=75)
![EC2 [Elastic Computing Services] screenshot 13](/_next/image?url=https%3A%2F%2Fzypelxywckyusgamhdpc.supabase.co%2Fstorage%2Fv1%2Fobject%2Fpublic%2Fpost-images%2F7b3e2030-9c28-4751-b36f-a6ac29233e57%2F13-image-9.webp&w=3840&q=75)
![EC2 [Elastic Computing Services] screenshot 14](/_next/image?url=https%3A%2F%2Fzypelxywckyusgamhdpc.supabase.co%2Fstorage%2Fv1%2Fobject%2Fpublic%2Fpost-images%2F7b3e2030-9c28-4751-b36f-a6ac29233e57%2F14-image-10.webp&w=3840&q=75)
- Here inbound rules defines what are the incoming traffic that is allowed.
- Tags are also compulsory here that i forgot to highlight.
![EC2 [Elastic Computing Services] screenshot 15](/_next/image?url=https%3A%2F%2Fzypelxywckyusgamhdpc.supabase.co%2Fstorage%2Fv1%2Fobject%2Fpublic%2Fpost-images%2F7b3e2030-9c28-4751-b36f-a6ac29233e57%2F15-image-11.webp&w=3840&q=75)
![EC2 [Elastic Computing Services] screenshot 16](/_next/image?url=https%3A%2F%2Fzypelxywckyusgamhdpc.supabase.co%2Fstorage%2Fv1%2Fobject%2Fpublic%2Fpost-images%2F7b3e2030-9c28-4751-b36f-a6ac29233e57%2F16-image-12.webp&w=3840&q=75)
![EC2 [Elastic Computing Services] screenshot 17](/_next/image?url=https%3A%2F%2Fzypelxywckyusgamhdpc.supabase.co%2Fstorage%2Fv1%2Fobject%2Fpublic%2Fpost-images%2F7b3e2030-9c28-4751-b36f-a6ac29233e57%2F17-image-13.webp&w=3840&q=75)
![EC2 [Elastic Computing Services] screenshot 18](/_next/image?url=https%3A%2F%2Fzypelxywckyusgamhdpc.supabase.co%2Fstorage%2Fv1%2Fobject%2Fpublic%2Fpost-images%2F7b3e2030-9c28-4751-b36f-a6ac29233e57%2F18-image-14.webp&w=3840&q=75)
User data – optional
- Upload a file with your user data or enter it in the field.
- Similar to vagrant provisioning.
- Like installing services.
- updating machine etc…
- For example:
#!/bin/bash
apt update
apt install apache2 -y

echo "Hello from aws ubuntu" > /var/www/index.htmlNow let’s launch the instance.
![EC2 [Elastic Computing Services] screenshot 19](/_next/image?url=https%3A%2F%2Fzypelxywckyusgamhdpc.supabase.co%2Fstorage%2Fv1%2Fobject%2Fpublic%2Fpost-images%2F7b3e2030-9c28-4751-b36f-a6ac29233e57%2F19-image-15.webp&w=3840&q=75)
- We can see our instance is running successfully.
- Now we can details about this machine details in this menu also or if we want to see in detail click instance id.
- DNS: While creating New EC2 AWS will always assign a domain name to it. Yo can see the domain name also.
- Status and alarm: CPU and memory is utilized how much. Health check thing.
Connecting from Local machine
![EC2 [Elastic Computing Services] screenshot 20](/_next/image?url=https%3A%2F%2Fzypelxywckyusgamhdpc.supabase.co%2Fstorage%2Fv1%2Fobject%2Fpublic%2Fpost-images%2F7b3e2030-9c28-4751-b36f-a6ac29233e57%2F20-image-16.webp&w=3840&q=75)
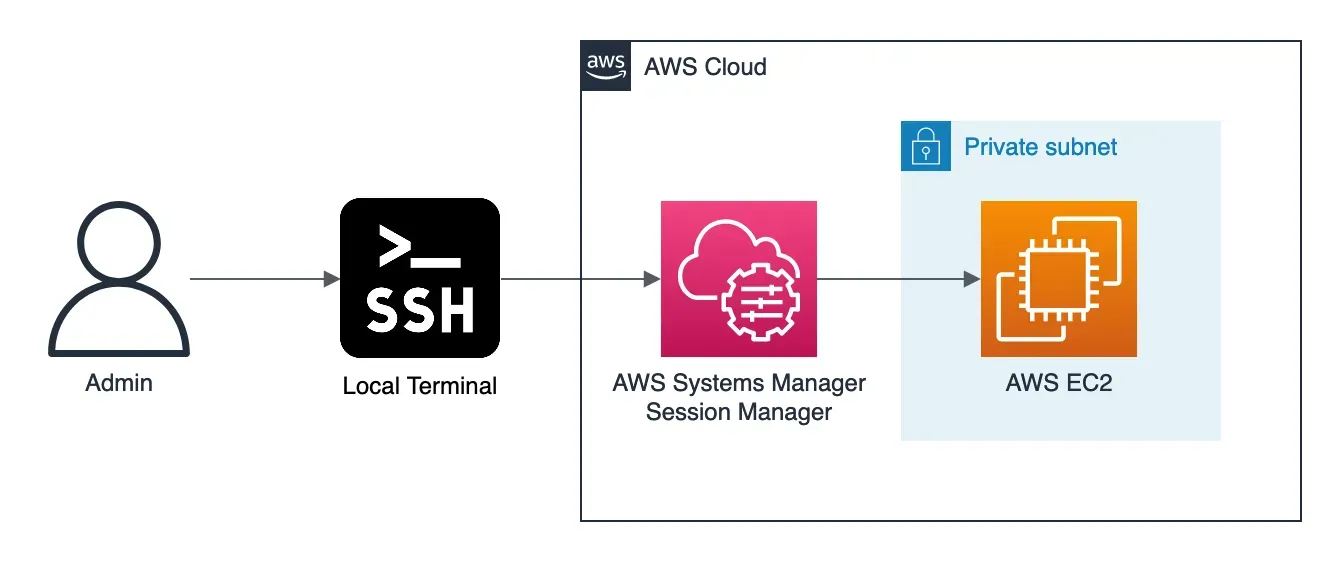
- Now to access the instance from my machine we can run these commands. The ssh process is similar as
![EC2 [Elastic Computing Services] screenshot 21](/_next/image?url=https%3A%2F%2Fzypelxywckyusgamhdpc.supabase.co%2Fstorage%2Fv1%2Fobject%2Fpublic%2Fpost-images%2F7b3e2030-9c28-4751-b36f-a6ac29233e57%2F21-image-17.webp&w=3840&q=75)
If we don’t know how to connect this machine from our local machine. We can also see the instructions in AWS also
![EC2 [Elastic Computing Services] screenshot 22](/_next/image?url=https%3A%2F%2Fzypelxywckyusgamhdpc.supabase.co%2Fstorage%2Fv1%2Fobject%2Fpublic%2Fpost-images%2F7b3e2030-9c28-4751-b36f-a6ac29233e57%2F22-image-18.webp&w=3840&q=75)
![EC2 [Elastic Computing Services] screenshot 23](/_next/image?url=https%3A%2F%2Fzypelxywckyusgamhdpc.supabase.co%2Fstorage%2Fv1%2Fobject%2Fpublic%2Fpost-images%2F7b3e2030-9c28-4751-b36f-a6ac29233e57%2F23-image-20.webp&w=3840&q=75)
- We have successfully installed the apache2 but we didn’t added any rule for HTTP so we cannot browse this service and also we cannot access it from internet. So for to make the service active and accessible from internet we need to add rule. Like this.
![EC2 [Elastic Computing Services] screenshot 24](/_next/image?url=https%3A%2F%2Fzypelxywckyusgamhdpc.supabase.co%2Fstorage%2Fv1%2Fobject%2Fpublic%2Fpost-images%2F7b3e2030-9c28-4751-b36f-a6ac29233e57%2F24-image-21.webp&w=3840&q=75)
- Now we can see the apache2 service is running and is active and also can browse from website.
![EC2 [Elastic Computing Services] screenshot 25](/_next/image?url=https%3A%2F%2Fzypelxywckyusgamhdpc.supabase.co%2Fstorage%2Fv1%2Fobject%2Fpublic%2Fpost-images%2F7b3e2030-9c28-4751-b36f-a6ac29233e57%2F25-image-22.webp&w=3840&q=75)
ACTIONS
![EC2 [Elastic Computing Services] screenshot 26](/_next/image?url=https%3A%2F%2Fzypelxywckyusgamhdpc.supabase.co%2Fstorage%2Fv1%2Fobject%2Fpublic%2Fpost-images%2F7b3e2030-9c28-4751-b36f-a6ac29233e57%2F26-image-23.webp&w=3840&q=75)
IP address //Networking[Elastic ip]
- In the case of IP address in AWS the public IP is dynamic. It will change each and every time. We can only access public ip and private ip is only accessible within this subnet. This is not good because each and everytime we reboot it will change the ip. So to resolve this issue there is the concept of elastic ip.
- So if we want to use the elastic ip we need to pay some extra charges. In one account we can have 5 elastic ips.
images and template
- Using this feature we can place this machine as a template. For example we have installed different software, packages and done configuration. For example we need to create different machines with similar configuration or need to install different packages similar to this. So in that case we can use this feature.
- We can create millions using this template.
- This will also create AMI.
- How to crate template is discussed below:
Dedicated Host
- Instances means simply machine and the owner of instances is know as host.
- If are creating the machine in the VM in virtual box then the VM are instances and virtual box is host.
AUTO SCALING
- This is the similar concept of scaling. If the load in the site increases then based on the load it will auto scale the site.
- ie; Vertical and horizontal scaling
- In the case of vertical scaling the ip of the machine is same.
- But in the case of horizontal scaling the ip of the machine will change.
- There are multiple instances in the case of horizontal scaling.
- IP and domain name of different machine will be different.
- SO to solve this and provide a single ip for customer there is the concept of load balancer.
- Based on the load it will create or remove resources.
- We can define desired states here. ie; minimum and maximum resources.
- Desired state means in ideal condition there should be these number of machines.
- AUTO SCALING GROUP
- In ideal condition it will run in desired capacityAmazon EC2 Auto Scaling helps you ensure that you have the correct number of Amazon EC2 instances available to handle the load for your application. You create collections of EC2 instances, called Auto Scaling groups. You can specify the minimum number of instances in each Auto Scaling group, and Amazon EC2 Auto Scaling ensures that your group never goes below this size. You can specify the maximum number of instances in each Auto Scaling group, and Amazon EC2 Auto Scaling ensures that your group never goes above this size. If you specify the desired capacity, either when you create the group or at any time thereafter, Amazon EC2 Auto Scaling ensures that your group has this many instances.
- Minimum number of instances
- Maximum number of vm we define
- Desired capacity
- If resource utilization is reduced then it can only go to minimum
- ie; if we define only 3 it can only go to 3
- If we have maximum 8 then it can go to 8
- In ideal condition it will run in desired capacityAmazon EC2 Auto Scaling helps you ensure that you have the correct number of Amazon EC2 instances available to handle the load for your application. You create collections of EC2 instances, called Auto Scaling groups. You can specify the minimum number of instances in each Auto Scaling group, and Amazon EC2 Auto Scaling ensures that your group never goes below this size. You can specify the maximum number of instances in each Auto Scaling group, and Amazon EC2 Auto Scaling ensures that your group never goes above this size. If you specify the desired capacity, either when you create the group or at any time thereafter, Amazon EC2 Auto Scaling ensures that your group has this many instances.
![EC2 [Elastic Computing Services] screenshot 27](/_next/image?url=https%3A%2F%2Fzypelxywckyusgamhdpc.supabase.co%2Fstorage%2Fv1%2Fobject%2Fpublic%2Fpost-images%2F7b3e2030-9c28-4751-b36f-a6ac29233e57%2F27-image-24.webp&w=3840&q=75)
Advantages
With Amazon EC2 Auto Scaling, your EC2 instances are organized into Auto Scaling groups so that they can be treated as a logical unit for the purposes of scaling and management. Auto Scaling groups use launch templates (or launch configurations) as configuration templates for their EC2 instances.
- Monitoring the health of running instances
- Custom health checks
- Balancing capacity across Availability Zones
- Multiple instance types and purchase options
- Automated replacement of Spot Instances
- Spot Instances: Scenario
- Suppose we are going to restaurant for dinner in group. We can book the table before dinner ie; can do reservation. Now the table is dedicated for us. If any other people come they cannot sit there. Or we can go without booking the table. We can get the table or cannot get any table there is no guarantee. This is similar to spot.
- In the case of aws
- Reserved instances: You reserve some instances. They are particular for you no one can use them.
- Spot instances: AWS infrastructure is huge. So to sell it’s services it provides spot instances. If you get spot instance it is cheap. If any other people came and pay higher than us then the service will now belong to another person. There is no gurantee for these services.
- Spot Instances: Scenario
- Load balancing
- We can also configure to make sure equal number of traffic is routed across different available machines.
- Scalability
- Instance refresh
- Lifecycle hooks
- Support for stateful workloads
Work with Auto Scaling groups
You can create, access, and manage your Auto Scaling groups using any of the following interfaces:
- AWS Management Console
- AWS Command Line Interface (AWS CLI) .
- AWS Tools for Windows PowerShell
- AWS SDKs
- Query API
- AWS CloudFormation
- Can also use terraform
- Can also use Ansible
Let’s create a template for auto scaling
![EC2 [Elastic Computing Services] screenshot 28](/_next/image?url=https%3A%2F%2Fzypelxywckyusgamhdpc.supabase.co%2Fstorage%2Fv1%2Fobject%2Fpublic%2Fpost-images%2F7b3e2030-9c28-4751-b36f-a6ac29233e57%2F28-image-25.webp&w=3840&q=75)
- When you want to create the instance more than 1 then AWS will recommend to create auto scaling template like this. We can simply click on this to create a template.
- After clicking on this all the steps are similar to creating an EC2 instance.
- We will select AMI
- EC2 instance type
- Provide key pair ;;We can provide here or can provide during load balancing
- Security groups ;;We can provide here or can provide during load balancing
![EC2 [Elastic Computing Services] screenshot 29](/_next/image?url=https%3A%2F%2Fzypelxywckyusgamhdpc.supabase.co%2Fstorage%2Fv1%2Fobject%2Fpublic%2Fpost-images%2F7b3e2030-9c28-4751-b36f-a6ac29233e57%2F29-image-26.webp&w=3840&q=75)
- You will see sometime error like this. This is due to unsupported AMI. To resolve this simply select another AMI.
#!/bin/bash

sudo apt update
yes | sudo apt install apache2

sudo bash -c "cat > /var/www/html/index.html <<EOF
<h1>Server Details</h1>
<p><strong>Hostname:</strong> $(hostname)</p>
<p><strong>IP Address:</strong> $(hostname -I | cut -d ' ' -f1)</p>
EOF"

sudo systemctl restart apache2- Now if you click on launch template you can see the template is successfully created.
![EC2 [Elastic Computing Services] screenshot 30](/_next/image?url=https%3A%2F%2Fzypelxywckyusgamhdpc.supabase.co%2Fstorage%2Fv1%2Fobject%2Fpublic%2Fpost-images%2F7b3e2030-9c28-4751-b36f-a6ac29233e57%2F30-image-27.webp&w=3840&q=75)
To modify the existing template we can configure the new changes from here
![EC2 [Elastic Computing Services] screenshot 31](/_next/image?url=https%3A%2F%2Fzypelxywckyusgamhdpc.supabase.co%2Fstorage%2Fv1%2Fobject%2Fpublic%2Fpost-images%2F7b3e2030-9c28-4751-b36f-a6ac29233e57%2F31-image-33.webp&w=3840&q=75)
- After making changes to template then we need to do instance refresh to see the changes that we have done in the template. We also need to configure default version to make the version2 latest.
Doing auto scaling using template
- Now let’s create an auto scaling group. For this we need to go to auto scaling group and then click create auto scaling group. You will see this interface.
![EC2 [Elastic Computing Services] screenshot 32](/_next/image?url=https%3A%2F%2Fzypelxywckyusgamhdpc.supabase.co%2Fstorage%2Fv1%2Fobject%2Fpublic%2Fpost-images%2F7b3e2030-9c28-4751-b36f-a6ac29233e57%2F32-image-28.webp&w=3840&q=75)
- Name:
- Auto scaling group name
- demo-asg-suryaraj
- Auto scaling group name
- Launch template
- Select the template here that you have created.
- Version
- Selects version by default
Step2:
- In this part we can configure vCPUs and Memory.
- For now i am keeping it as it is
- You can also select availability zones here.
- For now i am selecting all availability zones.
- Availability Zone distribution
- Balanced best effort / Balanced only
- For now i am selecting Balanced best effort
- Balanced best effort / Balanced only
Step 3:
- Here we can define load balancer. Based on our need we can define the load balancer
- Health check option is also available here
setp 4
- Here we can define scaling values: ie; desired, min desired and max desired capacity as you can see in the screenshot.
![EC2 [Elastic Computing Services] screenshot 33](/_next/image?url=https%3A%2F%2Fzypelxywckyusgamhdpc.supabase.co%2Fstorage%2Fv1%2Fobject%2Fpublic%2Fpost-images%2F7b3e2030-9c28-4751-b36f-a6ac29233e57%2F33-image-29.webp&w=3840&q=75)
- Instance maintenance policy
- No policy
- Launch before terminating
- Custom behavior
- Terminate and launch
- For now i am selecting No policy.
- Additional settings
- Instance scale-in protection
- Monitoring
- Default instance warmup
- For now i am not selecting any options
step 5
- Add notifications – optional
- Add notifications – optional
step 6
![EC2 [Elastic Computing Services] screenshot 34](/_next/image?url=https%3A%2F%2Fzypelxywckyusgamhdpc.supabase.co%2Fstorage%2Fv1%2Fobject%2Fpublic%2Fpost-images%2F7b3e2030-9c28-4751-b36f-a6ac29233e57%2F34-image-30.webp&w=3840&q=75)
- Now the auto scaling group will create the templates based on our desired states. ie; Based on our Desired state it will now create machines.
![EC2 [Elastic Computing Services] screenshot 35](/_next/image?url=https%3A%2F%2Fzypelxywckyusgamhdpc.supabase.co%2Fstorage%2Fv1%2Fobject%2Fpublic%2Fpost-images%2F7b3e2030-9c28-4751-b36f-a6ac29233e57%2F35-image-31.webp&w=3840&q=75)
- Here we can see it is creating two EC2 instances to maintain desired state.
![EC2 [Elastic Computing Services] screenshot 36](/_next/image?url=https%3A%2F%2Fzypelxywckyusgamhdpc.supabase.co%2Fstorage%2Fv1%2Fobject%2Fpublic%2Fpost-images%2F7b3e2030-9c28-4751-b36f-a6ac29233e57%2F36-image-32.webp&w=3840&q=75)
- Now here we have 2 EC2 instances created by auto scaling group. You can see the details in the tags of the machine.
For example let’s delete one instance. So after deleting/stopping the instance the auto scale group will now create automatically new instances to meet the desired state. This is the nature of auto scaling.
Load Balancer
Elastic Load Balancing automatically distributes your incoming traffic across multiple targets, such as EC2 instances, containers, and IP addresses, in one or more Availability Zones. It monitors the health of its registered targets, and routes traffic only to the healthy targets. Elastic Load Balancing scales your load balancer capacity automatically in response to changes in incoming traffic.Health Monitoring(Machine is Healthy or not, loaded or not, used or not).
- Internally we have many machines. So this will distribute the load among the machines and will provide only one ip that can be accessed by the costumers.
- classic
- Traditional not used nowadays.
- Mostly used load balancers are
- application
- gateway
- Network
- Classic load balancer {Old load balancer/old generation/ Now not used}
- classic
- Suppose we are launching 200 EC2 instances. So this we need to provide customer with unique ip address or DNS name. But for 200 instances it is not possible to provide ip address or DNS name of each machine. So to resolve this we need some types of mechanism due to which we can have as much as instances internally but customer is accessing from only one interface. So the load balancer basically splits up the request among different servers or machines so that the load from the interference is equally divided among the servers.
Load balancer benefits
- A load balancer distributes workloads across multiple compute resources, such as virtual servers. Using a load balancer increases the availability and fault tolerance of your applications.
- You can add and remove compute resources from your load balancer as your needs change, without disrupting the overall flow of requests to your applications.
![EC2 [Elastic Computing Services] screenshot 37](/_next/image?url=https%3A%2F%2Fzypelxywckyusgamhdpc.supabase.co%2Fstorage%2Fv1%2Fobject%2Fpublic%2Fpost-images%2F7b3e2030-9c28-4751-b36f-a6ac29233e57%2F37-image-34.webp&w=3840&q=75)
How to create load balancers
- Go to load balancer in EC2 or you can simply search in the search bar. After that you will reach to this interface
![EC2 [Elastic Computing Services] screenshot 38](/_next/image?url=https%3A%2F%2Fzypelxywckyusgamhdpc.supabase.co%2Fstorage%2Fv1%2Fobject%2Fpublic%2Fpost-images%2F7b3e2030-9c28-4751-b36f-a6ac29233e57%2F38-image-45.webp&w=3840&q=75)
![EC2 [Elastic Computing Services] screenshot 39](/_next/image?url=https%3A%2F%2Fzypelxywckyusgamhdpc.supabase.co%2Fstorage%2Fv1%2Fobject%2Fpublic%2Fpost-images%2F7b3e2030-9c28-4751-b36f-a6ac29233e57%2F39-image-46.webp&w=3840&q=75)
- These are the basic types of load balancers in AWS.
- How all of these load balancers actually works?
Application load balancer
![EC2 [Elastic Computing Services] screenshot 40](/_next/image?url=https%3A%2F%2Fzypelxywckyusgamhdpc.supabase.co%2Fstorage%2Fv1%2Fobject%2Fpublic%2Fpost-images%2F7b3e2030-9c28-4751-b36f-a6ac29233e57%2F40-image-47.webp&w=3840&q=75)
Network load balancer
![EC2 [Elastic Computing Services] screenshot 41](/_next/image?url=https%3A%2F%2Fzypelxywckyusgamhdpc.supabase.co%2Fstorage%2Fv1%2Fobject%2Fpublic%2Fpost-images%2F7b3e2030-9c28-4751-b36f-a6ac29233e57%2F41-image-48.webp&w=3840&q=75)
Gateway load balancer
![EC2 [Elastic Computing Services] screenshot 42](/_next/image?url=https%3A%2F%2Fzypelxywckyusgamhdpc.supabase.co%2Fstorage%2Fv1%2Fobject%2Fpublic%2Fpost-images%2F7b3e2030-9c28-4751-b36f-a6ac29233e57%2F42-image-49.webp&w=3840&q=75)
- You will see these options after clicking on create
- For now i am creating application load balancer. ie; for HTTP and HTTPs.
- Basic configuration
- Load balancer name
- Provide unique name here
- Scheme
- Internet-facing
- For world wide internet
- Internal service
- Within the organization only
- For now i am using internet-facing
- Load balancer IP address type
- IPv4
- Includes only IPv4 addresses.
- Dualstack
- Includes IPv4 and IPv6 addresses.
- Dualstack without public IPv4
- Includes a public IPv6 address, and private IPv4 and IPv6 addresses. Compatible with internet-facing load balancers only.
- For now i am using IPv4 only.
- IPv4
- Internet-facing
- Network mapping
- VPC
- Can create and set new vpc or also use the default vpc. For now i am using default vpc.
- IP pools – new
- For now i am leaving this blank
- Availability Zones and subnets
- For now i am selecting all zones. You can configure based on your needs.
- Security groups
- Here you have to add security group
- 1. Need to give access to the ip of your machine so that it will allow ssh connection
- 2. Need add HTTP access so that the load balancer can be accessed anywhere.
- Here you have to add security group
- VPC
- Load balancer name
![EC2 [Elastic Computing Services] screenshot 43](/_next/image?url=https%3A%2F%2Fzypelxywckyusgamhdpc.supabase.co%2Fstorage%2Fv1%2Fobject%2Fpublic%2Fpost-images%2F7b3e2030-9c28-4751-b36f-a6ac29233e57%2F43-image-50.webp&w=3840&q=75)
- Now you need to create target group. These are the machines in which you load is distributed.
![EC2 [Elastic Computing Services] screenshot 44](/_next/image?url=https%3A%2F%2Fzypelxywckyusgamhdpc.supabase.co%2Fstorage%2Fv1%2Fobject%2Fpublic%2Fpost-images%2F7b3e2030-9c28-4751-b36f-a6ac29233e57%2F44-image-51.webp&w=3840&q=75)
- Here you can create target group. For now i am using instances but you can use other things also.
![EC2 [Elastic Computing Services] screenshot 45](/_next/image?url=https%3A%2F%2Fzypelxywckyusgamhdpc.supabase.co%2Fstorage%2Fv1%2Fobject%2Fpublic%2Fpost-images%2F7b3e2030-9c28-4751-b36f-a6ac29233e57%2F45-image-52.webp&w=3840&q=75)
- You can configure also these to configure health check options. And create the target group here.
![EC2 [Elastic Computing Services] screenshot 46](/_next/image?url=https%3A%2F%2Fzypelxywckyusgamhdpc.supabase.co%2Fstorage%2Fv1%2Fobject%2Fpublic%2Fpost-images%2F7b3e2030-9c28-4751-b36f-a6ac29233e57%2F46-image-41.webp&w=3840&q=75)
- Now we can select the target group. You can configure also these so for now it will be enough to test the behavior of load balancer. Now create the load balancer. After creeating the load balancer you can see it will provide ARN and DNS name. You can browse the services with this DNS.
![EC2 [Elastic Computing Services] screenshot 47](/_next/image?url=https%3A%2F%2Fzypelxywckyusgamhdpc.supabase.co%2Fstorage%2Fv1%2Fobject%2Fpublic%2Fpost-images%2F7b3e2030-9c28-4751-b36f-a6ac29233e57%2F47-image-42.webp&w=3840&q=75)
- You can browse the services with this DNS. If we browse the services with this DNS then the service will be interchanged between the instances based on the load they are taking. This is the main work of load balancer. If you find any problem related this you can also troubleshoot through this menu.
![EC2 [Elastic Computing Services] screenshot 48](/_next/image?url=https%3A%2F%2Fzypelxywckyusgamhdpc.supabase.co%2Fstorage%2Fv1%2Fobject%2Fpublic%2Fpost-images%2F7b3e2030-9c28-4751-b36f-a6ac29233e57%2F48-image-43.webp&w=3840&q=75)
- Most of the problem related while accessing the services arises due to security group rules. So it is better to review them.
- SO IF WE CREATE NEW INSTANCES WILL THEY AUTOMATICALLY ADDED TO LOAD BALANCER?
- No they are not automatically added to the load balancer you need to automate the task or need to add manually to the load balancers. ie; In target groups.
![EC2 [Elastic Computing Services] screenshot 49](/_next/image?url=https%3A%2F%2Fzypelxywckyusgamhdpc.supabase.co%2Fstorage%2Fv1%2Fobject%2Fpublic%2Fpost-images%2F7b3e2030-9c28-4751-b36f-a6ac29233e57%2F49-image-53.webp&w=3840&q=75)
- Here you can see the service/ machine is accessible from the DNS of the machine and the load are interchanged between machines. You can also access using the machine IP also.
AWS cloud watch
Amazon CloudWatch monitors your Amazon Web Services (AWS) resources and the applications you run on AWS in real time, and offers many tools to give you system-wide observability of your application performance, operational health, and resource utilization.
Benefits
- Enhanced Visibility and Monitoring
- Real-time Metrics and Logs
- Customizable Dashboards
- System-wide Operational Health
- Network Monitoring
- Proactive and Reactive Monitoring
- Cost Optimization
- Resource Optimization
- Cost Monitoring
- Improved Troubleshooting and Problem Solving
- Log Analysis
- Detailed Insights
- Integration and Automation
How to setup cloud watch in AWS
- You can configure from AWS CLI or from AWS console.
- Let’s Do a small example. Here i am going to monitor the service and based on the usage/ CPU load turn on/off the machine. Also send email notification. To send email notification in AWS there is a concept of SNS in AWS.
- You can configure the detailed monitoring from here but it will take additional charges
![EC2 [Elastic Computing Services] screenshot 50](/_next/image?url=https%3A%2F%2Fzypelxywckyusgamhdpc.supabase.co%2Fstorage%2Fv1%2Fobject%2Fpublic%2Fpost-images%2F7b3e2030-9c28-4751-b36f-a6ac29233e57%2F50-image-56.webp&w=3840&q=75)
- Let’s configure cloud watch for now. My requirement is when the utilization is above 60% then it needs to send me notification and also shut down the machine.
- For this go to cloud watch and go to alarms.
![EC2 [Elastic Computing Services] screenshot 51](/_next/image?url=https%3A%2F%2Fzypelxywckyusgamhdpc.supabase.co%2Fstorage%2Fv1%2Fobject%2Fpublic%2Fpost-images%2F7b3e2030-9c28-4751-b36f-a6ac29233e57%2F51-image-57.webp&w=3840&q=75)
- Specify metric and conditions
- Here comes CPU utilization and memory utilization
![EC2 [Elastic Computing Services] screenshot 52](/_next/image?url=https%3A%2F%2Fzypelxywckyusgamhdpc.supabase.co%2Fstorage%2Fv1%2Fobject%2Fpublic%2Fpost-images%2F7b3e2030-9c28-4751-b36f-a6ac29233e57%2F52-image-58.webp&w=3840&q=75)
- Now go click here
![EC2 [Elastic Computing Services] screenshot 53](/_next/image?url=https%3A%2F%2Fzypelxywckyusgamhdpc.supabase.co%2Fstorage%2Fv1%2Fobject%2Fpublic%2Fpost-images%2F7b3e2030-9c28-4751-b36f-a6ac29233e57%2F53-image-59.webp&w=3840&q=75)
![EC2 [Elastic Computing Services] screenshot 54](/_next/image?url=https%3A%2F%2Fzypelxywckyusgamhdpc.supabase.co%2Fstorage%2Fv1%2Fobject%2Fpublic%2Fpost-images%2F7b3e2030-9c28-4751-b36f-a6ac29233e57%2F54-image-60.webp&w=3840&q=75)
- Now select the cpu utilization from here. You can select other metrics also but for now i am selecting CPU utilization only.
![EC2 [Elastic Computing Services] screenshot 55](/_next/image?url=https%3A%2F%2Fzypelxywckyusgamhdpc.supabase.co%2Fstorage%2Fv1%2Fobject%2Fpublic%2Fpost-images%2F7b3e2030-9c28-4751-b36f-a6ac29233e57%2F55-image-61.webp&w=3840&q=75)
- Click on select Metric
- Now we need to setup conditions as shown in figure below. Here i am setting if the cpu utilization is greater than 70 then, Now it’s time to configure action like what it needs to do if the utilization is greater than 70%.
![EC2 [Elastic Computing Services] screenshot 56](/_next/image?url=https%3A%2F%2Fzypelxywckyusgamhdpc.supabase.co%2Fstorage%2Fv1%2Fobject%2Fpublic%2Fpost-images%2F7b3e2030-9c28-4751-b36f-a6ac29233e57%2F56-image-62.webp&w=3840&q=75)
- Now we need to set alarm and create topic ie;
![EC2 [Elastic Computing Services] screenshot 57](/_next/image?url=https%3A%2F%2Fzypelxywckyusgamhdpc.supabase.co%2Fstorage%2Fv1%2Fobject%2Fpublic%2Fpost-images%2F7b3e2030-9c28-4751-b36f-a6ac29233e57%2F57-image-63.webp&w=3840&q=75)
- Now click create topic and you will see a mail in your gmail where you need to conform the subsciption.
Application-to-application (A2A)
Amazon SNS is a managed messaging service that lets you decouple publishers from subscribers. This is useful for application-to-application messaging for microservices, distributed systems, and serverless applications.Learn more
![EC2 [Elastic Computing Services] screenshot 58](/_next/image?url=https%3A%2F%2Fzypelxywckyusgamhdpc.supabase.co%2Fstorage%2Fv1%2Fobject%2Fpublic%2Fpost-images%2F7b3e2030-9c28-4751-b36f-a6ac29233e57%2F58-image-71.webp&w=3840&q=75)
Application-to-person (A2P)
Amazon SNS lets you send push notifications to mobile apps, text messages to mobile phone numbers, and plain-text emails to email addresses. You can fan out messages with a topic, or publish to mobile endpoints directly. Learn more
![EC2 [Elastic Computing Services] screenshot 59](/_next/image?url=https%3A%2F%2Fzypelxywckyusgamhdpc.supabase.co%2Fstorage%2Fv1%2Fobject%2Fpublic%2Fpost-images%2F7b3e2030-9c28-4751-b36f-a6ac29233e57%2F59-image-72.webp&w=3840&q=75)
![EC2 [Elastic Computing Services] screenshot 60](/_next/image?url=https%3A%2F%2Fzypelxywckyusgamhdpc.supabase.co%2Fstorage%2Fv1%2Fobject%2Fpublic%2Fpost-images%2F7b3e2030-9c28-4751-b36f-a6ac29233e57%2F60-image-64.webp&w=3840&q=75)
- After conforming this now you will see the conformation status in aws sns console if you have permissions.
- Subscriptions (0) ie; here
- Now after subscribing email you can further add other details but for now i am only adding these things only.
- Now we need to set action here in EC2. We can also add other actions but for now i am only adding this.
![EC2 [Elastic Computing Services] screenshot 61](/_next/image?url=https%3A%2F%2Fzypelxywckyusgamhdpc.supabase.co%2Fstorage%2Fv1%2Fobject%2Fpublic%2Fpost-images%2F7b3e2030-9c28-4751-b36f-a6ac29233e57%2F61-image-65.webp&w=3840&q=75)
- After than provide a name to EC2 instance and create the alarm.
![EC2 [Elastic Computing Services] screenshot 62](/_next/image?url=https%3A%2F%2Fzypelxywckyusgamhdpc.supabase.co%2Fstorage%2Fv1%2Fobject%2Fpublic%2Fpost-images%2F7b3e2030-9c28-4751-b36f-a6ac29233e57%2F62-image-66.webp&w=3840&q=75)
- Here if we install stress it will increase the utilization of the resources.
![EC2 [Elastic Computing Services] screenshot 63](/_next/image?url=https%3A%2F%2Fzypelxywckyusgamhdpc.supabase.co%2Fstorage%2Fv1%2Fobject%2Fpublic%2Fpost-images%2F7b3e2030-9c28-4751-b36f-a6ac29233e57%2F63-image-67.webp&w=3840&q=75)
- Here we can see the machine cpu is fully utilized.
- Now this will trigger the alarm that we have configured in cloud watch. The cpu utilization is above 70% this will stop the machine and send us the notifications.
![EC2 [Elastic Computing Services] screenshot 64](/_next/image?url=https%3A%2F%2Fzypelxywckyusgamhdpc.supabase.co%2Fstorage%2Fv1%2Fobject%2Fpublic%2Fpost-images%2F7b3e2030-9c28-4751-b36f-a6ac29233e57%2F64-image-68.webp&w=3840&q=75)
- Here we can see the alarm is created and the notification is also sent to the gmail and the EC2 is also stopped as we define this in the actions.
![EC2 [Elastic Computing Services] screenshot 65](/_next/image?url=https%3A%2F%2Fzypelxywckyusgamhdpc.supabase.co%2Fstorage%2Fv1%2Fobject%2Fpublic%2Fpost-images%2F7b3e2030-9c28-4751-b36f-a6ac29233e57%2F65-image-70.webp&w=3840&q=75)
- Details of the cloud watch.
Elastic Block storage
- While creating machine there is certain amount of volume is attached to the machine but for future use we might need additional volumes. For this we can attach EBS to the machine.
![EC2 [Elastic Computing Services] screenshot 66](/_next/image?url=https%3A%2F%2Fzypelxywckyusgamhdpc.supabase.co%2Fstorage%2Fv1%2Fobject%2Fpublic%2Fpost-images%2F7b3e2030-9c28-4751-b36f-a6ac29233e57%2F66-image-55.webp&w=3840&q=75)
Snapshot
This the backup in certain point of the time.
ERRORS
- ERR connection timeout
- In the case of AWS you have configured firewall. When you don’t have allowed the IP from security group then you will get ERR Connection Time out.
- Here in this case i have tried to login to the machine another daya nd got this error because my local machine ip got changed.
- ie; firewall blocked the request of my machine due to security group rules.
- Here in this case i have tried to login to the machine another daya nd got this error because my local machine ip got changed.
- To trouble shoot this issue you need to check firewall rules . ie; it is whether allowing or not
- In the case of AWS you have configured firewall. When you don’t have allowed the IP from security group then you will get ERR Connection Time out.
- ERR_CONNECTION_REFUSED
- Your request enters the firewall / can reach to the server but the service is not running in the server.
- For this example:
- I have stopped apache2 service and tried to browse this and got this error. ie;apache2 is not running in my machine
- For this example:
- Need to check the service
- Your request enters the firewall / can reach to the server but the service is not running in the server.
- 504 Gateway Time out
- The HTTP
504 Gateway Timeoutserver error response status code indicates that the server, while acting as a gateway or proxy, did not get a response in time from the upstream server in order to complete the request. This is similar to a502 Bad Gateway, except that in a504status, the proxy or gateway did not receive any HTTP response from the origin within a certain time.
- The HTTP
- 503 service temporarily unavailable
- Request load balancer xamman pugyo but load balancer bata target xamman pugena/ target is not available.
- 502 bad gateway
- Load balancer bata request gayo server ma but server bata response aayena vanne ho.
- A “502 Bad Gateway” error indicates a problem with communication between servers. Specifically, it means a server acting as a gateway or proxy received an invalid response from an upstream server. Essentially, your browser requested a webpage, and the server handling that request (the gateway) couldn’t get a valid response from the server that actually holds the website’s content. This is a server-side issue and is usually resolved by the website’s administrators.
Keep reading
- AWS Global Infrastructure cert
AWS Global Infrastructure Overview The AWS Global Infrastructure is designed and built to deliver a flexible, reliable, scalable, and secure cloud computing environment with high-quality global…
- Cloud Computing Economics
Fundamentals of pricing AWS Pricing Model Three fundamental drivers of cost with AWS There are three fundamental drivers of cost with AWS: compute, storage, and outbound data transfer. These…
- VPC
VPC We can isolate resources from other resources and also isolate it from other resources.Amazon Virtual Private Cloud (VPC) is an Amazon Web Services (AWS) service that allows you to launch AWS…