Docker file, Best practices and Registry
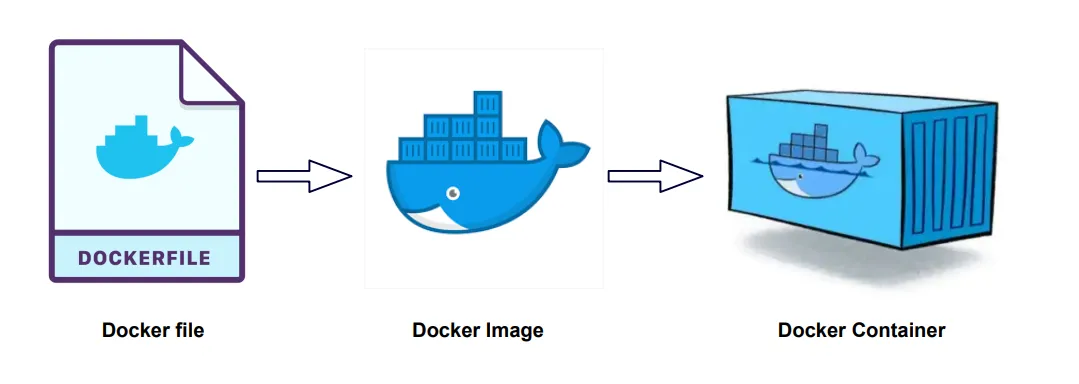
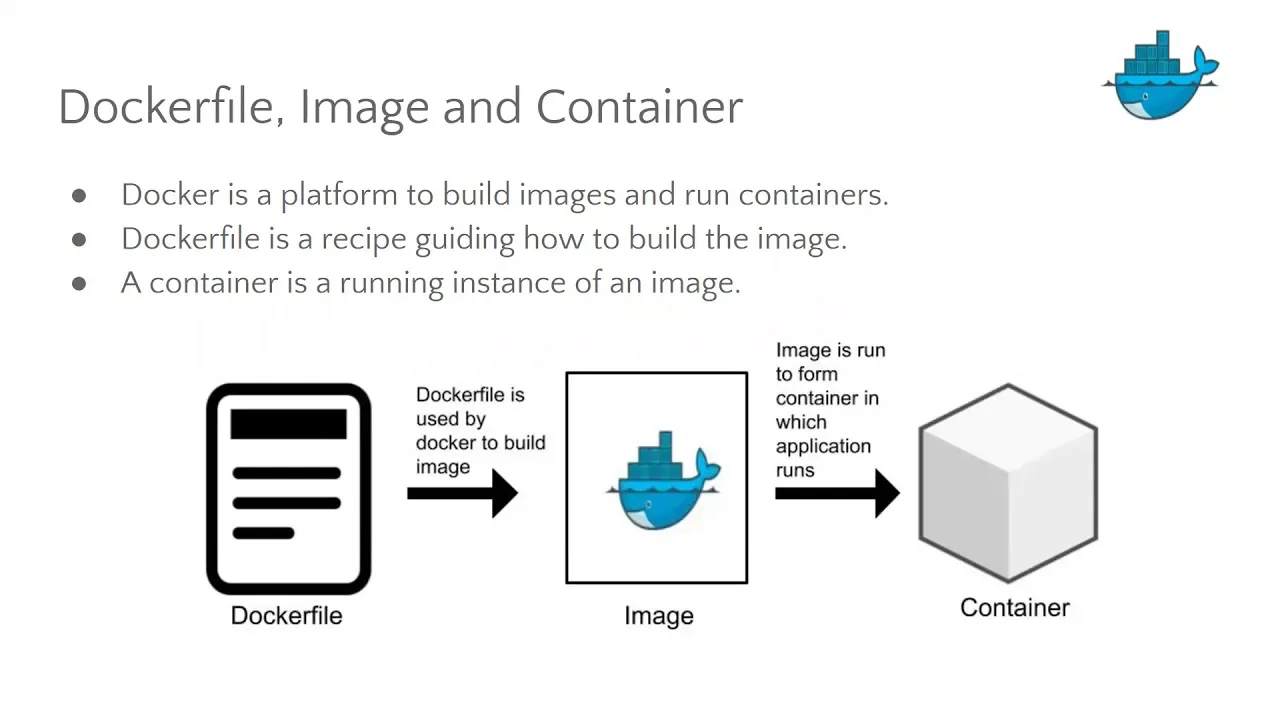
Dockerfile Docker can build images automatically by reading the instructions from a Dockerfile. A Dockerfile is a text document that contains all the commands a user could call on the command line to…

ON THIS PAGE
Dockerfile
Docker can build images automatically by reading the instructions from a Dockerfile. A Dockerfile is a text document that contains all the commands a user could call on the command line to assemble an image. This page describes the commands you can use in a Dockerfile.
While writing a docker file sequence matters and each line creates a layer.
- # : Is treated as comment in docker file
ADD
Copies files or directories from the source and adds them to the file system of the image at the path destination
ADD [OPTIONS] <src> ... <dest>
ADD [OPTIONS] ["<src>", ... "<dest>"]

ADD file1.txt file2.txt /usr/src/things/

ADD https://example.com/archive.zip /usr/src/things/
ADD git@github.com:user/repo.git /usr/src/things/

ADD *.png /dest/ #All the files that start has .png extension

ADD index.?s /dest/ # here ? is wildcard for single caharacterARG
The ARG instruction defines a variable that users can pass at build-time into the builder with the docker build command using the --build-arg <varname>=<value> flag.
FROM busybox
USER ${username:-some_user}
ARG username
USER $username
# ...- Passing argument during build time
- docker image build –build-arg DIR=/var/code
Note: Don’t use build arguments for passing secrets such as user credentials, API tokens, etc.
CMD
Sets the commands to be executed when running a container from an image.
CMD ["executable","param1","param2"] (exec form)
CMD ["param1","param2"] (exec form, as default parameters to ENTRYPOINT)
CMD command param1 param2 (shell form)Note: If we use multiple CMD in our docker file then the only last one will be executed.
COPY
copies new files or directories from source and adds them to the file system of the image at the path . can be copied from build context, build stage and named context or an image.
COPY file1.txt file2.txt /usr/src/things/

COPY [--from=<image|stage|context>] <src> ... <dest>

COPY --from=build /myapp /usr/bin/

COPY --chmod=$MODE . .By default, the COPY instruction copies files from the build context. The COPY --from flag lets you copy files from an image, a build stage, or a named context instead.
Simple example of –from
FROM alpine AS build
COPY . .
RUN apk add clang
RUN clang -o /hello hello.c

FROM scratch
COPY --from=build /hello /To copy by changing ownership of the file
FROM alpine
WORKDIR /src
ARG MODE=440
COPY --chmod=$MODE . .ENTRYPOINT
An ENTRYPOINT allows you to configure a container that will run as an executable.
ENTRYPOINT ["executable", "param1", "param2"] :Exec form
This form is widely preferred and used in most of the scenarios

ENTRYPOINT command param1 param2 : Shell formExample
FROM ubuntu
ENTRYPOINT ["top", "-b"]
CMD ["-c"]ENV
The ENV instruction sets the environment variable <key> to the value <value>.These variables are then available to any processes running inside containers created from that image.
ENV MY_NAME="John Doe"
ENV MY_DOG=Rex\ The\ Dog
ENV MY_CAT=fluffyEXPOSE
The EXPOSE instruction informs Docker that the container listens on the specified network ports at runtime. You can specify whether the port listens on TCP or UDP, and the default is TCP if you don’t specify a protocol.
The EXPOSE instruction doesn’t actually publish the port. It functions as a type of documentation between the person who builds the image and the person who runs the container, about which ports are intended to be published. To publish the port when running the container, use the **-p** flag on docker run to publish and map one or more ports, or the **-P** flag to publish all exposed ports and map them to high-order ports.
EXPOSE 80/tcp
EXPOSE 80/udpFROM
The FROM instruction initializes a new build stage and sets the base image for subsequent instructions. As such, a valid Dockerfile must start with a FROM instruction. The image can be any valid image.
FROM [--platform=<platform>] <image> [AS <name>]

FROM [--platform=<platform>] <image>[@<digest>] [AS <name>]

Example:
-FROM nginx:alpine
-FROM node:22.16.0-alpine3.22 AS deployHEALTHCHECK
The HEALTHCHECK instruction has two forms:
HEALTHCHECK [OPTIONS] CMD command(check container health by running a command inside the container)HEALTHCHECK NONE(disable any healthcheck inherited from the base image)
The HEALTHCHECK instruction tells Docker how to test a container to check that it’s still working. This can detect cases such as a web server stuck in an infinite loop and unable to handle new connections, even though the server process is still running. The status is initially **starting**. Whenever a health check passes, it becomes healthy . After a certain number of consecutive failures, it becomes **unhealthy**.
The options that can appear before CMD are:

--interval=DURATION (default: 30s)
--timeout=DURATION (default: 30s)
--start-period=DURATION (default: 0s)
--start-interval=DURATION (default: 5s)
--retries=N (default: 3)The command’s exit status indicates the health status of the container. The possible values are:
- 0: success – the container is healthy and ready for use
- 1: unhealthy – the container isn’t working correctly
- 2: reserved – don’t use this exit code
Example:
Docker file
HEALTHCHECK --interval=5m --timeout=3s \
  CMD curl -f http://localhost/ || exit 1

Compose.yaml
healthcheck:
      test: mongo --eval "db.adminCommand('ping')"
      interval: 5s
      timeout: 5s
retries: 10LABEL
The LABEL instruction adds metadata to an image. A LABEL is a key-value pair. To include spaces within a LABEL value, use quotes and backslashes as you would in command-line parsing. A few usage examples:
LABEL "com.example.vendor"="ACME Incorporated"
LABEL com.example.label-with-value="foo"
LABEL version="1.0"
LABEL description="This text illustrates \
that label-values can span multiple lines."MAINTAINER
The MAINTAINER instruction sets the Author field of the generated images. The LABEL instruction is a much more flexible version of this and you should use it instead, as it enables setting any metadata you require, and can be viewed easily, for example with docker inspect. To set a label corresponding to the MAINTAINER field you could use:
LABEL org.opencontainers.image.authors="SvenDowideit@home.org.au"ONBUILD
The ONBUILD instruction adds to the image a trigger instruction to be executed at a later time, when the image is used as the base for another build. The trigger will be executed in the context of the downstream build, as if it had been inserted immediately after the FROM instruction in the downstream Dockerfile.
This is useful if you are building an image which will be used as a base to build other images, for example an application build environment or a daemon which may be customized with user-specific configuration.
How it works
- When it encounters an
ONBUILDinstruction, the builder adds a trigger to the metadata of the image being built. The instruction doesn’t otherwise affect the current build. - At the end of the build, a list of all triggers is stored in the image manifest, under the key
OnBuild. They can be inspected with thedocker inspectcommand. - Later the image may be used as a base for a new build, using the
FROMinstruction. As part of processing theFROMinstruction, the downstream builder looks forONBUILDtriggers, and executes them in the same order they were registered. If any of the triggers fail, theFROMinstruction is aborted which in turn causes the build to fail. If all triggers succeed, theFROMinstruction completes and the build continues as usual. - Triggers are cleared from the final image after being executed. In other words they aren’t inherited by “grand-children” builds.
FROM alpine AS baseimage
ONBUILD COPY --from=build /usr/bin/app /app
ONBUILD RUN --mount=from=config,target=/opt/appconfig ..RUN
The RUN instruction will execute any commands to create a new layer on top of the current image. The added layer is used in the next step in the Dockerfile. RUN has two forms:
# Shell form:
RUN [OPTIONS] <command> ...
# Exec form:
RUN [OPTIONS] [ "<command>", ... ]

Example:
RUN <<EOF
apt-get update
apt-get install -y curl
EOFSHELL
The SHELL instruction allows the default shell used for the shell form of commands to be overridden. The default shell on Linux is ["/bin/sh", "-c"], and on Windows is ["cmd", "/S", "/C"]. The SHELL instruction must be written in JSON form in a Dockerfile.
The SHELL instruction is particularly useful on Windows where there are two commonly used and quite different native shells: cmd and powershell, as well as alternate shells available including sh.
The SHELL instruction can appear multiple times. Each SHELL instruction overrides all previous SHELL instructions, and affects all subsequent instructions. For example:
FROM microsoft/windowsservercore

# Executed as cmd /S /C echo default
RUN echo default

# Executed as cmd /S /C powershell -command Write-Host default
RUN powershell -command Write-Host default

# Executed as powershell -command Write-Host hello
SHELL ["powershell", "-command"]
RUN Write-Host hello

# Executed as cmd /S /C echo hello
SHELL ["cmd", "/S", "/C"]
RUN echo helloSTOPSIGNAL
The STOPSIGNAL instruction sets the system call signal that will be sent to the container to exit. This signal can be a signal name in the format SIG<NAME>, for instance SIGKILL, or an unsigned number that matches a position in the kernel’s syscall table, for instance 9. The default is SIGTERM if not defined.
The image’s default stopsignal can be overridden per container, using the --stop-signal flag on docker run and docker create.
STOPSIGNAL signalUSER
The USER instruction sets the user name (or UID) and optionally the user group (or GID) to use as the default user and group for the remainder of the current stage. The specified user is used for RUN instructions and at runtime, runs the relevant ENTRYPOINT and CMD commands.
FROM microsoft/windowsservercore
# Create Windows user in the container
RUN net user /add patrick
# Set it for subsequent commands
USER patrickVOLUME
The VOLUME instruction creates a mount point with the specified name and marks it as holding externally mounted volumes from native host or other containers. The value can be a JSON array, VOLUME ["/var/log/"], or a plain string with multiple arguments, such as VOLUME /var/log or VOLUME /var/log /var/db. For more information/examples and mounting instructions via the Docker client, refer to Share Directories via Volumes documentation.
The docker run command initializes the newly created volume with any data that exists at the specified location within the base image. For example, consider the following Dockerfile snippet:
FROM ubuntu
RUN mkdir /myvol
RUN echo "hello world" > /myvol/greeting
VOLUME /myvolWORKDIR
The WORKDIR instruction sets the working directory for any RUN, CMD, ENTRYPOINT, COPY and ADD instructions that follow it in the Dockerfile. If the WORKDIR doesn’t exist, it will be created even if it’s not used in any subsequent Dockerfile instruction.
The WORKDIR instruction can be used multiple times in a Dockerfile. If a relative path is provided, it will be relative to the path of the previous WORKDIR instruction. For example:
WORKDIR /a
WORKDIR b
WORKDIR c
RUN pwd

ENV DIRPATH=/path
WORKDIR $DIRPATH/$DIRNAME
RUN pwdDocker image build best practices
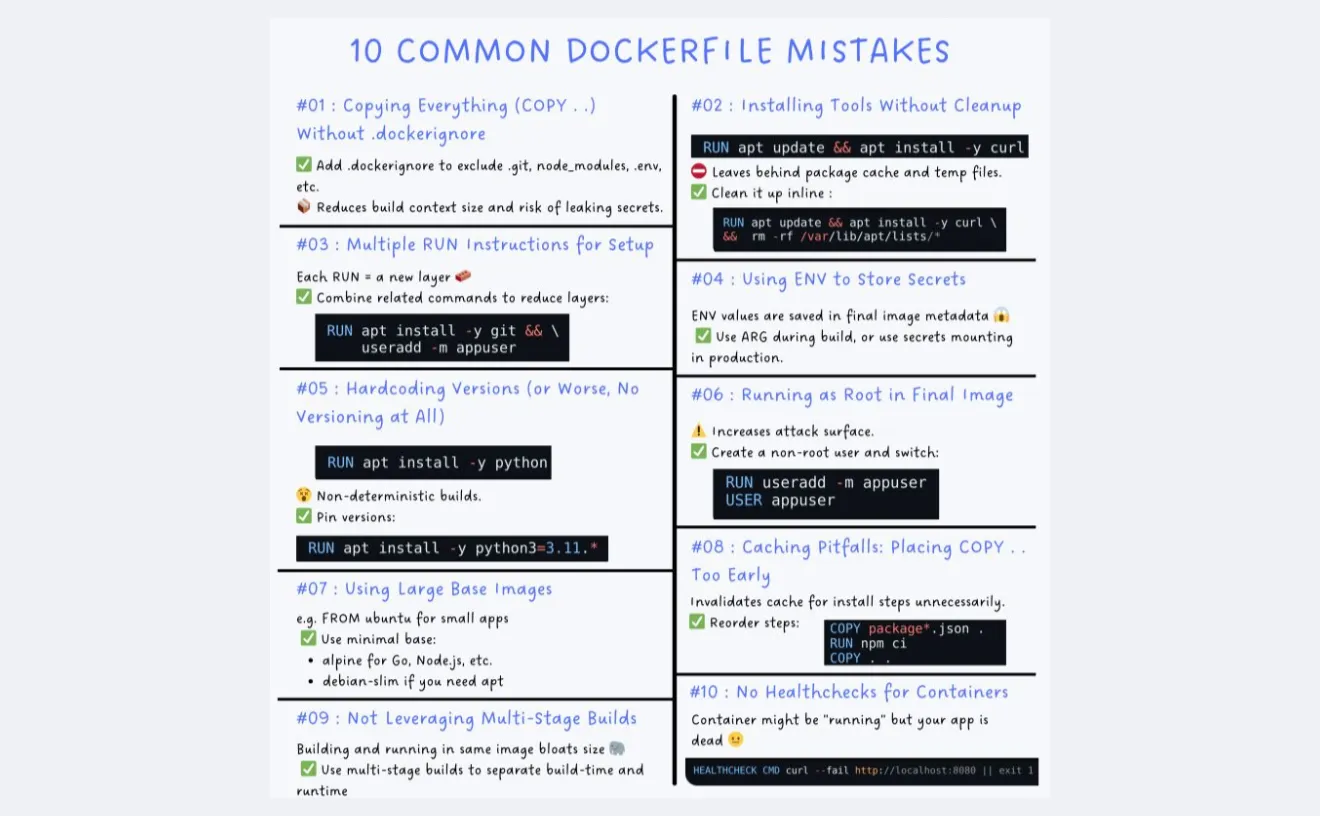
- Use multi-stage build: Multi-stage builds let you reduce the size of your final image, by creating a cleaner separation between the building of your image and the final output. Split your Dockerfile instructions into distinct stages to make sure that the resulting output only contains the files that are needed to run the application.
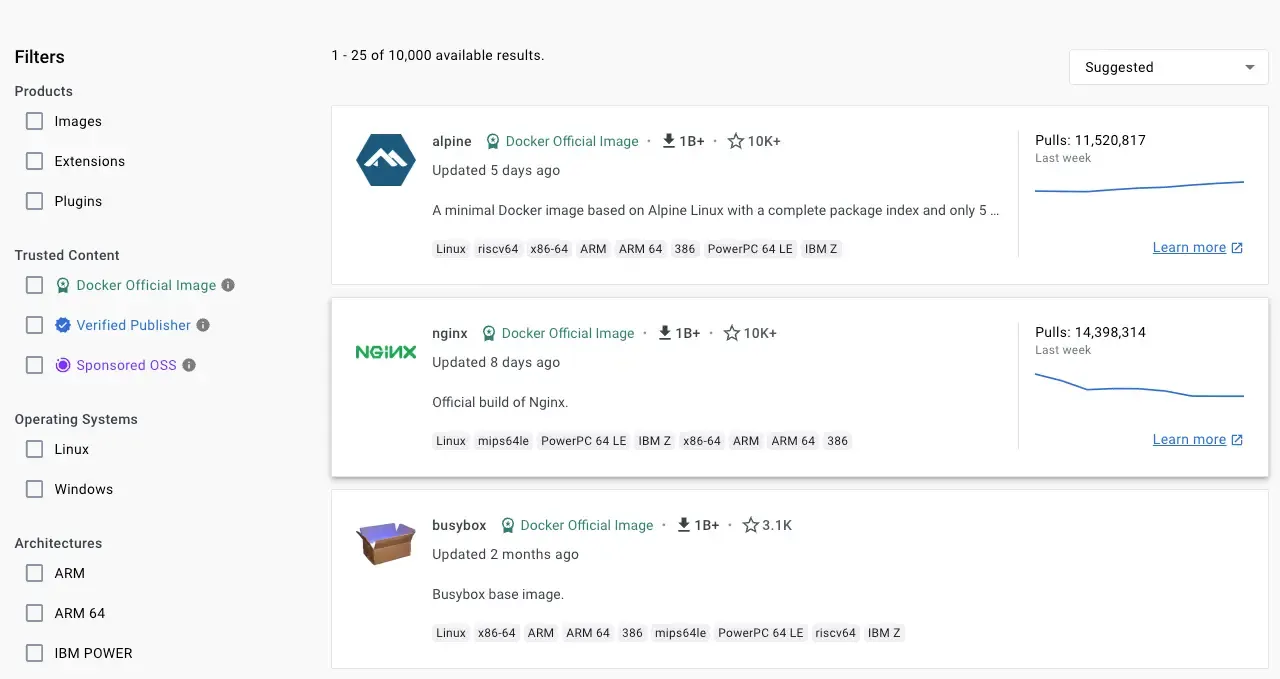
- Choose right base image: The first step towards achieving a secure image is to choose the right base image. When choosing an image, ensure it’s built from a trusted source and keep it small. Alipine images are small in size and reduces the size of the image.
- Create Reusable stages: If you have multiple images with a lot in common, consider creating a reusable stage that includes the shared components, and basing your unique stages on that. Docker only needs to build the common stage once.
- Rebuild your images often: Docker images are immutable. Building an image is taking a snapshot of that image at that moment. That includes any base images, libraries, or other software you use in your build. To keep your images up-to-date and secure, make sure to rebuild your image often, with updated dependencies. Build the image with no cache used.
docker build --no-cache -t my-image:my-tag .- Exclude with .dockerignore: To exclude files not relevant to the build, without restructuring your source repository, use a
.dockerignorefile. This file supports exclusion patterns similar to.gitignorefiles.
for example
-Create .dockerignore in project directory
– *.md #This will ignore all the files that has extension .md - Create ephemeral containers: Ephemeral means that the container can be stopped and destroyed, then rebuilt and replaced with an absolute minimum set up and configuration.
- Don’t install unnecessary packages: Avoid installing extra or unnecessary packages just because they might be nice to have. For example, you don’t need to include a text editor in a database image.
- Decouple applications: Each container should have only one concern. Decoupling applications into multiple containers makes it easier to scale horizontally and reuse containers.
- Sort multi-line arguments: Whenever possible, sort multi-line arguments alphanumerically to make maintenance easier. This helps to avoid duplication of packages and make the list much easier to update.
RUN apt-get update && apt-get install -y --no-install-recommends \
  bzr \
  cvs \
  git \
  mercurial \
  subversion \
&& rm -rf /var/lib/apt/lists/*- Leverage Build cache: When building an image, Docker steps through the instructions in your Dockerfile, executing each in the order specified. For each instruction, Docker checks whether it can reuse the instruction from the build cache. To see more click build cache
- Use images with tags because if you specify only image it will use latest by default. Due to this behavior sometimes it will cause disaster. So to minimize this always use tags:
Setting up registries
Docker harbor registry
Harbor is an open source registry that secures artifacts with policies and role-based access control, ensures images are scanned and free from vulnerabilities, and signs images as trusted.
- To install harbor first see Harbor Installation Prerequisites.
- Download the harbor from official release page.
- wget https://github.com/goharbor/harbor/releases/download/v2.13.1/harbor-offline-installer-v2.13.1.tgz
This will download offline package of harbor registry. **bash $ tar xzvf harbor-offline-installer-version.tgz**: Run this command to extract tar ball.- Follow the link to install harbor and setup certificates.
- Here we are generating self signed certificate if you want to use public certificate you can generate it from let’s encrypt
- wget https://github.com/goharbor/harbor/releases/download/v2.13.1/harbor-offline-installer-v2.13.1.tgz
- Or you can install docker, configure harbor and deploy harbor using this script in github
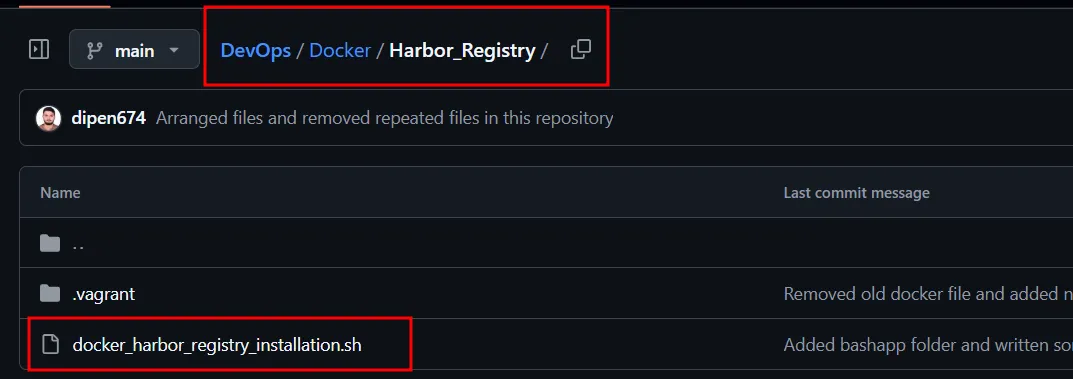
- Clone this repo or directly copy the script and run. Make sure you are running the script with sudo permission otherwise you will see error related permission.
After installing this harbor registry now we can now access the registry any browser like chrome,edge,etc. with ip_address of machine. You will see the prompt login using
username: admin
password: Harbor12345
- Things need to do
- inside /etc/hosts file add ip address of the machine ie;
- harbor.registry.local
- If you want to access registry from another machine you need to copy the certificates on another machine and you are good to go.
- path /etc/docker/certs.d/harbor.registry.local
- Verify using docker login harbor.registry.local
- After that enter username and password of the harbor machine.
- If the certificates are copied properly you can easily login to the machine if not then you cannot.
- path /etc/docker/certs.d/harbor.registry.local
- For pushing image we need to rename with the tag of the repo ie;
- You can see the tag after creating repo in harbor
- similar concept as we push image in docker name using the repo tag.
- inside /etc/hosts file add ip address of the machine ie;
Docker Hub
Docker Hub simplifies development with the world’s largest container registry for storing, managing, and sharing Docker images. By integrating seamlessly with your tools, it enhances productivity and ensures reliable deployment, distribution, and access to containerized applications. It also provides developers with pre-built images and assets to speed up development workflows.
Key features of Docker Hub:
- Unlimited public repositories
- Private repositories
- Webhooks to automate workflows
- GitHub and Bitbucket integrations
- Concurrent and automated builds
- Trusted content featuring high-quality, secure images
Get started with docker hub
- Sign in to docker hub
- create a account there
- Create a repo in dockerhub
- After that to push the image there create a tag
- docker image tag nginx:latest deependrabhatta/practice:v1
- Here nginx:latest >>Image locally available
- deependrabhatta/practice:v1 >>Image tag of repo in dockerhub
- docker image tag nginx:latest deependrabhatta/practice:v1
- After that now we need to login
- docker login
- Generates token and URL
- Clock the url and you will a token
- provide that token
- Now you can login
- Or you can generate token from
- click on profile icon >> Account settings >>Personal access tokken
- Generate token here and use this during login
- docker login
Keep reading
- Docker Installation and commands
Docker Installation Installation Uninstall old versions Install using the apt repository Another method for installing docker is to run the official script from https://get.docker.com Post…
- DOCKER Introduction
Docker container Container standard and industry leadership Micro kernel Monolithic Kernel Can we run Linux container on windows and vice versa? Can we run linux container on mac and vice versa?…
- Docker Compose
Docker Compose Tool for defining and running multi container applications. Simplifies the control of your entire application stack, making it easy yo manage servicess, networks and volumes in a…