Kubernetes with minikube: Pods, Deployments and Services
Set up a local Kubernetes cluster with minikube, then create pods, ReplicaSets and Deployments from YAML, roll updates forward and back, and expose nginx with Services.

ON THIS PAGE
A local cluster is the cheapest place to learn Kubernetes, and the same kubectl commands and YAML files carry over to kubeadm and Amazon EKS. This guide sets up minikube on Ubuntu and works through the core objects: pods, ReplicaSets, Deployments, Services and namespaces. By the end, you will write a Deployment, roll it forward and back, and reach it in a browser through a Service.
Prerequisites
- An Ubuntu machine (x86-64) with VirtualBox or Docker installed for the minikube driver.
- The cluster components from part 1, which this guide refers to.
Install minikube
minikube runs a whole cluster (control plane and node in one) on your machine. Download links for every OS are on the minikube start page. On Linux x86-64:
$ curl -LO https://github.com/kubernetes/minikube/releases/latest/download/minikube-linux-amd64
$ sudo install minikube-linux-amd64 /usr/local/bin/minikube && rm minikube-linux-amd64Choose a driver
A driver decides where the cluster runs: inside a VM (VirtualBox, KVM) or inside a container (Docker). You can pass it once or make it the default. See the driver list.
$ minikube start --driver=virtualbox
$ minikube config set driver virtualboxIf you do not pass a driver, minikube picks one automatically from what is installed on your machine. The cluster in this guide runs on the VirtualBox driver, which is why the node IP below is 192.168.59.101 (a VirtualBox host-only network). The Docker driver also works:
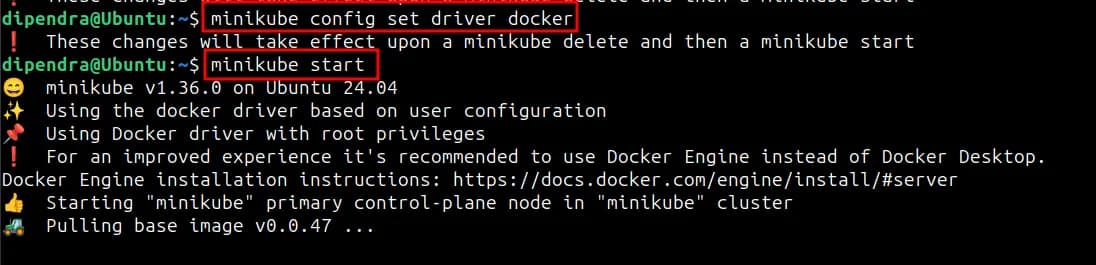
The driver change only takes effect after minikube delete and a new minikube start.
Useful minikube commands
$ minikube status
$ minikube start
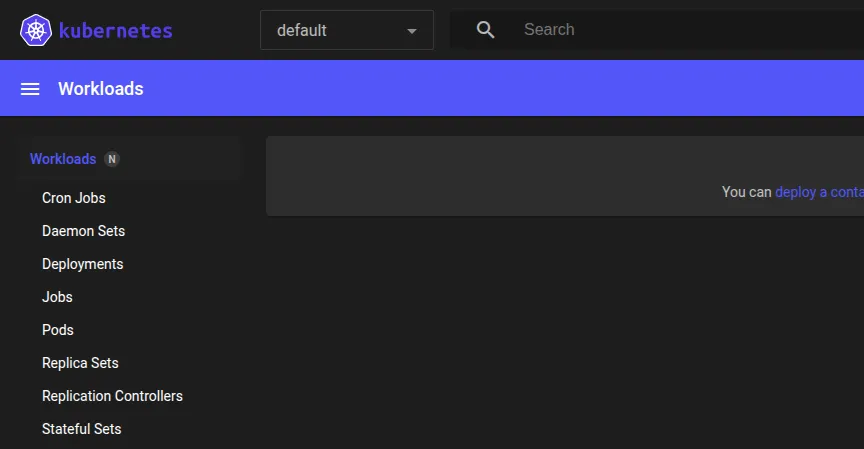
$ minikube dashboardminikube dashboard enables the web UI and opens it in your browser:
Next, install kubectl by following the official Linux guide.
kubectl basics
kubectl (often said "kube control") is only a client. It does not create or run a cluster. It reads ~/.kube/config to find a cluster and sends requests to that cluster's API server. The same commands work on minikube, EKS, AKS or any other cluster.
$ kubectl get nodes
$ kubectl cluster-info
Kubernetes control plane is running at https://192.168.59.101:8443
CoreDNS is running at https://192.168.59.101:8443/api/v1/namespaces/kube-system/services/kube-dns:dns/proxy
$ kubectl get pods
$ kubectl get pods -n kube-system
$ kubectl get namespaces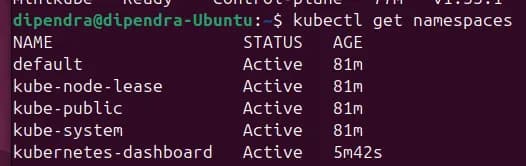
kubectl get pods shows only the default namespace. The cluster's own pods (CoreDNS, kube-proxy and so on) are in kube-system.
Run a pod with one command
The fastest way to start a pod is an imperative ("ad hoc") command:
$ kubectl run mynginx --image=nginx --port=80
$ kubectl get pods
$ kubectl describe pod mynginx
$ kubectl delete pod mynginxkubectl describe is the Kubernetes version of docker inspect. It shows the node, IP, labels, status and, at the bottom, the events:
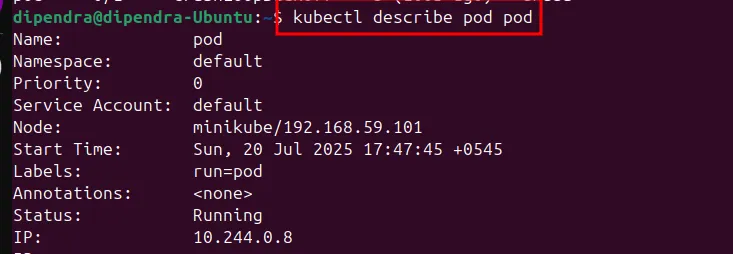
Add -o wide to see the pod IP and the node it runs on:

Imperative commands suit testing. For anything you intend to keep, write YAML.
Kubernetes objects
Objects are records in the cluster that describe the desired state. The objects used in this series:
| Object | Purpose |
|---|---|
| Pod | The smallest unit Kubernetes runs: one or more containers sharing network and storage. |
| ReplicaSet | Keeps a fixed number of identical pods running. |
| Deployment | Manages ReplicaSets and adds rolling updates and rollbacks. Use this for stateless apps. |
| Service | A stable IP and DNS name in front of a changing group of pods. |
| StatefulSet | Like a Deployment, but each pod keeps a stable name and its own storage (databases). |
| DaemonSet | Runs one copy of a pod on every node (log or monitoring agents). |
| ConfigMap and Secret | Configuration and sensitive data kept outside the image. |
| Namespace | Divides one cluster into isolated groups of resources. |
| Volume | Storage attached to a pod. |
Pods
Most pods run one container. Kubernetes manages the pod, not the container directly, so think of the pod as a thin wrapper.
Some pods run several containers that must work together, for example the main app plus a helper (a sidecar) that ships its logs. Containers in the same pod share the network (they reach each other on localhost) and can share volumes. A pod can also have init containers, which run to completion before the app containers start.
Pods are mortal. They get a new name and a new IP every time they are recreated. For that reason, production workloads rarely use bare pods. A Deployment creates the pods, and a Service sits in front of them.
Write a manifest
Every Kubernetes YAML file has four top-level fields:
| Field | Meaning |
|---|---|
apiVersion | The API group and version of the object: v1 for Pod and Service, apps/v1 for ReplicaSet and Deployment. |
kind | The type of object. The apiVersion must match it. |
metadata | The object's name, its labels (key-value pairs you choose) and optional annotations. |
spec | The desired state: images, ports, replicas, arguments and so on. |
To look up the version for a kind, query the cluster:
$ kubectl explain pod
$ kubectl explain deployment
$ kubectl explain configmap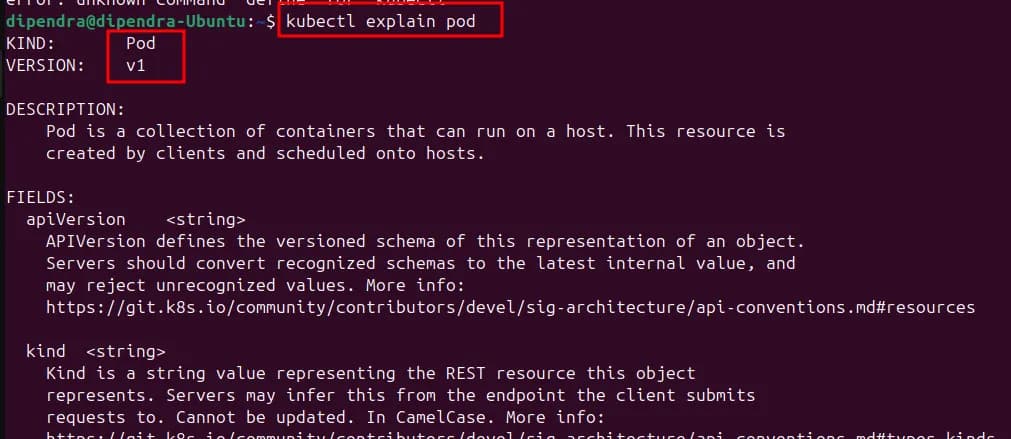
A minimal pod manifest:
apiVersion: v1
kind: Pod
metadata:
  name: myapp
  labels:
    owner: frontend
    app: myapp
spec:
  containers:
    - name: mynginx-app
      image: nginx
      ports:
- containerPort: 80$ kubectl create -f pod.yaml
$ kubectl get -f pod.yaml
$ kubectl delete -f pod.yamlcreate or apply
kubectl create -f | kubectl apply -f |
|---|---|
| Creates the object. Fails with "already exists" if you run it again. | Creates the object if it is missing, or updates it to match the file. |
| Imperative: "make this". | Declarative: "make the cluster look like this file". |
Use kubectl apply for both the first run and every later change.
ReplicationController and ReplicaSet
A ReplicationController keeps a set number of pod copies running: it starts more if there are too few and removes extras if there are too many. It is the legacy way. A ReplicaSet does the same job with more flexible label selectors, and in practice you do not create either one directly: you create a Deployment, which manages ReplicaSets for you. Writing a ReplicaSet once shows what a Deployment does underneath.
A ReplicaSet needs three fields:
replicas: how many pods to keep.selector: which labels identify "my" pods.template: what a new pod should look like.
The template is the reason it can self-heal. If one of five pods dies, the ReplicaSet must create a replacement, and the template tells it which image, labels and ports to use.
apiVersion: apps/v1
kind: ReplicaSet
metadata:
  name: myappreplicaset
  labels:
    app: myappnew
    type: dev
    owner: dipendra
spec:
  replicas: 5
  selector:
    matchLabels:
      owner: dipendra   # manage every pod with this label
  template:
    metadata:
      labels:           # must match the selector
        owner: dipendra
        app: myappnew
        type: dev
    spec:
      containers:
        - name: mynewnginxapp
          image: nginx
          ports:
- containerPort: 80$ kubectl create -f replicaset.yaml
$ kubectl get rs
$ kubectl describe rs myappreplicaset
$ kubectl delete -f replicaset.yaml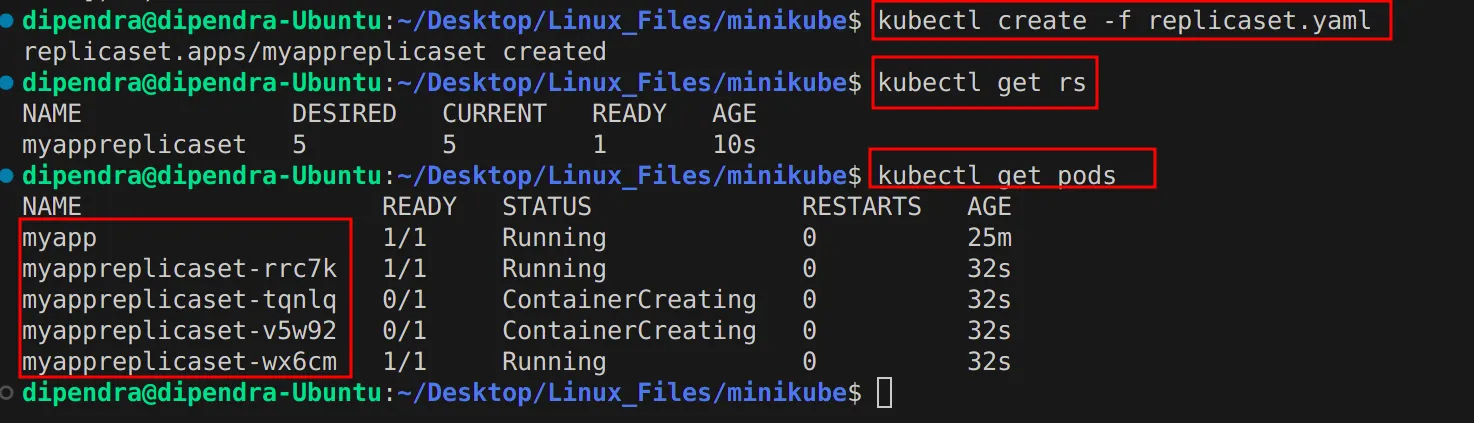
The manifest asks for 5 replicas, but only 4 new pods appeared. The existing myapp pod had no owner and its labels matched the selector owner: dipendra, so the ReplicaSet adopted it and counted it as the fifth pod. Selectors match labels, not names. Keep selectors specific, or a controller will take over pods you did not mean to give it.
Scaling
The clean way to scale is to change replicas: in the file and run kubectl apply -f replicaset.yaml. Because the ReplicaSet was first created with kubectl create, apply prints this warning:

kubectl apply stores the last applied file in an annotation. Objects made with create do not have it, so apply adds it the first time. The warning is harmless, and it goes away if you use apply from the start.
For quick tests you can also scale or edit from the command line:
$ kubectl scale --replicas=9 replicaset myappreplicaset
replicaset.apps/myappreplicaset scaled
$ kubectl scale --replicas=9 -f replicaset.yaml
$ kubectl edit replicaset myappreplicaset
replicaset.apps/myappreplicaset editedDeployments
A Deployment sits on top of ReplicaSets. You declare the desired state and the Deployment controller moves the cluster there at a controlled rate. It adds what a ReplicaSet lacks: rolling updates, rollout history, rollback, and pause and resume. When you use a Deployment you do not write a ReplicaSet yourself.
The manifest matches the ReplicaSet except for the kind and the name:
apiVersion: apps/v1
kind: Deployment
metadata:
  name: myapp-deployment
  labels:
    app: myappnew
    type: dev
    owner: dipendra
spec:
  replicas: 5
  selector:
    matchLabels:
      owner: dipendra
  template:
    metadata:
      labels:
        owner: dipendra
        app: myappnew
        type: dev
    spec:
      containers:
        - name: mynewnginxapp
          image: nginx
          ports:
- containerPort: 80$ kubectl apply -f deployment.yaml
$ kubectl get deployments
$ kubectl describe deployment myapp-deployment
$ kubectl delete -f deployment.yaml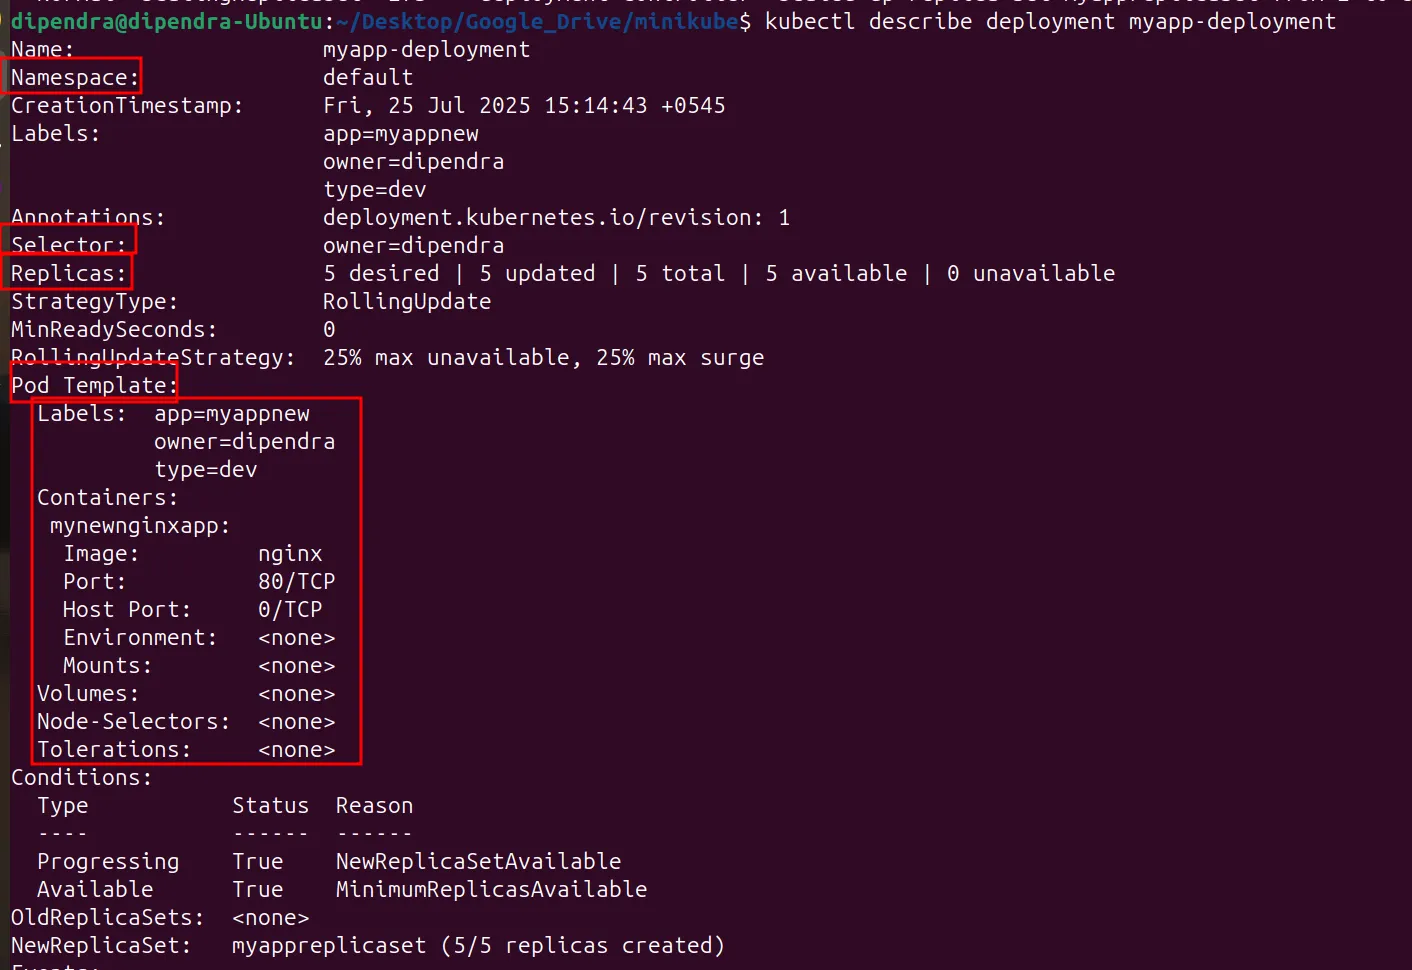
Key fields in this output:
StrategyType: RollingUpdatewith25% max unavailable, 25% max surgeis the default update strategy.NewReplicaSet: myappreplicaset. The ReplicaSet from the previous section was still running with the same selector and the same pod template, so the Deployment adopted it instead of creating a new one. Normally the ReplicaSet is named<deployment>-<hash>, which appears after the first update.TolerationsandNode-Selectorscontrol which nodes the pods may run on. Part 3 covers taints, tolerations and node affinity.
Get a shell in a pod
kubectl exec works like docker exec:
$ kubectl exec --stdin --tty myappreplicaset-2jxm8 -- /bin/bash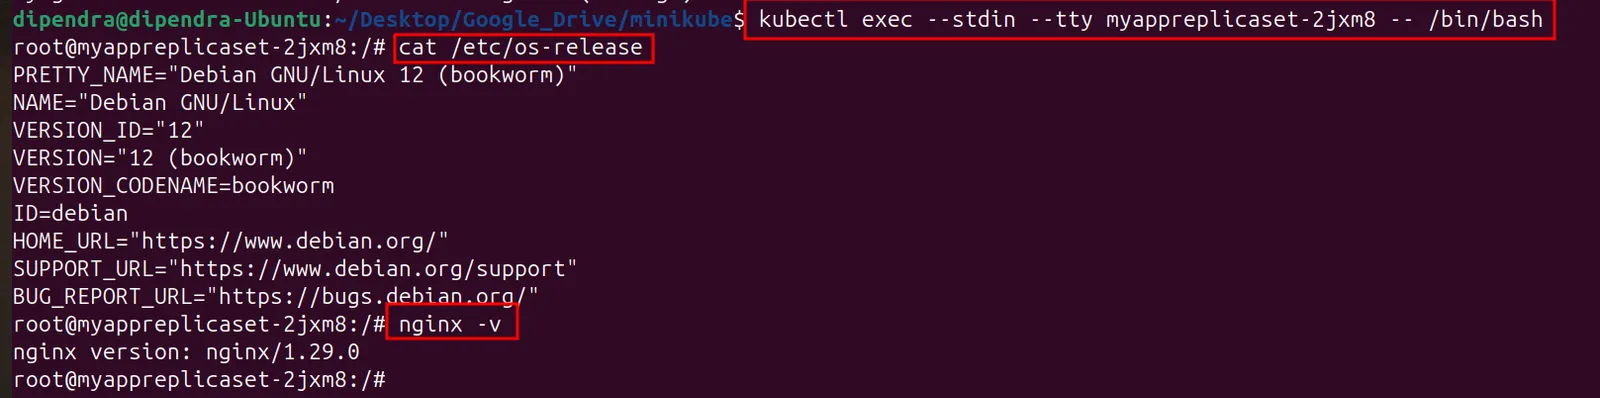
Everything after -- is the command to run in the container. You can also run a single command without opening a shell:
$ kubectl exec myappreplicaset-2jxm8 -- nginx -v
nginx version: nginx/1.29.0Roll out an update
To practice updates, pin the image to a version in deployment.yaml:
image: nginx:1.28.0Delete the Deployment, apply it again and check the rollout:
$ kubectl delete -f deployment.yaml
$ kubectl apply -f deployment.yaml
$ kubectl rollout status deployment myapp-deployment
deployment "myapp-deployment" successfully rolled out
$ kubectl rollout history deployment myapp-deployment
History shows only revision 1, because deleting a Deployment also deletes its history. To keep history, change the file and apply it without deleting.
Rolling update strategy
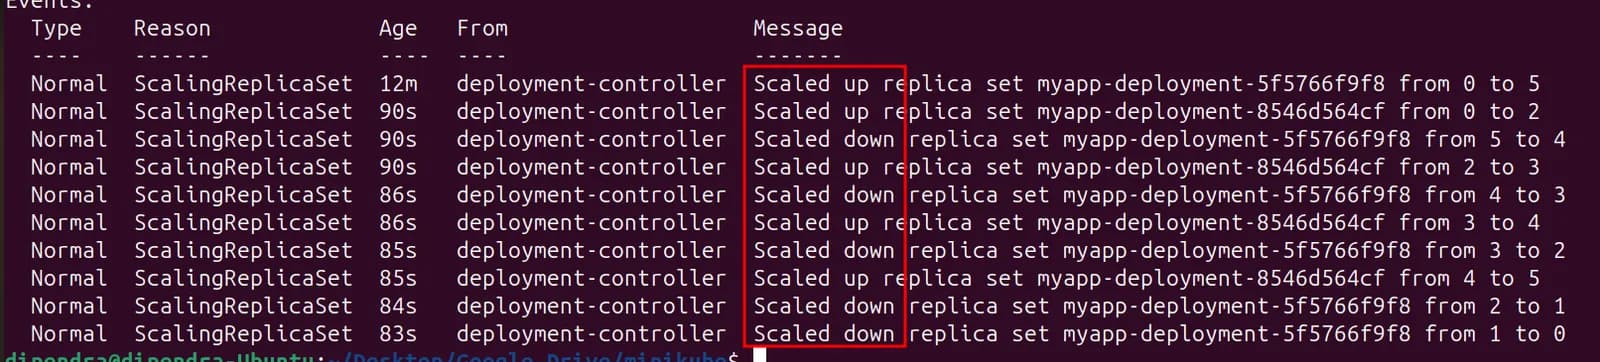
With a rolling update, Kubernetes replaces pods a few at a time and only sends traffic to pods that are ready, so users see no downtime. 25% max unavailable means at most a quarter of the desired pods can be down at once. 25% max surge means it can run up to a quarter extra pods during the update. This is the default and fits most stateless apps.
To watch a rolling update, change the image in the file again (the file stays the source of truth) and apply it:
-          image: nginx:1.28.0
+ image: nginx:1.29.0$ kubectl apply -f deployment.yaml
$ kubectl rollout status deployment myapp-deployment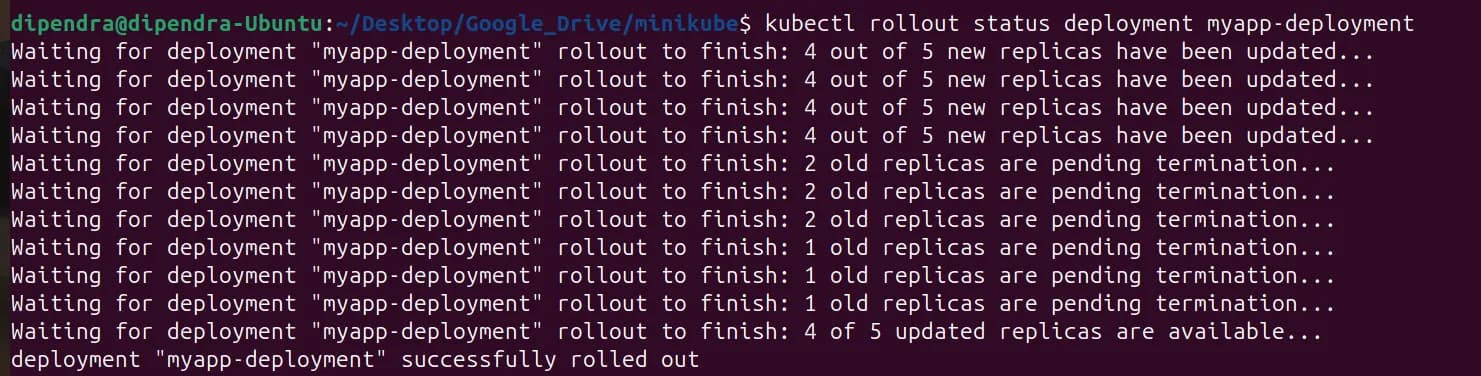
The events in kubectl describe deployment myapp-deployment show the mechanism. A new ReplicaSet scales up one step while the old one scales down one step, until the old one reaches 0:
Roll back
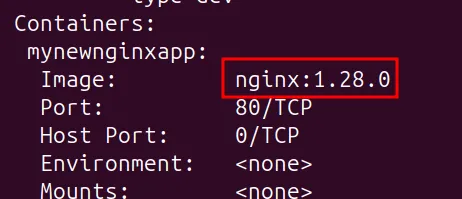
$ kubectl rollout undo deployment myapp-deployment
deployment.apps/myapp-deployment rolled back
$ kubectl rollout history deployment myapp-deployment
The rollback becomes a new revision (3), and the image is back to the previous version:
Recreate strategy
The other strategy, Recreate, stops all old pods first and then starts the new ones. That means downtime, so use it only when two versions must never run at the same time (for example, a database schema change the old version cannot handle).
spec:
  strategy:
type: RecreateServices
Port-forwarding to a single pod is not a stable way to reach an app, because pods are mortal. A Deployment creates and deletes pods all the time, and each new pod gets a new IP. A Service gives that changing group of pods one stable IP and DNS name. It finds its pods with a label selector, the same way a ReplicaSet does.
| Type | Reachable from | Typical use |
|---|---|---|
ClusterIP (default) | Inside the cluster only | Internal traffic: frontend to backend, Tomcat to MySQL. |
NodePort | <any node IP>:<port 30000-32767> | Testing, or behind your own load balancer. Like docker run -p. |
LoadBalancer | A cloud load balancer's address | Public apps on AWS, Azure or GCP. |
ExternalName | Inside the cluster | A DNS CNAME alias to an outside hostname. No proxying. |
For HTTP routing of many apps behind one address, look at Ingress or the Gateway API.
NodePort
apiVersion: v1
kind: Service
metadata:
  name: service
spec:
  type: NodePort
  selector:
    owner: dipendra   # send traffic to pods with this label
  ports:
    - port: 80          # the port the Service listens on
      targetPort: 80    # the port the app listens on inside the pod (containerPort)
nodePort: 30007 # the port opened on every node (30000-32767)The manifest defines three ports, one each for the Service, the pod and the node. Only port is required. targetPort defaults to the same value as port, and nodePort is picked at random if you leave it out.
$ kubectl apply -f service.yaml
$ kubectl get services
With the nodePort line removed and the Service renamed to svc, Kubernetes assigns a random node port:

minikube can print the URL for a Service:
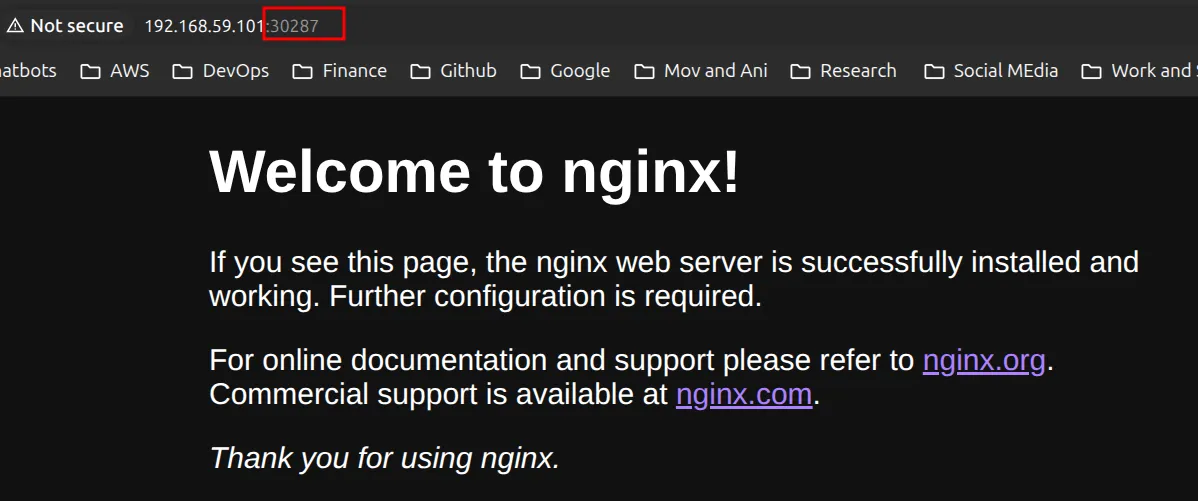
$ minikube service svc --url
http://192.168.59.101:30287
Opening that URL shows nginx, served by one of the Deployment's pods. The port in the address is the node port:
ClusterIP
Change only the type and apply again:
spec:
  type: ClusterIP   # internal only: frontend to backend, backend to database
LoadBalancer
spec:
  type: LoadBalancer   # reachable from outside through a load balancer
EXTERNAL-IP stays <pending> because minikube has no cloud provider to create a load balancer. A LoadBalancer Service also gets a node port, so it still works through the node IP. On minikube, running minikube tunnel in another terminal assigns an external IP. On EKS, AWS creates a real load balancer, as shown in part 3.
Namespaces
Namespaces isolate groups of resources inside one cluster, for example dev and prod, or one namespace per team. Names only need to be unique within a namespace, and you can attach quotas and RBAC rules to a namespace.
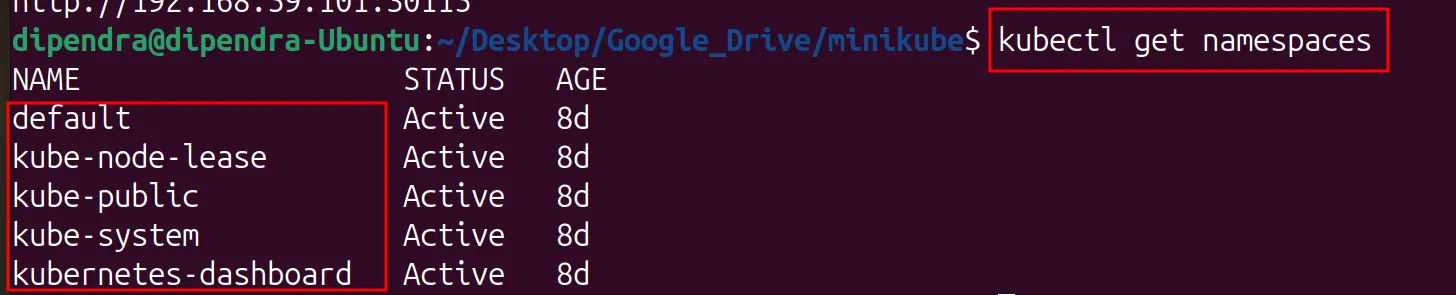
$ kubectl create namespace dev
$ kubectl get all
$ kubectl get all -n dev
$ kubectl get all --all-namespaces
$ kubectl get services -n devThe kubeconfig file
kubectl finds clusters through ~/.kube/config, the kubeconfig file. minikube start writes it for you:
$ cat ~/.kube/config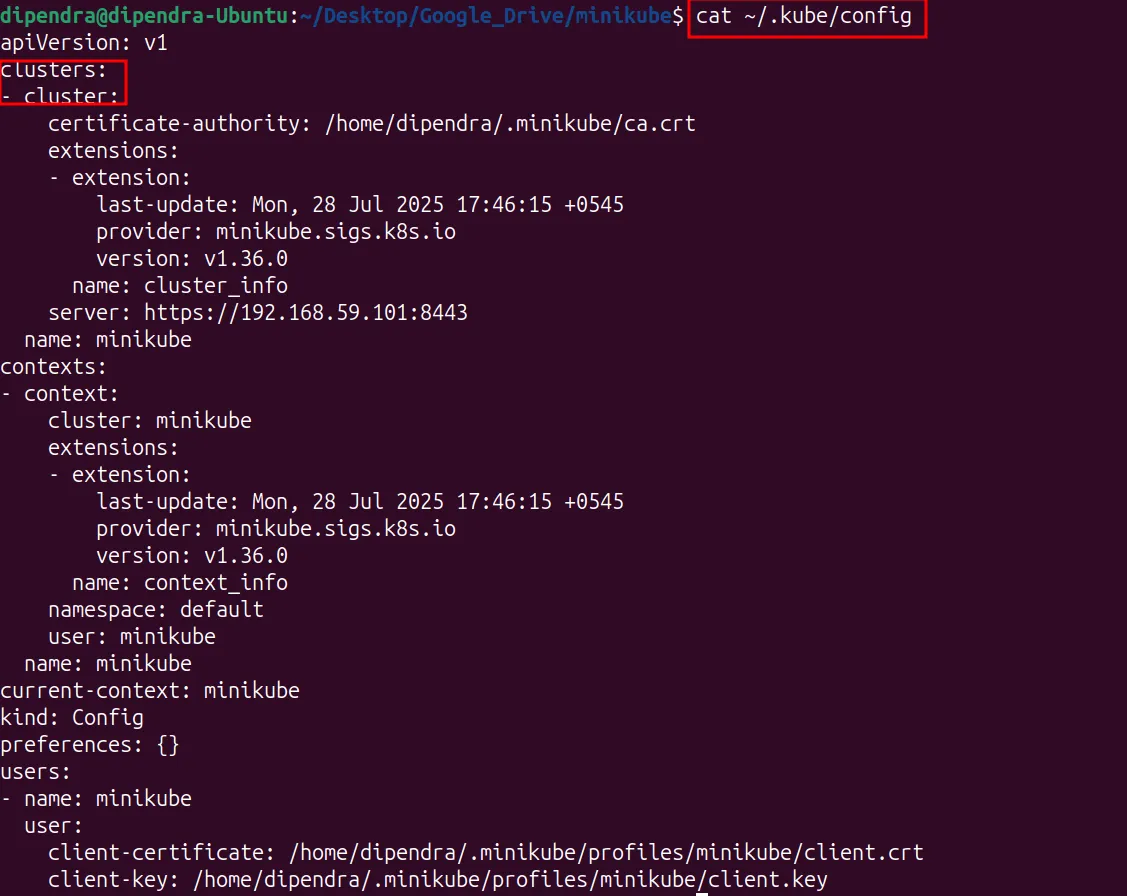
It has three lists: clusters (API server address and CA certificate), users (credentials) and contexts (a cluster plus a user plus a default namespace). current-context is the one kubectl uses now. Switching between minikube and EKS is a context change (kubectl config use-context <name>).
Troubleshooting a pod
When a pod misbehaves, work through these checks in order:
kubectl get pod <pod>to see the status (Pending,CrashLoopBackOff,ImagePullBackOff).kubectl describe pod <pod>and read the Events at the bottom: scheduling failures, image pull errors, failed probes.kubectl logs <pod>(add--previousfor the last crashed container).kubectl get events --sort-by=.metadata.creationTimestampfor the namespace timeline.- Check the YAML: image name and tag, ports, labels that match the Service selector.
kubectl exec -it <pod> -- shto test DNS and network connections from inside.kubectl top pod <pod>for CPU and memory (needs metrics-server).kubectl rollout restart deployment/<name>once the cause is fixed.
Key takeaways
- minikube gives you a full cluster on a laptop. Pick the driver with
--driverand it writes your kubeconfig for you. - Write YAML and use
kubectl apply. Keep imperative commands for experiments. - ReplicationController is legacy. Use a Deployment, which manages ReplicaSets for you.
- Selectors match labels, so a controller can adopt pods or ReplicaSets you did not expect. Keep labels specific.
- Rolling update is the default: no downtime, and
kubectl rollout undobrings back the previous version. - Pods come and go, so put a Service in front of them: ClusterIP inside the cluster, NodePort for tests, LoadBalancer on a cloud.
Next in this series: Kubernetes Cluster Setup with kubeadm and Amazon EKS.
Keep reading
- Kubernetes Architecture: Control Plane, Nodes and Add-ons
How a Kubernetes cluster is built: what the control plane and node components do, which add-ons matter, and when to use kubectl, kind, minikube or kubeadm.
- kubectl Cheat Sheet by Category
The most-used kubectl commands, grouped by task: cluster info, namespaces, pods, Deployments, Services, ConfigMaps, Secrets, storage, contexts and debugging.
- Kubernetes Cluster Setup with kubeadm and Amazon EKS
Build a three-node Kubernetes cluster with kubeadm on EC2 or VirtualBox, resolve common CNI and certificate errors, then create an Amazon EKS cluster and deploy a multi-tier app.